주요 콘텐츠로 건너뛰기
수리 커뮤니티 가입 - 계정 만들기

Garmin GPS V Logic Board Replacement

필요한 것

  1. Garmin GPS V Logic Board Replacement, Logic Board: 1 단계, 이미지 3개 중 1개 Garmin GPS V Logic Board Replacement, Logic Board: 1 단계, 이미지 3개 중 2개 Garmin GPS V Logic Board Replacement, Logic Board: 1 단계, 이미지 3개 중 3개
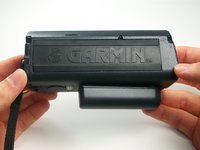
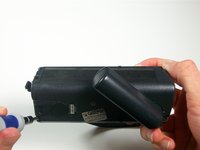
    • Orient the GPS V backside up.

    • With a #0 Philips screwdriver, remove six M2x0.4 black screws on the back of the unit.

    댓글 쓰기

  2. Garmin GPS V Logic Board Replacement: 2 단계, 이미지 2개 중 1개 Garmin GPS V Logic Board Replacement: 2 단계, 이미지 2개 중 2개
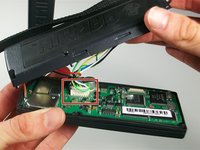
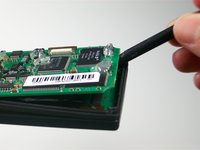
    • With the spudger, gently pry the back plate off the unit starting at the corners.

    • Open the back plate about 35°, use the antenna side act like a hinge.

    • Do NOT remove the back plate all the way, there are cables connected to it.

    댓글 쓰기

  3. Garmin GPS V Logic Board Replacement: 3 단계, 이미지 2개 중 1개 Garmin GPS V Logic Board Replacement: 3 단계, 이미지 2개 중 2개
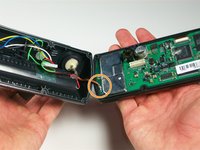
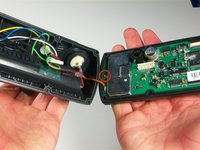
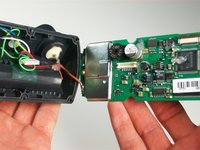
    • Locate the white 8-pin connector on the logic board and disconnect it.

    • Open the device all the way, making sure to not disconnect the brown antenna wire.

    댓글 쓰기

  4. Garmin GPS V Logic Board Replacement: 4 단계, 이미지 2개 중 1개 Garmin GPS V Logic Board Replacement: 4 단계, 이미지 2개 중 2개
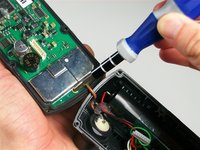
    • With a #1 Philips screwdriver, remove the silver M2x0.4 screw on the logic board near the brown wire.

    • You may need to rotate the device to get better access to the screw.

    댓글 쓰기

  5. Garmin GPS V Logic Board Replacement: 5 단계, 이미지 3개 중 1개 Garmin GPS V Logic Board Replacement: 5 단계, 이미지 3개 중 2개 Garmin GPS V Logic Board Replacement: 5 단계, 이미지 3개 중 3개
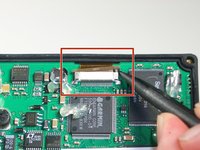
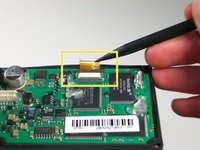
    • Locate the ribbon connector on the logic board.

    • With the spudger, gently apply pressure to both sides of the brown connector lock until it pushes out.

    • With the spudger, gently work the ribbon cable out of the connector until it is free.

    댓글 쓰기

  6. Garmin GPS V Logic Board Replacement: 6 단계, 이미지 2개 중 1개 Garmin GPS V Logic Board Replacement: 6 단계, 이미지 2개 중 2개
    • With the spudger, gently pry out the logic board.

    • Be careful to not disconnect the brown antenna wire as you remove the logic board.

    댓글 쓰기

  7. Garmin GPS V Logic Board Replacement: 7 단계, 이미지 1개 중 1개
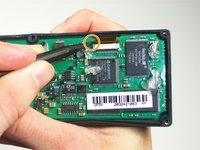
    • Locate the brown wire connection on the logic board.

    • Carefully apply heat with the soldering iron while gently pulling on the brown wire.

    • It may take some time to heat the flux up before the wire can be pulled out.

    • Pull brown wire free of the logic board.

    댓글 쓰기

결론

To reassemble your device, follow these instructions in reverse order.

취소: 해당 안내서를 완성하지 않았습니다.

다른 2명이 해당 안내서를 완성하였습니다.

작성자

5다른 기여자 명과 함께

Connor

회원 가입일: 01/23/12

194 평판

안내서 4개를 작성함

Cal Poly, Team 3-25, Amido Winter 2012 Cal Poly, Team 3-25, Amido Winter 2012 회원

CPSU-AMIDO-W12S3G25

4 회원들

안내서 4개를 작성함

0가이드 댓글

댓글 쓰기

조회 통계:

지난 24시간: 0

지난 7일: 9

지난 30일: 45

전체 시간: 6,022