주요 콘텐츠로 건너뛰기
수리 커뮤니티 가입 - 계정 만들기

GoPro Hero+ LCD Image Sensor Replacement

필요한 것

    1. GoPro Hero+ LCD Image Sensor Replacement, Back Panel: 1 단계, 이미지 2개 중 1개 GoPro Hero+ LCD Image Sensor Replacement, Back Panel: 1 단계, 이미지 2개 중 2개
      • Be sure to power off the GoPro before you start disassembly.

      • Pop up and pull back on the clip to remove the screen cover and expose the back panel with the touchscreen.

      댓글 쓰기

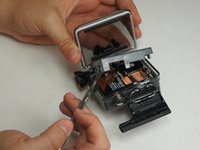
    2. GoPro Hero+ LCD Image Sensor Replacement: 2 단계, 이미지 2개 중 1개 GoPro Hero+ LCD Image Sensor Replacement: 2 단계, 이미지 2개 중 2개
      • Use the metal spudger to pry around the perimeter of the panel.

      • Pry the panel upwards by inserting the metal spudger into the corner crease between the panel and camera shell.

      댓글 쓰기

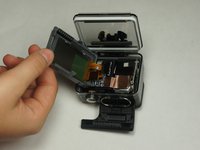
    3. GoPro Hero+ LCD Image Sensor Replacement: 3 단계, 이미지 2개 중 1개 GoPro Hero+ LCD Image Sensor Replacement: 3 단계, 이미지 2개 중 2개
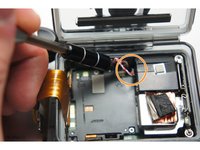
      • Pry around the panel to ensure it is not attached to the device.

      • Move the panel to the side so you can access the internal components.

      • The panel is still attached to the rest of the device with a ribbon cable, so be sure to not tear or damage the cable.

      댓글 쓰기

    1. GoPro Hero+ LCD Image Sensor Replacement, Battery: 4 단계, 이미지 1개 중 1개
      • Peel back the rear panel ribbon cable that is adhered to the battery until it is completely separated from the battery.

      • Be careful of metal contacts on strip; they can be sharp.

      댓글 쓰기

    2. GoPro Hero+ LCD Image Sensor Replacement: 5 단계, 이미지 1개 중 1개
      이 단계에 사용된 도구:
      Tweezers
      $4.99
      • Using tweezers, peel off the copper tape on the right side of the battery.

      댓글 쓰기

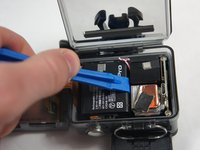
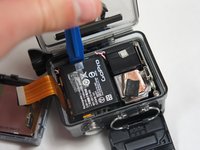
    3. GoPro Hero+ LCD Image Sensor Replacement: 6 단계, 이미지 2개 중 1개 GoPro Hero+ LCD Image Sensor Replacement: 6 단계, 이미지 2개 중 2개
      • Place the plastic opening tool at one of the edges of the battery then pry until the battery is removed from the GoPro.

      댓글 쓰기

    4. GoPro Hero+ LCD Image Sensor Replacement: 7 단계, 이미지 1개 중 1개
      • Use a pair of tweezers to disconnect the battery connector from the motherboard.

      • Gently pull the battery off the motherboard. Pulling vertically off the motherboard will give a clean release.

      댓글 쓰기

    1. GoPro Hero+ LCD Image Sensor Replacement, MicroSD/Micro USB Port Assembly: 8 단계, 이미지 3개 중 1개 GoPro Hero+ LCD Image Sensor Replacement, MicroSD/Micro USB Port Assembly: 8 단계, 이미지 3개 중 2개 GoPro Hero+ LCD Image Sensor Replacement, MicroSD/Micro USB Port Assembly: 8 단계, 이미지 3개 중 3개
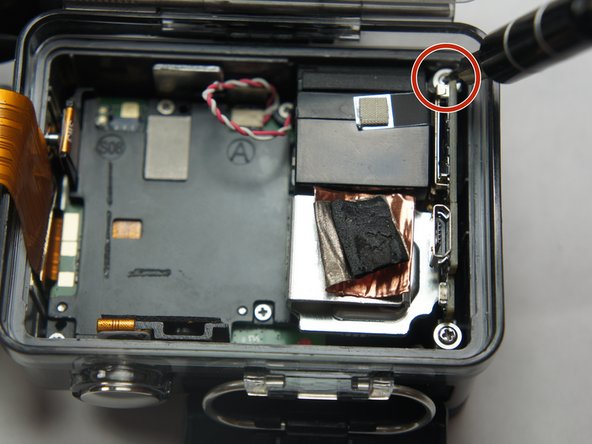
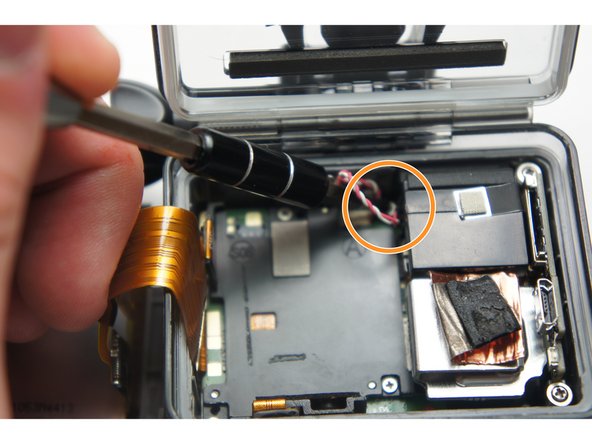
      • Remove the two 6 mm Phillips #00 screws.

      • Remove the single 4 mm Phillips #000 screws.

      댓글 쓰기

    2. GoPro Hero+ LCD Image Sensor Replacement: 9 단계, 이미지 1개 중 1개
      • Remove the image sensor from the camera.

      • You do not have to unplug the black box to remove the USB/SD chip.

      댓글 쓰기

    3. GoPro Hero+ LCD Image Sensor Replacement: 10 단계, 이미지 1개 중 1개
      이 단계에 사용된 도구:
      Tweezers
      $4.99
      • Grab the edge of the ribbon cable with the tweezers and gently pull until the cable is disconnected from the motherboard.

      • Be careful when removing the ribbon cable. You must pull gently or you can rip the ribbon off of its contacts.

      댓글 쓰기

    4. GoPro Hero+ LCD Image Sensor Replacement: 11 단계, 이미지 1개 중 1개
      • Gently lift the microSD/Micro USB assembly up and out of the device.

      댓글 쓰기

    1. GoPro Hero+ LCD Image Sensor Replacement, Image Sensor: 12 단계, 이미지 1개 중 1개
      • Use your fingers and gently pull out the sensor from the motherboard by slowly and gradually pulling up on the image sensor box.

      • Do not yank on the image sensor, it can rip out the wiring or damage the motherboard.

      댓글 쓰기

결론

To reassemble your device, follow these instructions in reverse order.

취소: 해당 안내서를 완성하지 않았습니다.

작성자

3다른 기여자 명과 함께

Matthew Tinkey

회원 가입일: 08/27/15

922 평판

안내서 4개를 작성함

USF Tampa, Team 2-4, Blackwell Fall 2015 USF Tampa, Team 2-4, Blackwell Fall 2015 회원

USFT-BLACKWELL-F15S2G4

4 회원들

안내서 20개를 작성함

0가이드 댓글

댓글 쓰기

조회 통계:

지난 24시간: 1

지난 7일: 7

지난 30일: 44

전체 시간: 2,205