소개
Fix the lights on the top of your Google Home with a new LED Board.
This guide will teach you how to take apart your Google Home to remove a faulty LED Board and replace it with a new one.
필요한 것
-
-
-
Pull off the Google Home’s magnetically attached base and set it aside.
-
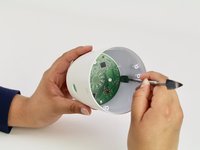
Using a Torx T6 screwdriver head, unscrew the four 1.7mm Torx screws deep in the speaker recess so that you can remove the lid.
-
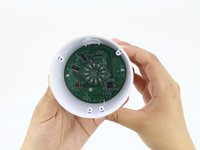
After all four screws are out, pop the lid off the device to open the capsule.
 FixBot에 문의하기
-
-
-
이 단계에 사용된 도구:Tweezers$4.99
-
Carefully remove the interconnect cable using a pair of tweezers.
-
-
-
-
-
Use a metal spudger to pry the LED board away from the lid.
-
Remove the LED board.
-
-


To reassemble your device, follow these instructions in reverse order.
다른 한 분이 해당 안내서를 완성하였습니다.

팀

Cal Poly, Team S24-G11, Maness Spring 2018 Cal Poly, Team S24-G11, Maness Spring 2018 회원
CPSU-MANESS-S18S24G11
4 회원들
안내서 35개를 작성함
