소개
The motherboard is the main hub for every component in a laptop. For this reason, one should always know how to access and disconnect any component from a motherboard. Removing a motherboard is also a necessary prerequisite to accessing components such as the RAM and CPU.
필요한 것
-
-
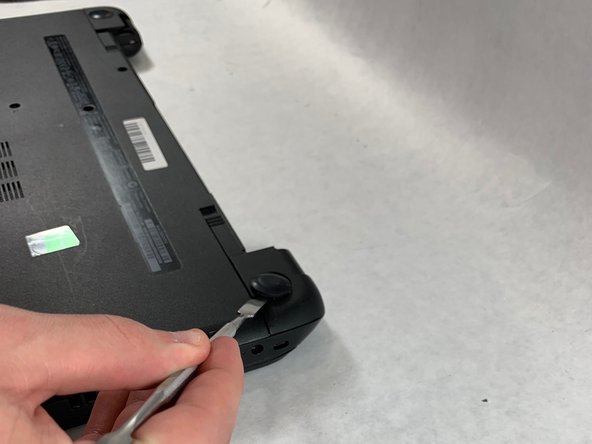
Slide the lock mechanism on the left side of the laptop to the right.
 FixBot에 문의하기
-
-
-
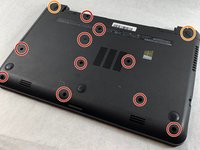
Flip the laptop over to reveal screw locations.
-
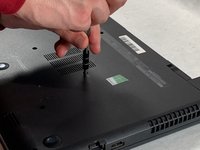
Use a metal spudger to remove the two rear rubber feet. There are screws hidden underneath them.
-
-
-
Remove the DVD drive from the laptop.
-
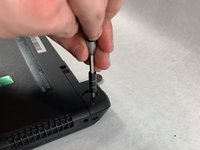
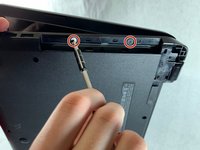
Remove the two 3 mm Phillips #1 screws underneath the DVD drive.
-
-
-
-
Flip the laptop and open.
-
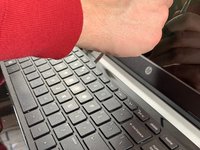
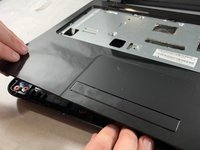
Detach the keyboard by prying it free from the laptop using a spudger.
-
Disconnect the keyboard ribbon cable.
-
-
-
Disconnect the two narrow ribbon cables to the left of the keyboard connection.
-
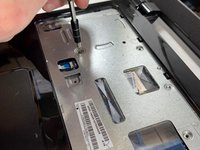
Remove five 4 mm Phillips #1 screws from the metal tray for the keyboard.
-
Pry open the plastic casing using a spudger.
-
-
-
Remove two 5 mm Phillips #1 screws located at the base of the hard drive.
-
-
-
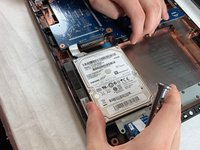
Pull the hard drive upwards and away from the laptop.
-
The hard drive should disconnect from its port on the motherboard as shown in the second image.
-
-
-
Flip the hard drive over.
-
Remove the two 4 mm Phillips #1 screws from the base of the hard drive.
-
Remove the mounting brace (silver bracket) from the hard drive.
-
-
-
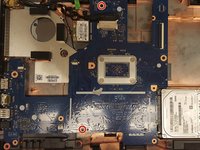
Remove the remaining two 5 mm Philips #1 screws from the motherboard.
-
-
-
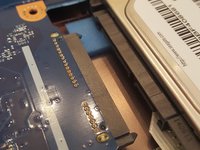
Remove the tape from the display connector attached to the motherboard.
-
Disconnect the display connector from the motherboard.
-
-
-
Remove one 4 mm Phillips #1 screw from the wireless chip.
-
Remove the wireless chip from the motherboard.
-
-
-
Remove two 5 mm Phillips #1 screws from the USB component connected to the motherboard.
-
Lift the USB component until the band connecting it to the motherboard lifts off of the laptop.
-
-
-
Slowly lift the motherboard out of the computer.
-
Disconnect the power connector from the motherboard as shown in the image.
-


To reassemble your device, follow these instructions in reverse order.
다른 3명이 해당 안내서를 완성하였습니다.
팀

UMass Dartmouth, Team S2-G4, Bailey Spring 2019 UMass Dartmouth, Team S2-G4, Bailey Spring 2019 회원
UMASSD-BAILEY-S19S2G4
3 회원들
안내서 6개를 작성함