소개
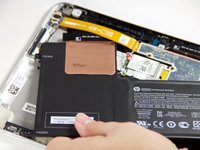
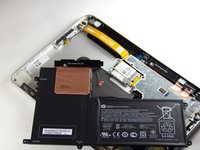
If your HP ElitePad 900 battery life quickly dies, is constantly overheating, or having problems holding a charge, use this guide to replace your battery.
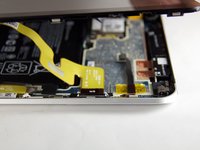
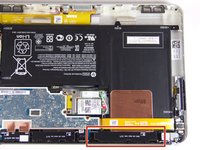
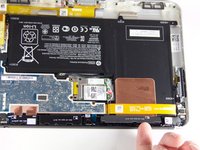
The battery held within the laptop stores and supplies energy through the laptop for the convenience of not having to be plugged in to use, providing portable use.
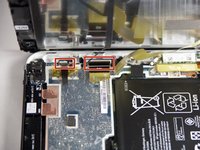
Before conducting the repair, make sure your laptop is completely off and not connected to any power source.
필요한 것


To reassemble your device, follow these instructions in reverse order. Take your e-waste to an R2 or e-Stewards certified recycler.
다른 13명이 해당 안내서를 완성하였습니다.

팀

USF Tampa, Team 12-4, Blackwell Fall 2015 USF Tampa, Team 12-4, Blackwell Fall 2015 회원
USFT-BLACKWELL-F15S12G4
4 회원들
안내서 6개를 작성함
2가이드 댓글
One way to remove screen assembly without a suction cup is to use a piece of duct tape folded onto to itself leaving a small amount of the adhesive portion exposed. This creates a little handle. You can then stick it to assembly and lift it out easily.
Matt Brunk - 답글 공유