소개
This guide is designed to repair a keyboard on the HP flyer red laptop. It will be useful if you are having any of the following issues: visibly broken keys, unresponsive keyboard or non-functioning individual keys.
필요한 것
-
-
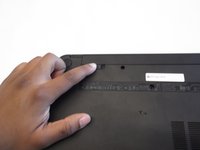
On the underside of the laptop towards the hinge for the screen there are two rectangular slide switches located inside of rectangular tracks.
-
-
-
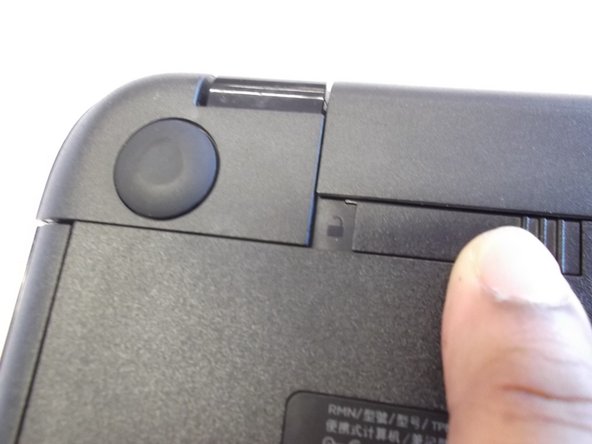
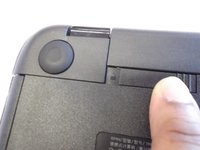
The left switch is the battery unlock switch.
-
Inside the rectangular track of this switch there is an image of a closed lock that should be visible. Push this switch to the other end of the track and an image of an open lock should be visible.
-
-
-
-
Then take and slide the other switch to the other end of its track which will pop out the battery.
-
Grab the battery and pull it out of the slot.
-
-
-
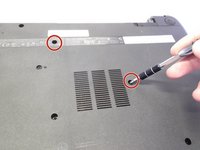
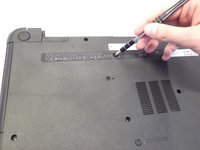
Next locate and unscrew the two 4mm Phllips #1 screws with the keyboard symbol located towards the middle and top of the bottom of the laptop.
-
-
-
Next turn the laptop over and flip open the screen.
-
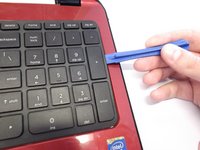
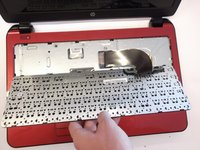
Use the plastic opening tool to pry the keyboard upwards from the bottom right hand corner of the keyboard.
-
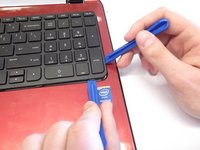
Use another plastic opening tool with the first plastic opening tool you placed to undo every plastic clasp surrounding the keyboard.
-
-
-
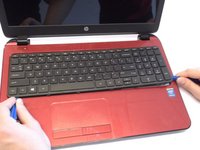
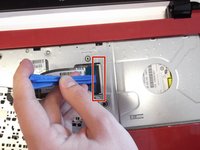
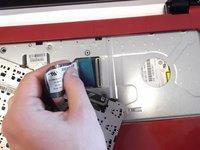
Next lift up the keyboard gently and use the plastic opening tool to undo the ribbon wire by unclasping the ZIF (zero insertion force) connector to the laptop.
-
Gently slide the ribbon wire out of its slot.
-


To reassemble your device, follow these instructions in reverse order.
다른 7명이 해당 안내서를 완성하였습니다.
