주요 콘텐츠로 건너뛰기
수리 커뮤니티 가입 - 계정 만들기

HP LaserJet P1102w Power Plug Replacement

필요한 것

  1. HP LaserJet P1102w Power Plug Replacement, Left Side Panel: 1 단계, 이미지 3개 중 1개 HP LaserJet P1102w Power Plug Replacement, Left Side Panel: 1 단계, 이미지 3개 중 2개 HP LaserJet P1102w Power Plug Replacement, Left Side Panel: 1 단계, 이미지 3개 중 3개
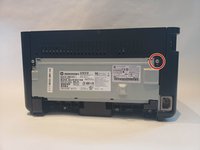
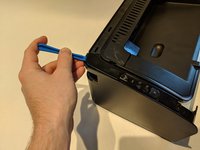
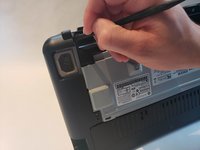
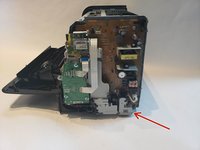
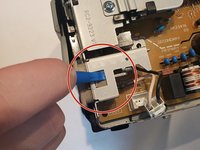
    • Flip printer on it's back. Using the plastic spudger, pry off front panel. There will be two main points to focus as shown.

    • Pry carefully to not break any plastic.

  2. HP LaserJet P1102w Power Plug Replacement: 2 단계, 이미지 2개 중 1개 HP LaserJet P1102w Power Plug Replacement: 2 단계, 이미지 2개 중 2개
    • Now that the pry points are free lift up the front panel.

  3. HP LaserJet P1102w Power Plug Replacement: 3 단계, 이미지 2개 중 1개 HP LaserJet P1102w Power Plug Replacement: 3 단계, 이미지 2개 중 2개
    • Unscrew the #1 Phillips screw 6mm on the back of the printer.

  4. HP LaserJet P1102w Power Plug Replacement: 4 단계, 이미지 3개 중 1개 HP LaserJet P1102w Power Plug Replacement: 4 단계, 이미지 3개 중 2개 HP LaserJet P1102w Power Plug Replacement: 4 단계, 이미지 3개 중 3개
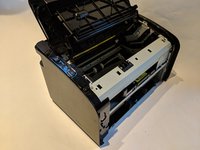
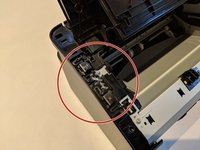
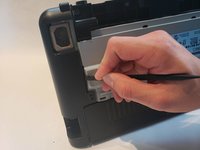
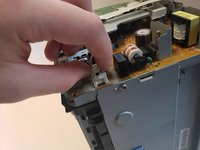
    • Using the plastic spudger, remove the button housing from the top left of printer.

    • Pry carefully to not break any plastic.

  5. HP LaserJet P1102w Power Plug Replacement: 5 단계, 이미지 2개 중 1개 HP LaserJet P1102w Power Plug Replacement: 5 단계, 이미지 2개 중 2개
    • Once the housing is removed, remove the three buttons.

  6. HP LaserJet P1102w Power Plug Replacement: 6 단계, 이미지 3개 중 1개 HP LaserJet P1102w Power Plug Replacement: 6 단계, 이미지 3개 중 2개 HP LaserJet P1102w Power Plug Replacement: 6 단계, 이미지 3개 중 3개
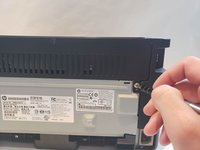
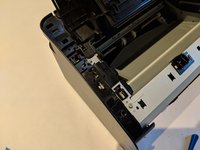
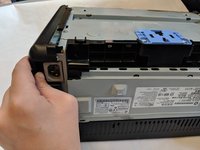
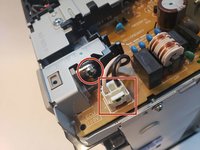
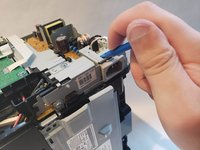
    • Use the plastic spudger to remove the side panel. There are three main prying points as shown.

    • Pry carefully to not break any plastic.

  7. HP LaserJet P1102w Power Plug Replacement: 7 단계, 이미지 2개 중 1개 HP LaserJet P1102w Power Plug Replacement: 7 단계, 이미지 2개 중 2개
    • With all pry points free, remove the side panel.

  8. HP LaserJet P1102w Power Plug Replacement, Power Plug: 8 단계, 이미지 2개 중 1개 HP LaserJet P1102w Power Plug Replacement, Power Plug: 8 단계, 이미지 2개 중 2개
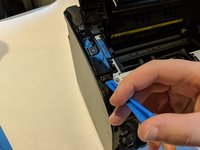
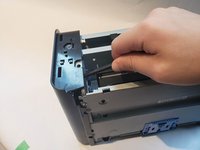
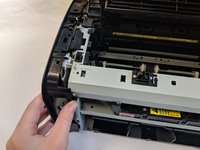
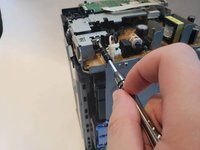
    • The power plug will be held together with one Phillips screw 7mm and wire connection.

  9. HP LaserJet P1102w Power Plug Replacement: 9 단계, 이미지 2개 중 1개 HP LaserJet P1102w Power Plug Replacement: 9 단계, 이미지 2개 중 2개
    • Unplug wire connector and unscrew the Phillips 7mm screw with #1 Phillips screw driver.

  10. HP LaserJet P1102w Power Plug Replacement: 10 단계, 이미지 3개 중 1개 HP LaserJet P1102w Power Plug Replacement: 10 단계, 이미지 3개 중 2개 HP LaserJet P1102w Power Plug Replacement: 10 단계, 이미지 3개 중 3개
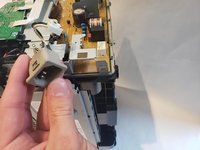
    • Apply pressure using spudger on top of the power plug to release it from metal housing. While doing that pull the power plug out.

결론

To reassemble your device, follow these instructions in reverse order.

다른 4명이 해당 안내서를 완성하였습니다.

작성자

4다른 기여자 명과 함께

Myles Nofsinger

회원 가입일: 10/04/18

280 평판

안내서 1개를 작성함

UW Stout, Team S6-G4, Ogden Fall 2018 UW Stout, Team S6-G4, Ogden Fall 2018 회원

UWSTOUT-OGDEN-F18S6G4

4 회원들

안내서 12개를 작성함

0가이드 댓글

댓글 쓰기

조회 통계:

지난 24시간: 0

지난 7일: 6

지난 30일: 27

전체 시간: 1,895