주요 콘텐츠로 건너뛰기

HP Pavilion zd8000 CD/Optical Drive Replacement

필요한 것

  1. HP Pavilion zd8000 CD/Optical Drive Replacement, Battery: 1 단계, 이미지 1/1
    • Slide the battery release latch towards you.

  2. HP Pavilion zd8000 CD/Optical Drive Replacement: 2 단계, 이미지 1/2 HP Pavilion zd8000 CD/Optical Drive Replacement: 2 단계, 이미지 2/2
    • Pull up on the battery to remove it.

  3. HP Pavilion zd8000 CD/Optical Drive Replacement, CD/Optical Drive: 3 단계, 이미지 1/1
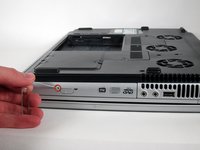
    • Remove the 8mm Philips screw located between the hard drive and the WiFi card.

  4. HP Pavilion zd8000 CD/Optical Drive Replacement: 4 단계, 이미지 1/2 HP Pavilion zd8000 CD/Optical Drive Replacement: 4 단계, 이미지 2/2
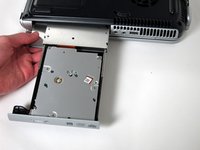
    • Turn the laptop 90 degrees clockwise so you are facing the CD drive.

    • Unbend a paperclip and insert the end into the small hole by the eject button to cause the tray to pop out towards you.

  5. HP Pavilion zd8000 CD/Optical Drive Replacement: 5 단계, 이미지 1/2 HP Pavilion zd8000 CD/Optical Drive Replacement: 5 단계, 이미지 2/2
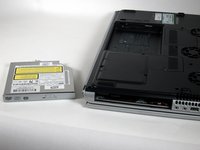
    • Gently pull the tray away from the laptop and the rest of the optical drive will follow.

결론

To reassemble your device, follow these instructions in reverse order.

다른 한 분이 해당 안내서를 완성하였습니다.

Allie Menard

회원 가입일: 04/12/11

820 평판

안내서 13개 작성하였습니다

Cal Poly, Team 24-56, Amido Spring 2011 Cal Poly, Team 24-56, Amido Spring 2011 회원

CPSU-AMIDO-S11S24G56

4 회원들

안내서 13개 작성하였습니다

댓글 0개

댓글 쓰기

조회 통계:

24 시간 전: 0

7일 전: 1

30일 전: 3

전체 시간: 3,420