주요 콘텐츠로 건너뛰기
HP Photosmart D110a Power Button Replacement

HP Photosmart D110a Power Button Replacement

Tim Wise

Tim Wise12 다른 기여자

최종 수정일 July 21, 2017

10 - 20 분
조정

필요한 것

도구

더보기...

  1. HP Photosmart D110a Power Button Replacement, Power Button: 1 단계, 이미지 1개 중 1개
    • Open the printer's mouth by pulling the two mouth pieces down.

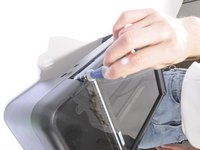
    • Lift the flap covering the scanner. When you are finished, the printer should appear as shown.

  2. HP Photosmart D110a Power Button Replacement: 2 단계, 이미지 1개 중 1개
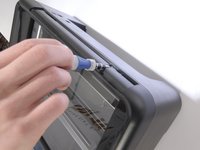
    • Remove the flap for the scanner by pulling lightly on the clip that attaches it to the printer.

    • The clip may be damaged by applying too much force.

  3. HP Photosmart D110a Power Button Replacement: 3 단계, 이미지 3개 중 1개 HP Photosmart D110a Power Button Replacement: 3 단계, 이미지 3개 중 2개 HP Photosmart D110a Power Button Replacement: 3 단계, 이미지 3개 중 3개
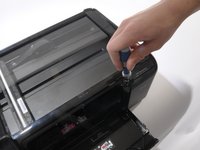
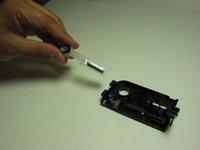
    • Remove the three screws from the top of the printer using a T9 screwdriver as shown.

    • The screws are located in the far-left, far-right, and near-right corners of the printer, with respect to the front view.

  4. HP Photosmart D110a Power Button Replacement: 4 단계, 이미지 1개 중 1개
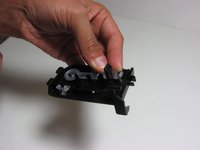
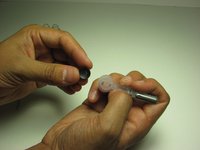
    • Reach into the mouth of the printer and press the clip behind the power button to release the power button face.

  5. HP Photosmart D110a Power Button Replacement: 5 단계, 이미지 1개 중 1개
    • A picture of the removed power button is provided to show the location of the clip that needs to be pressed.

    • After pressing the clip, pull out the face of the power button by sliding it from the right to the left side.

  6. HP Photosmart D110a Power Button Replacement: 6 단계, 이미지 3개 중 1개 HP Photosmart D110a Power Button Replacement: 6 단계, 이미지 3개 중 2개 HP Photosmart D110a Power Button Replacement: 6 단계, 이미지 3개 중 3개
    • The power button face has a plastic holder that attaches the power button and the wireless button to the face plate using two slots.

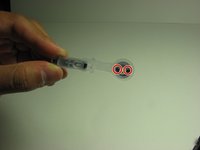
    • Loosen the plastic holder by pulling the slots on the face plate away from the plastic holder.

    • Remove the plastic holder from the face plate after the slots are loosened.

  7. HP Photosmart D110a Power Button Replacement: 7 단계, 이미지 3개 중 1개 HP Photosmart D110a Power Button Replacement: 7 단계, 이미지 3개 중 2개 HP Photosmart D110a Power Button Replacement: 7 단계, 이미지 3개 중 3개
    • The plastic holder secures the power button by two slots.

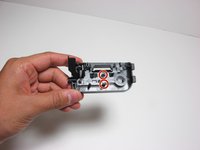
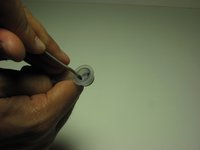
    • Using a spudger, push the holders inward to detach the button from the plastic holder.

결론

To reassemble your device, follow these instructions in reverse order.

다른 한 분이 해당 안내서를 완성하였습니다.

작성자

12다른 기여자 명과 함께

Tim Wise

회원 가입일: 04/01/11

173 평판

안내서 7개를 작성함

Cal Poly, Team 10-38, Forte Spring 2011 Cal Poly, Team 10-38, Forte Spring 2011 회원

CPSU-FORTE-S11S10G38

5 회원들

안내서 10개를 작성함

댓글 0개

댓글 쓰기

조회 통계:

지난 24시간: 0

지난 7일: 0

지난 30일: 10

전체 시간: 3,598