소개
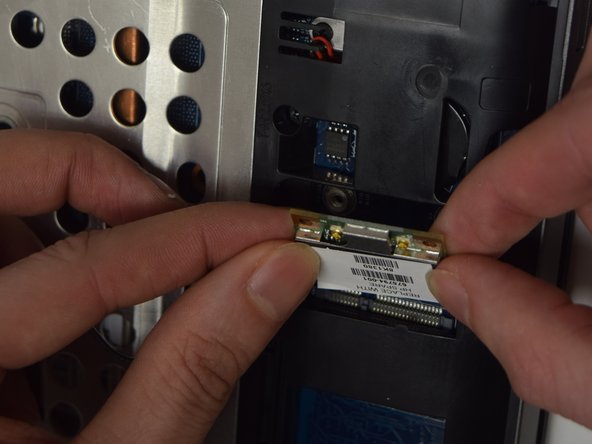
The WLAN module is used to power the Wi-Fi on the ProBook; not to be confused with the WWAN module that powers mobile broadband. The two modules are beside each other but the smaller module is WLAN which will be the focus for this guide.
필요한 것
-
-
Slide the two release latches on either side of the battery.
-
Gently tilt the battery upward and remove it from its socket.
 FixBot에 문의하기
-
-
-
Turn the computer so the bottom is facing towards you.
-
Remove the one 3.0 mm Phillips PM2.0x3.0 security screw.
-
Slide the release latches then pull the door towards you. Lift the door away to completely remove it.
-
-
-
-
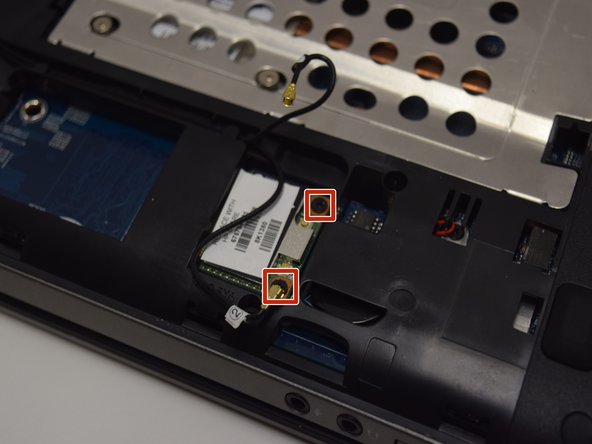
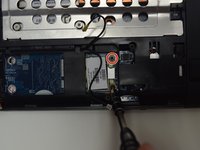
Disconnect the antenna cables from their terminals in the WLAN module.
-
-
-
Unscrew two 3.0 mm Phillips PM2.0x3.0 screw securing the module to the computer.
-
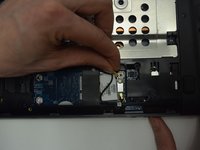
Gently lift and remove the module.
-


To reassemble your device, follow these instructions in reverse order.
다른 2명이 해당 안내서를 완성하였습니다.
팀

UW Tacoma, Team 1-5, Rose Fall 2016 UW Tacoma, Team 1-5, Rose Fall 2016 회원
UWT-ROSE-F16S1G5
4 회원들
안내서 6개를 작성함