소개
If your computer frequently gets very hot and overheats you may need to replace the fan. Before performing any work remember to completely turn off your computer and disconnect it from any power source.
필요한 것
-
-
Push the unlock tabs on the back of the monitor in and towards each other while sliding the back cover up.
 FixBot에 문의하기
-
-
-
Loosen the two 1/2" screws , with the T15 Torx Screwdriver, on each side of the stand. Remove stand.
-
-
-
-
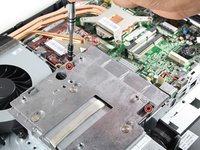
Take out the single 3/8" screw, with the T15 Torx Screwdriver, from the middle of the backplate.
-
-
-
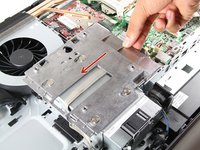
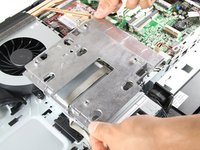
Remove both 3/8" screws using the T15 Torx Screwdriver from the metal plate, and slide the plate to the left.
-
-
-
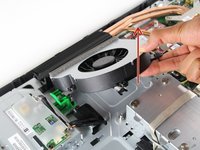
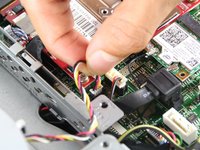
Unscrew three surrounding 1/4" screws, with the T15 Torx Screwdriver. Pull out the fan and attached wires.
-


To reassemble your device, follow these instructions in reverse order.
팀

Cal Poly, Team 1-20, Maness Fall 2015 Cal Poly, Team 1-20, Maness Fall 2015 회원
CPSU-MANESS-F15S1G20
4 회원들
안내서 12개를 작성함