주요 콘텐츠로 건너뛰기

Hamilton Beach 51101BA Power Button Replacement

필요한 것

  1. Hamilton Beach 51101BA Power Button Replacement, Power Button: 1 단계, 이미지 1/3 Hamilton Beach 51101BA Power Button Replacement, Power Button: 1 단계, 이미지 2/3 Hamilton Beach 51101BA Power Button Replacement, Power Button: 1 단계, 이미지 3/3
    • Remove the container from the base.

    • Hold the blender and the container, then twist the container in a clockwise motion.

    • Make sure to follow the lock and unlock markings on the container.

  2. Hamilton Beach 51101BA Power Button Replacement: 2 단계, 이미지 1/1
    • Turn the blender so the bottom is facing you.

    • Using a Phillips #2 screwdriver, remove the two 5 mm Phillips screws from the base.

  3. Hamilton Beach 51101BA Power Button Replacement: 3 단계, 이미지 1/1
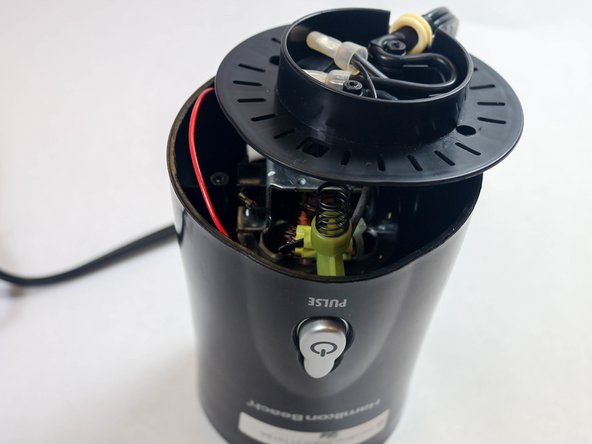
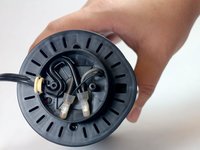
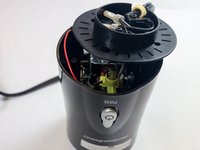
    • Using a Phillips #2 screwdriver, remove the two 5 mm Phillips screws from the motor platform.

  4. Hamilton Beach 51101BA Power Button Replacement: 4 단계, 이미지 1/2 Hamilton Beach 51101BA Power Button Replacement: 4 단계, 이미지 2/2
    • Unhinge the motor platform from the blender.

    • You may need a plastic spudger to unhinge the plastic bottom piece from the base of the blender.

    • You do not need to completely remove this piece from the base.

  5. Hamilton Beach 51101BA Power Button Replacement: 5 단계, 이미지 1/1
    • Pull out the rectangular green piece.

    • This is the actual power button.

  6. Hamilton Beach 51101BA Power Button Replacement: 6 단계, 이미지 1/1
    • Some experience in soldering is required!

    • On the back of the power button, desolder the red and grey wires that are connected to the piece.

결론

To reassemble your device, follow these instructions in reverse order.

다른 2명이 해당 안내서를 완성하였습니다.

Brandon Nunez

회원 가입일: 08/28/15

283 평판

안내서 2개 작성하였습니다

USF Tampa, Team 2-5, Sullivan Fall 2015 USF Tampa, Team 2-5, Sullivan Fall 2015 회원

USFT-SULLIVAN-F15S2G5

4 회원들

안내서 5개 작성하였습니다

댓글 0개

댓글 쓰기

조회 통계:

24 시간 전: 1

7일 전: 5

30일 전: 18

전체 시간: 3,236