이 번역은 원본 안내서의 최신 업데이트를 반영하지 않을 수 있습니다. 번역 업데이트를 돕거나 아니면 원본 안내서 보기를 참조하세요.
소개
Telescoping handle/텔레스코핑 손잡이는 모든 바퀴 달린 캐리어의 중요한 부품입니다. 구부러지거나 닳으면 움직임이 원활하지 않거나 아예 멈춰버려 매우 불편할 수 있습니다.
이 안내서는 Patagonia Freewheeler and Freightliner Roller 캐리어의 손잡이를 교체하는 방법을 설명합니다. 하지만 어떤 경우에는 간단한 윤활 조치만으로 해결될 수도 있습니다. 이런 경우에는 이 캐리어 손잡이 고착 문제 해결 안내서를 확인하세요: 고착된 캐리어 손잡이 윤활.
교체용 부품은 현재 구할 수 없습니다. 수리를 받으려면 현지 파타고니아 매장으로 가져가 수리 진단을 받거나 우편 수리 서비스를 통해 파타고니아에 보내주세요.
관련 튜토리얼
필요한 것
-
-
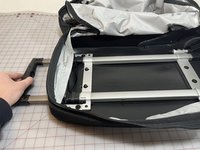
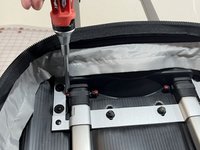
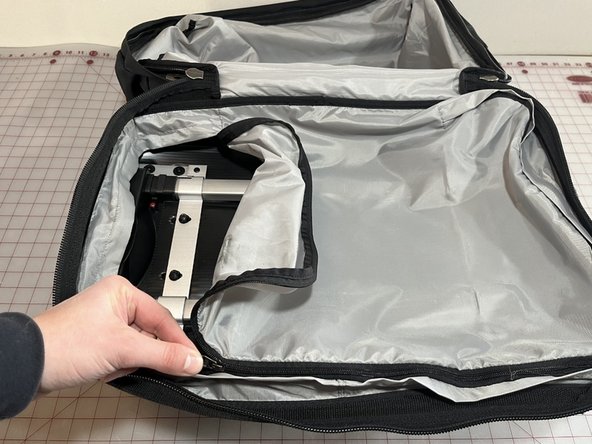
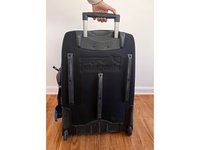
가방 바닥의 지퍼를 열고 수납칸 라이너의 지퍼를 열어 손잡이 메커니즘이 드러나도록 하세요.
-
손잡이가 걸린 것 같지만 손상되지 않았다면 먼저 윤활유를 발라주세요.
-
-
-
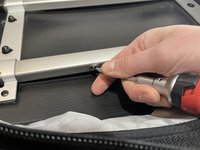
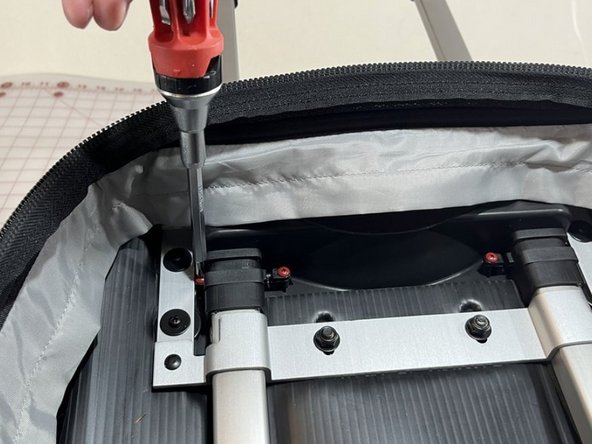
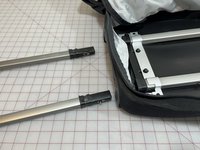
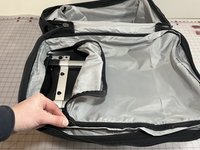
십자 PH1 드라이버를 사용하여 상단 손잡이 브래킷에 있는 나사 4개를 풀어주세요.
-
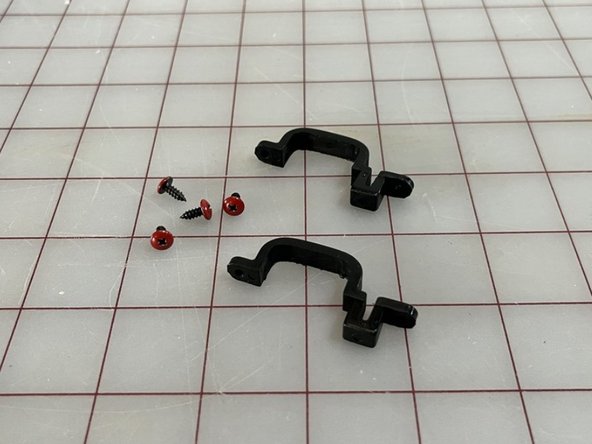
그런 다음 빨간색 나사로 고정되어 있던 검은색 플라스틱 고정 클립 2개를 분리하세요.
-
-
-
-
손잡이 해제 버튼을 눌러 손잡이의 토글 버튼을 집어넣으세요.
-
토글 버튼이 들어가지 않으면 (드라이버와 같은) 뾰족한 물체를 사용하여 버튼을 손잡이 하우징 안으로 수동으로 눌러 주세요.
-
손잡이를 위로 당겨서 손잡이 하우징에서 빼내세요. 좌우로 반복해서 움직여 손잡이 아래쪽의 검은색 플라스틱 슬리브를 분리하세요.
-
손상된 핸들은 적절하게 폐기하세요.
-
-
-
상단의 해제 버튼을 누른 상태에서 위아래로 반복해서 움직여 새 핸들을 핸들 하우징에 끼우세요.
-
고정 브래킷과 나사를 원래 자리에 다시 끼우세요.
-
-
-
손잡이가 제대로 작동하는지 테스트하세요. 손잡이를 모든 위치로 움직이고 각 위치에서 제대로 잠기는지 확인하세요:
-
완전히 펼친 상태
-
중간 위치(중형 및 소형 가방에만 해당)
-
손잡이 하우징에 완전히 접힌 상태
-
손잡이 해제 버튼을 눌렀을 때 토글 버튼이 자유롭게 움직여야 합니다.
-
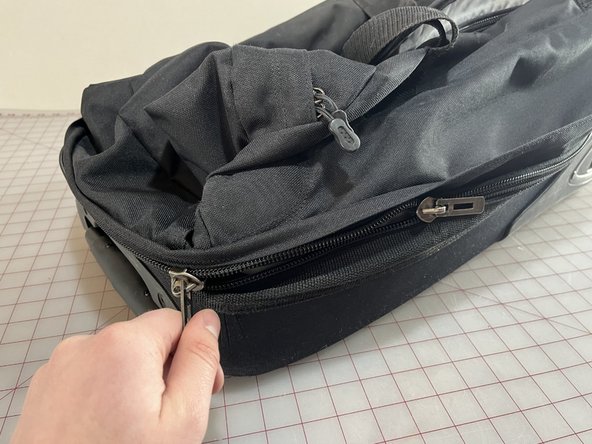
내부 라이너 지퍼와 메인 지퍼 수납칸을 닫으세요.
-


다른 5명이 해당 안내서를 완성하였습니다.
다음 번역가들에게 특별히 감사 드립니다:
91%

Christian Kim님은 저희가 세상을 수리하는데 동참하신 분입니다! 기여하시겠습니까?
번역 시작하기 ›


2가이드 댓글
I depressed the pins. It worked once or twice. But now, I have to depress the pins every time to get the handle to work OR even with the pins depressed it will still not retract or if retracted it will still not open.
What is the solution?
I love this suitcase otherwise, but the handle has always been tricky needing just the right angle on the way in and having to jiggle it to get it out.
Help Patagonia!
Hi Sharon,
The solution to depress the pins was meant to be a temporary solution when your handle is stuck in the extended position. Unfortunately, it means that your handle needs to be replaced as the handle trigger mechanism and pins are not functioning properly. Contact Patagonia for a new handle. You can either call us and we will can ship you a new one and you can replace yourself, or you can go to a Patagonia Retail Store and get a new handle there, afterwhich you can use the handing guidelines for replacement. Please visit our website for phone number and to locate a store near you. Copy and paste this URL in your search engine bar or click on the link.