소개
Is your Heyday Wireless Speaker 8126 not charging or holding a charge? It might be time to replace the charging port. Following the steps in this guide will help you replace the charging port on your Heyday Wireless Speaker 8125 (model number BTSP47).
Before following this guide, please refer to this device's troubleshooting page where charging port related symptoms are present.
This guide will require the use of a soldering tool. For more information on soldering, please refer to the How To Solder And Desolder Connections guide. Please note that the Heyday Wireless Speaker 8125 is fitted with a USB charging port.
Prior to starting this repair, be sure to turn off your device and remove it from the charger.
필요한 것
-
-
Orient the speaker so that it is sitting upright.
-
Use your nondominant hand to hold the speaker in place while you firmly push the plastic spudger into the seam between the device wall and the grille.
-
Push down with the plastic spudger and lift the grill until you feel it separate from the speaker.
-
Gently remove it from the top of the device.
-
-
-
Use tweezers to remove the four black rubber screw covers.
-
Use a Phillips screwdriver to remove four 8.9 mm screws underneath the screw covers.
-
Once all four screws are out, gently pull the black cover out using your hands or use a spudger to pry it out.
-
-
-
-
Use a Phillips screwdriver to remove four 6.6 mm screws from the motherboard.
-
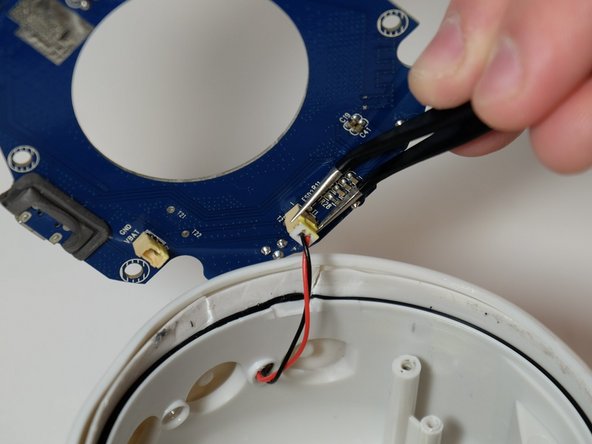
Lift the motherboard out of the speaker gently.
-
-
-
Flip the board upside down.
-
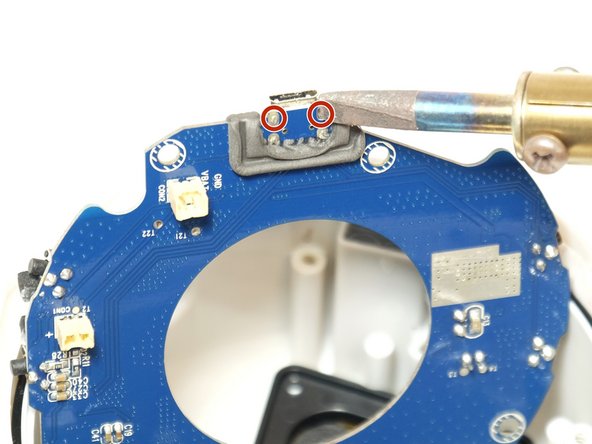
Use a soldering iron to desolder the charging ports' solder joints.
-
Remove the charging port.
-


To reassemble your device, follow these instructions in reverse order.
To reassemble your device, follow these instructions in reverse order.
다른 한 분이 해당 안내서를 완성하였습니다.
팀

Linn Benton Community College, Team 1-1, Karnes Winter 2023 Linn Benton Community College, Team 1-1, Karnes Winter 2023 회원
LBCC-KARNES-W23S1G1
4 회원들
안내서 8개 작성하였습니다