소개
The first step to replacing any internal component in the hoverboard is to remove the external plastic covers. You will need a Phillips #2 screwdriver with a long shaft for this guide.
필요한 것
-
-
Flip the hoverboard over so the labels are facing upwards.
-
Remove the twenty 18mm screws using a Phillips #2 screwdriver and twisting counterclockwise.
 FixBot에 문의하기
-
-
-
-
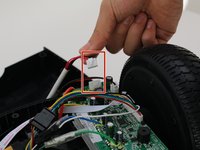
Remove one connector from the non-battery side circuit board.
-
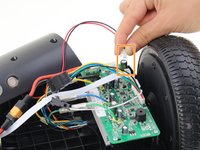
Remove the next connector from the non-battery side circuit board.
-


To reassemble your device, follow these instructions in reverse order.
다른 3명이 해당 안내서를 완성하였습니다.
팀

Cal Poly, Team S13-G2, White Fall 2018 Cal Poly, Team S13-G2, White Fall 2018 회원
CPSU-WHITE-F18S13G2
3 회원들
안내서 4개를 작성함
2가이드 댓글
I'm gettin nothin at all.. Charger is green.. But absolutely nothing when press the on button.. All the cables are connected.. No lights or anythin.. Can anyone help.
I am getting the 5 red lights. I have followed all the instructions. Is there a site to buy the motherboards that are burned out? Is it financially worth buy both boards and replacing them?
-Christopher Fields, Network Engineer, PC Repair, Grantsville, UT