주요 콘텐츠로 건너뛰기

Huawei Honor 9 Motherboard Assembly Replacement

필요한 것

  1. Huawei Honor 9 Motherboard Assembly Replacement, Remove the Rear Glass: 1 단계, 이미지 1/1
    • Switch off your phone.

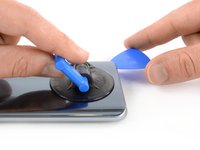
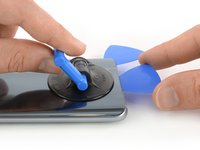
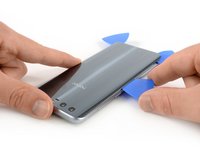
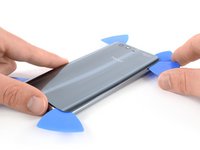
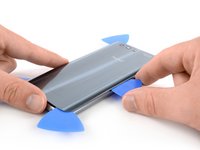
    • Heat an iOpener and apply it to the back of the phone for around two minutes. This will help soften the adhesive securing the rear glass.

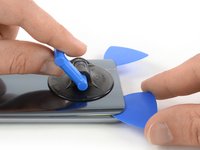
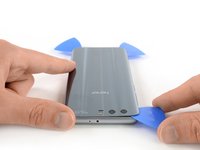
    • You might need to reheat and reapply the iOpener several times during the rear glass removal.

    • A hair dryer, heat gun, or hot plate may also be used, but be careful not to overheat the phone—the display and internal battery are both susceptible to heat damage.

  2. Huawei Honor 9 Motherboard Assembly Replacement: 2 단계, 이미지 1/2 Huawei Honor 9 Motherboard Assembly Replacement: 2 단계, 이미지 2/2
    • Secure a suction handle to the lower edge of the rear glass, as close to the edge as possible.

    • If the phone's rear glass is cracked, the suction cup may not stick. Try lifting it with strong tape, or superglue the suction cup in place and allow it to cure so you can proceed.

    • Lift the rear glass with the suction cup to create a gap between the glass and the frame.

    • Insert an opening pick into the gap.

    • If you have trouble, apply more heat to further soften the adhesive. Follow the iOpener instructions to avoid overheating.

  3. Huawei Honor 9 Motherboard Assembly Replacement: 3 단계, 이미지 1/3 Huawei Honor 9 Motherboard Assembly Replacement: 3 단계, 이미지 2/3 Huawei Honor 9 Motherboard Assembly Replacement: 3 단계, 이미지 3/3
    • Slide the opening pick to the bottom right corner.

    • Insert a second opening pick and slide it to the bottom left corner.

    • Leave the opening picks in place to prevent the adhesive from resealing.

  4. Huawei Honor 9 Motherboard Assembly Replacement: 4 단계, 이미지 1/3 Huawei Honor 9 Motherboard Assembly Replacement: 4 단계, 이미지 2/3 Huawei Honor 9 Motherboard Assembly Replacement: 4 단계, 이미지 3/3
    • Insert a third opening pick at the bottom left corner.

    • Start to slide the tip of the opening pick from the bottom left corner along the side of the Huawei Honor 9 to cut the adhesive.

    • Leave the opening pick in its place at the top left corner to prevent the adhesive from resealing.

  5. Huawei Honor 9 Motherboard Assembly Replacement: 5 단계, 이미지 1/2 Huawei Honor 9 Motherboard Assembly Replacement: 5 단계, 이미지 2/2
    • If the adhesive gets hard to cut it is likely too cold. Use your iOpener to reheat it.

    • Insert a fourth opening pick under the top left corner of the rear glass.

    • Slide the opening pick along the top edge of the phone to cut the adhesive.

    • Leave the opening pick in the top right corner to prevent the adhesive from resealing.

  6. Huawei Honor 9 Motherboard Assembly Replacement: 6 단계, 이미지 1/2 Huawei Honor 9 Motherboard Assembly Replacement: 6 단계, 이미지 2/2
    • Insert a fifth opening pick at the top right corner of the phone.

    • Slide the opening pick along the right side to cut the remaining adhesive.

  7. Huawei Honor 9 Motherboard Assembly Replacement: 7 단계, 이미지 1/2 Huawei Honor 9 Motherboard Assembly Replacement: 7 단계, 이미지 2/2
    이 단계에 사용된 도구:
    Tesa 61395 Tape
    $5.99
    구매
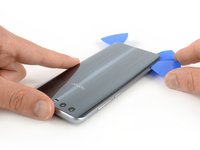
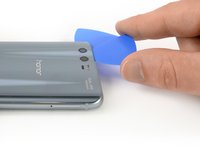
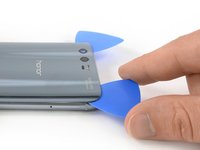
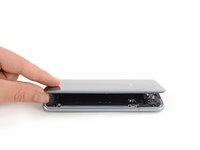
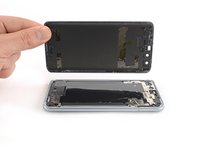
    • Carefully lift the rear glass and remove it.

    • Secure the new rear glass with pre-cut adhesive or double-sided adhesive tape.

    • After installing the rear glass, apply strong, steady pressure to your phone for several minutes to help the adhesive form a good bond, such as by placing it under a stack of heavy books.

  8. Huawei Honor 9 Motherboard Assembly Replacement, Remove the Motherboard Shield: 8 단계, 이미지 1/1
    • Remove the three Phillips #00 screws (3.45 mm length).

    • Remove the five Phillips #00 screws (2.9 mm length).

  9. Huawei Honor 9 Motherboard Assembly Replacement: 9 단계, 이미지 1/2 Huawei Honor 9 Motherboard Assembly Replacement: 9 단계, 이미지 2/2
    • Carefully peel up the black thermal foil and remove it completely.

    • This foil is very thin and brittle and may rip easily.

    • Remove the Phillips #00 screw that is located underneath the thermal foil at the bottom center of the motherboard.

  10. Huawei Honor 9 Motherboard Assembly Replacement: 10 단계, 이미지 1/2 Huawei Honor 9 Motherboard Assembly Replacement: 10 단계, 이미지 2/2
    • Slide an opening pick under the right side of the motherboard shield.

    • Twist the opening pick sideways to release the clips that hold the shield in place.

    • Repeat the previous process and work your way around the motherboard shield until it pops out.

  11. Huawei Honor 9 Motherboard Assembly Replacement: 11 단계, 이미지 1/1
    • Remove the motherboard shield.

  12. Huawei Honor 9 Motherboard Assembly Replacement, Disconnect the Battery: 12 단계, 이미지 1/2 Huawei Honor 9 Motherboard Assembly Replacement, Disconnect the Battery: 12 단계, 이미지 2/2
    • Use a spudger to pry up and disconnect the battery flex cable.

  13. Huawei Honor 9 Motherboard Assembly Replacement, Remove the Motherboard Assembly: 13 단계, 이미지 1/2 Huawei Honor 9 Motherboard Assembly Replacement, Remove the Motherboard Assembly: 13 단계, 이미지 2/2
    • Remove the SIM card tray.

  14. Huawei Honor 9 Motherboard Assembly Replacement: 14 단계, 이미지 1/2 Huawei Honor 9 Motherboard Assembly Replacement: 14 단계, 이미지 2/2
    • Use a pair of tweezers to pry up and disconnect the antenna coax cable located next to the battery connector.

  15. Huawei Honor 9 Motherboard Assembly Replacement: 15 단계, 이미지 1/2 Huawei Honor 9 Motherboard Assembly Replacement: 15 단계, 이미지 2/2
    • Use a spudger to pry up and disconnect the interconnect flex cable.

  16. Huawei Honor 9 Motherboard Assembly Replacement: 16 단계, 이미지 1/2 Huawei Honor 9 Motherboard Assembly Replacement: 16 단계, 이미지 2/2
    • Use a spudger to pry up and disconnect the display flex cable.

  17. Huawei Honor 9 Motherboard Assembly Replacement: 17 단계, 이미지 1/2 Huawei Honor 9 Motherboard Assembly Replacement: 17 단계, 이미지 2/2
    • Use a spudger to pry up and disconnect the power and volume button flex cable.

  18. Huawei Honor 9 Motherboard Assembly Replacement: 18 단계, 이미지 1/3 Huawei Honor 9 Motherboard Assembly Replacement: 18 단계, 이미지 2/3 Huawei Honor 9 Motherboard Assembly Replacement: 18 단계, 이미지 3/3
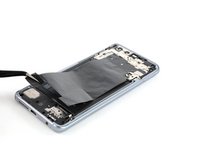
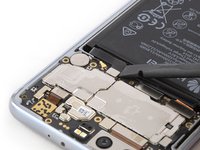
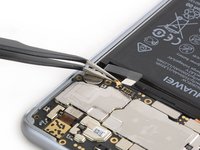
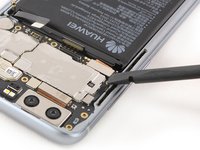
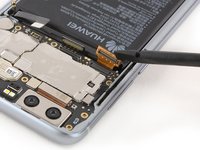
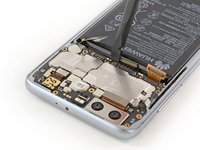
    • Insert a spudger in the gap between the battery and the motherboard.

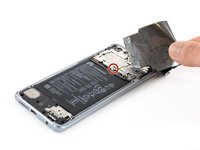
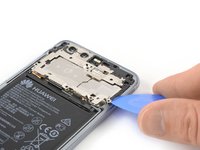
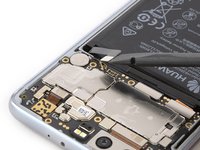
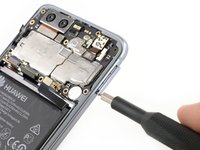
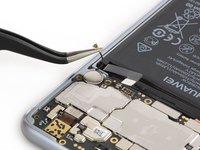
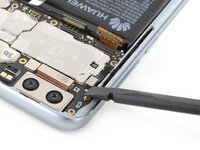
    • Carefully pry up the motherboard until you can get a good grip.

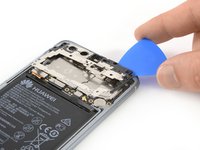
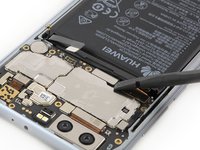
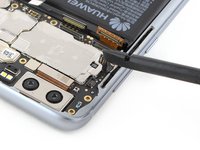
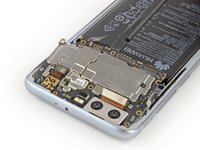
    • Make sure the previously unplugged connectors are out of the way and avoid damaging any close components while lifting the motherboard.

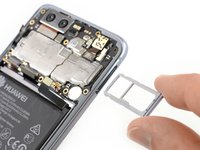
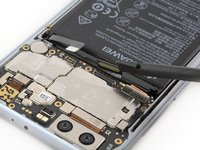
    • Remove the motherboard assembly.

결론

To reassemble your device, follow these instructions in reverse order.

Take your e-waste to an R2 or e-Stewards certified recycler.

Repair didn’t go as planned? Check out our Answers community for troubleshooting help.

Dominik Schnabelrauch

회원 가입일: 11/23/16

203,329 평판

안내서 682개 작성하였습니다

iFixit iFixit 회원

Staff

135 회원들

안내서 16,817개 작성하였습니다

댓글 0개

댓글 쓰기

조회 통계:

24 시간 전: 2

7일 전: 3

30일 전: 19

전체 시간: 1,361