소개
This guide will demonstrate how to remove and replace the screen on an IBM ThinkPad 560z. A Phillips 00 screwdriver and a push pin are needed for this process.
필요한 것
-
-
Slide the battery release latch to the right.
-
Pull out the battery out towards the front of the device.
 FixBot에 문의하기
-
-
-
Remove the plastic screw covers, then remove the 3 Phillips screws under them.
-
-
-
-
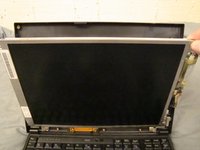
Insert the plastic opening tool between the front cover and back cover to pry open the screen case, then carefully pull the bezel off.
-
-
-
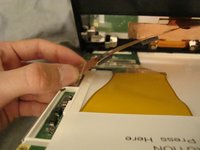
Using your fingers or an Opening Tool, detach the connector on the right side of the screen.
-
-
-
Slowly pull back the screen from the top and disconnect the ribbon cable from the back to completely free the screen from the laptop.
-


To reassemble your device, follow these instructions in reverse order.
다른 2명이 해당 안내서를 완성하였습니다.
팀

Cal Poly, Team 26-27, Regan Spring 2010 Cal Poly, Team 26-27, Regan Spring 2010 회원
CPSU-REGAN-S10S26G27
3 회원들
안내서 18개를 작성함