소개
This guide will teach users how to carefully remove an existing hard drive. Remember to always power down the computer before attempting any installation/removal of any hardware components. Be sure to remove the AC adapter and all cables from the computer. If the computer has been on, wait several minutes before beginning the procedure to ensure all parts have cooled down.
필요한 것
-
-
Turn the Thinkpad over so you can see the back.
-
Locate this screw in the bottom left-hand corner.
 FixBot에 문의하기
-
-
-
-
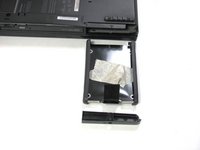
Carefully remove the plastic piece covering the hard drive port by pulling perpendicular to the side of the laptop.
-
-
-
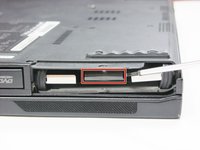
Use a small screwdriver to locate the black ribbon.
-
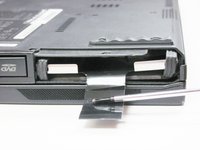
With the screwdriver, pull the black tab out of the slot.
-
-
-
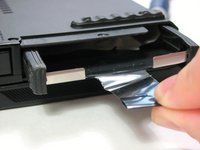
Pull gently on the black ribbon and the metal tray carrying the hard drive will slide out.
-





To reassemble your device, follow these instructions in reverse order.
다른 9명이 해당 안내서를 완성하였습니다.

팀

Cal Poly, Team 7-9, Maness Winter 2013 Cal Poly, Team 7-9, Maness Winter 2013 회원
CPSU-MANESS-W13S7G9
4 회원들
안내서 16개를 작성함
