주요 콘텐츠로 건너뛰기

IdeaPad Yoga 13 RAM Module Replacement

필요한 것

  1. IdeaPad Yoga 13 RAM Module Replacement, Keyboard: 1 단계, 이미지 1/1
    • Power off your laptop before beginning disassembly.

    • Open the laptop to locate the keyboard.

  2. IdeaPad Yoga 13 RAM Module Replacement: 2 단계, 이미지 1/2 IdeaPad Yoga 13 RAM Module Replacement: 2 단계, 이미지 2/2
    • Insert a plastic opening tool in the seam between the keyboard and laptop body.

    • Carefully run the tool around the top and sides of the keyboard to pop out the 9 tabs holding in the keyboard.

  3. IdeaPad Yoga 13 RAM Module Replacement: 3 단계, 이미지 1/3 IdeaPad Yoga 13 RAM Module Replacement: 3 단계, 이미지 2/3 IdeaPad Yoga 13 RAM Module Replacement: 3 단계, 이미지 3/3
    • Lift the keyboard up, then pivot it towards you to lay it facedown on the trackpad and palm rests.

    • Be careful when lifting the keyboard up. The ribbon cable connecting it to the motherboard is very short, and the connector is fragile.

    • The top corners of the keyboard may be stuck to the laptop bezel with double sided tape. See rectangles in Image 3. Be careful as you lift the keyboard up and pivot it toward you.

  4. IdeaPad Yoga 13 RAM Module Replacement: 4 단계, 이미지 1/3 IdeaPad Yoga 13 RAM Module Replacement: 4 단계, 이미지 2/3 IdeaPad Yoga 13 RAM Module Replacement: 4 단계, 이미지 3/3
    • Locate the ribbon cable connecting the keyboard to the motherboard.

    • Use the tip of the opening tool to lift the black flap on the connector.

    • With the twezers, gently lift the ribbon cable out of the connector.

    • Be careful when reinserting the ribbon cable.

    • Ensure the cutouts on the end of the cable match the tabs on the connector.

  5. IdeaPad Yoga 13 RAM Module Replacement, RAM Module: 5 단계, 이미지 1/2 IdeaPad Yoga 13 RAM Module Replacement, RAM Module: 5 단계, 이미지 2/2
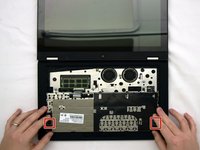
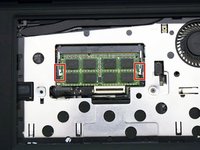
    • Locate the RAM module.

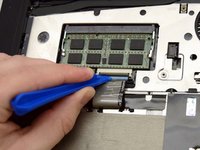
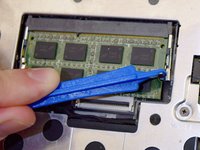
    • Locate the retention clips holding the module in place, and gently push them outwards.

  6. IdeaPad Yoga 13 RAM Module Replacement: 6 단계, 이미지 1/1
    • The RAM module should pop up at an angle and can be lifted out.

    • When re-installing, insert the RAM module at the same angle, then push it down to re-engage the retention clips.

결론

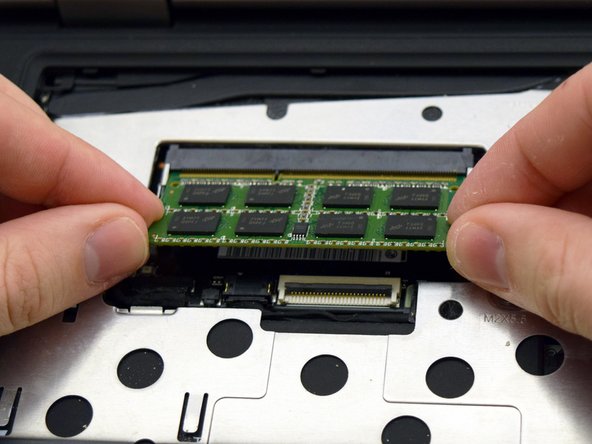
To reassemble your device, follow these instructions in reverse order.

다른 한 분이 해당 안내서를 완성하였습니다.

Remington Jones

회원 가입일: 01/17/17

750 평판

안내서 3개 작성하였습니다

댓글 한 개

That helps a lot!

Ruiming Jia - 답글

댓글 쓰기

조회 통계:

24 시간 전: 0

7일 전: 0

30일 전: 8

전체 시간: 1,383