주요 콘텐츠로 건너뛰기

Integrated Headset Replacement

필요한 것

  1. Integrated Headset Replacement, Integrated Headset: 1 단계, 이미지 1/3 Integrated Headset Replacement, Integrated Headset: 1 단계, 이미지 2/3 Integrated Headset Replacement, Integrated Headset: 1 단계, 이미지 3/3
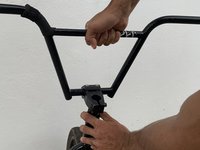
    • Use a 6 mm Allen wrench to loosen the pinch bolts on each side of the stem.

    • Make sure to alternate between each side.

  2. Integrated Headset Replacement: 2 단계, 이미지 1/3 Integrated Headset Replacement: 2 단계, 이미지 2/3 Integrated Headset Replacement: 2 단계, 이미지 3/3
    • After loosening the bolts, the stem will be free to rotate.

    • Loosen and remove the top cap compression bolt.

  3. Integrated Headset Replacement: 3 단계, 이미지 1/3 Integrated Headset Replacement: 3 단계, 이미지 2/3 Integrated Headset Replacement: 3 단계, 이미지 3/3
    • Lift the bars and stem to remove them from the fork.

    • Turn the bars side to side while you pull up. This should help you remove a tight stem.

  4. Integrated Headset Replacement: 4 단계, 이미지 1/3 Integrated Headset Replacement: 4 단계, 이미지 2/3 Integrated Headset Replacement: 4 단계, 이미지 3/3
    • Remove the fork and headset from the bottom of the frame.

  5. Integrated Headset Replacement: 5 단계, 이미지 1/3 Integrated Headset Replacement: 5 단계, 이미지 2/3 Integrated Headset Replacement: 5 단계, 이미지 3/3
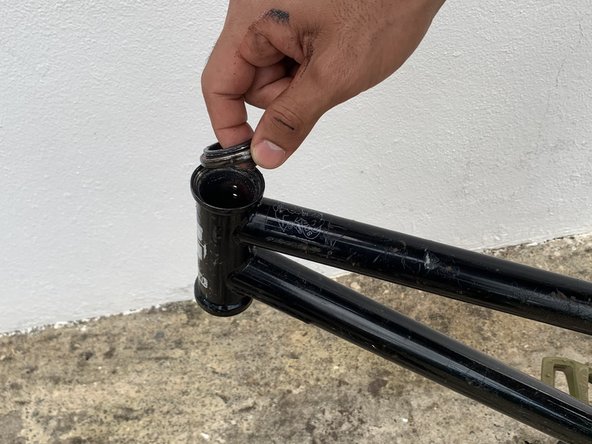
    • Remove the dust cap on top and replace the old bearings with the new headset if necessary.

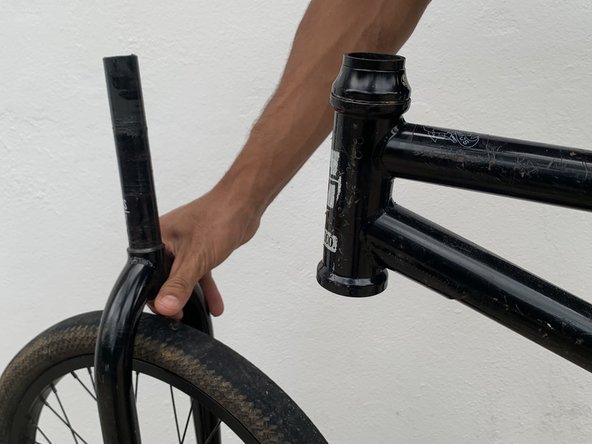
    • Apply a thin coat of grease as needed on the frame’s head tube or steering head and fork.

  6. Integrated Headset Replacement: 6 단계, 이미지 1/3 Integrated Headset Replacement: 6 단계, 이미지 2/3 Integrated Headset Replacement: 6 단계, 이미지 3/3
    • Slide the fork back on the frame and place the compression ring on the upper headset bearing.

  7. Integrated Headset Replacement: 7 단계, 이미지 1/3 Integrated Headset Replacement: 7 단계, 이미지 2/3 Integrated Headset Replacement: 7 단계, 이미지 3/3
    • Slide the dust cover on and install the stem.

    • Check the amount of space between the top of the steerer tube and the top of your stem. Your steerer tube should lay just a few millimeters below, and allow for clamping and compression. If it doesn't, add a spacer on top of the dust cover and under the stem.

  8. Integrated Headset Replacement: 8 단계, 이미지 1/3 Integrated Headset Replacement: 8 단계, 이미지 2/3 Integrated Headset Replacement: 8 단계, 이미지 3/3
    • Reinstall the compression bolt and tighten it down, while at the same time keeping the bars in alignment.

    • Tighten the compression bolt until the thread becomes hard.

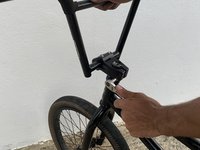
    • Use the socket wrench to turn the bolt half turn more and check for play by rocking the bars forward and backwards while pinching the frame with your knees.

  9. Integrated Headset Replacement: 9 단계, 이미지 1/3 Integrated Headset Replacement: 9 단계, 이미지 2/3 Integrated Headset Replacement: 9 단계, 이미지 3/3
    • Check for play and make sure the bars turn smoothly.

    • You don’t want to over tighten the compression bolt as this will result in improper steering.

    • Secure the pinching bolts on each side of the stem, alternating between each side as you go.

결론

The final product should end up with aligned and firm bars. There should be no forward or backwards play and everything should turn smoothly.

Carlos

회원 가입일: 03/25/22

169 평판

안내서 1개 작성함

댓글 0개

댓글 쓰기

조회 통계:

24 시간 전: 0

7일 전: 4

30일 전: 12

전체 시간: 381