소개
Phone cases protect your phone's inner workings and screen from damage. In the event the case itself gets damaged, this guide will walk you through how to properly replace it. A Phillips #0 Screwdriver and a plastic opening tool will be needed to complete this. This repair will solve any problems that have to do with screen damage, and allows the user to put on an entirely brand new screen. This should take around 10 minutes to complete
필요한 것
-
-
Use a Phillips #0 screwdriver to remove the screw in the middle of the battery compartment.
-
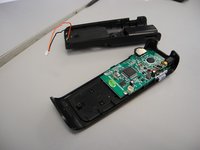
Pry open the case body with the plastic opening tool. Start at the bottom of the device and work toward the top. You will hear a "click" sound as the sides open.
-
-
-
-
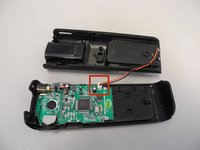
Carefully pull the wire connectors out of the white connector gauge to completely separate the front and back pieces.
-
-
-
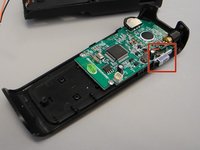
Find the lever on the right side of the back half of the device.
-
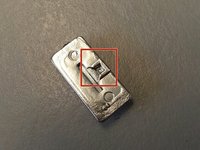
Insert the tip of the lever into the square indent on the underside of the button.
-


To reassemble your device, follow these instructions in reverse order. It's possible to either use a new case for your phone, or put the old one back on.
다른 한 분이 해당 안내서를 완성하였습니다.
팀

Ohio State, Team 1-1, Buehl Spring 2014 Ohio State, Team 1-1, Buehl Spring 2014 회원
OSU-BUEHL-S14S1G1
4 회원들
안내서 3개를 작성함