주요 콘텐츠로 건너뛰기

JBL Flip Battery Replacement

필요한 것

  1. JBL Flip Battery Replacement, JBL Flip disassembly: 1 단계, 이미지 1/3 JBL Flip Battery Replacement, JBL Flip disassembly: 1 단계, 이미지 2/3 JBL Flip Battery Replacement, JBL Flip disassembly: 1 단계, 이미지 3/3
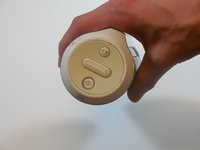
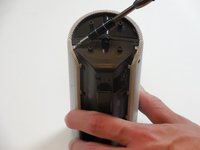
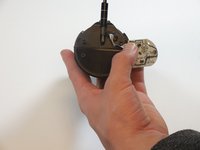
    • On the end with the buttons, remove the end cap using the flat head screwdriver to get between the rubber lining and the plastic.

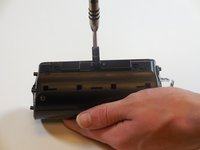
    • After the cap is removed, unscrew the two 3.3mm screws using a size 1 ph screw driver.

  2. JBL Flip Battery Replacement: 2 단계, 이미지 1/3 JBL Flip Battery Replacement: 2 단계, 이미지 2/3 JBL Flip Battery Replacement: 2 단계, 이미지 3/3
    • Unscrew four 3.3mm screws on each end of the JBL using a size 1 ph screw driver (8 screws total).

  3. JBL Flip Battery Replacement: 3 단계, 이미지 1/3 JBL Flip Battery Replacement: 3 단계, 이미지 2/3 JBL Flip Battery Replacement: 3 단계, 이미지 3/3
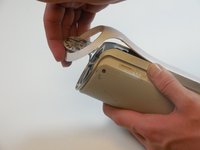
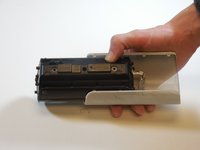
    • Remove outermost white casing by gently lifting up on one side.

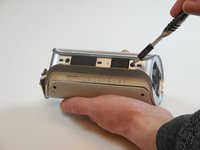
    • Remove two 5mm screws holding the silver back plate in place with a size 2 ph screw driver.

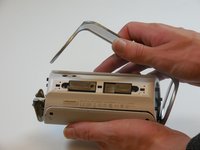
    • Gently lift up and remove the silver casing.

  4. JBL Flip Battery Replacement: 4 단계, 이미지 1/1
    • Remove last white back plate to expose the back of the speaker cover.

  5. JBL Flip Battery Replacement: 5 단계, 이미지 1/3 JBL Flip Battery Replacement: 5 단계, 이미지 2/3 JBL Flip Battery Replacement: 5 단계, 이미지 3/3
    • Pry the four tabs on each side of the speaker cover (8 tabs total).

    • Pry the two tabs on each end to remove the cover (4 tabs total).

    • Slide speaker out of metal speaker cover.

  6. JBL Flip Battery Replacement: 6 단계, 이미지 1/3 JBL Flip Battery Replacement: 6 단계, 이미지 2/3 JBL Flip Battery Replacement: 6 단계, 이미지 3/3
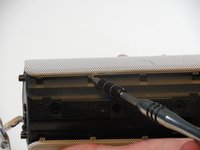
    • Remove 5mm screw in the middle of the back of the device with a size 2 ph screw driver.

    • Unscrew the two 5mm screws on each side using a size 2 ph screwdriver.
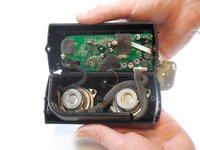
    • Open the speaker.

  7. JBL Flip Battery Replacement, Battery: 7 단계, 이미지 1/2 JBL Flip Battery Replacement, Battery: 7 단계, 이미지 2/2
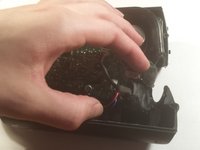
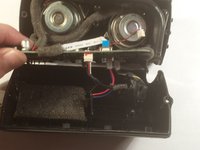
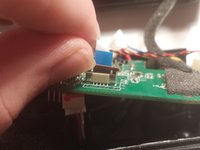
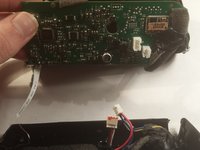
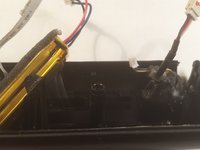
    • Slowly peel the motherboard away from the black glue on the underside.

    • Make sure the battery below the motherboard is turned off before proceeding.

  8. JBL Flip Battery Replacement: 8 단계, 이미지 1/2 JBL Flip Battery Replacement: 8 단계, 이미지 2/2
    • Push brown tab up and gently pull connector out.

  9. JBL Flip Battery Replacement: 9 단계, 이미지 1/3 JBL Flip Battery Replacement: 9 단계, 이미지 2/3 JBL Flip Battery Replacement: 9 단계, 이미지 3/3
    • Remove the first two connectors on the underside of the motherboard.

  10. JBL Flip Battery Replacement: 10 단계, 이미지 1/3 JBL Flip Battery Replacement: 10 단계, 이미지 2/3 JBL Flip Battery Replacement: 10 단계, 이미지 3/3
    • Remove last connector.

    • Remove battery and replace.

결론

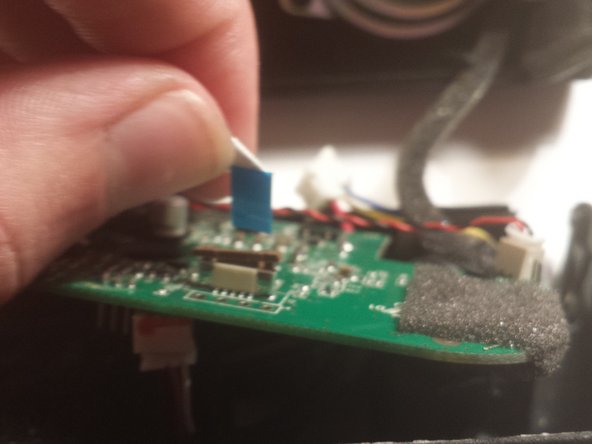
To reassemble your device, follow these instructions in reverse order.

다른 24명이 해당 안내서를 완성하였습니다.

Dillon

회원 가입일: 03/11/15

1,556 평판

안내서 5개 작성하였습니다

Colorado Springs, Team 9-5, Panko Spring 2015 Colorado Springs, Team 9-5, Panko Spring 2015 회원

UCCS-PANKO-S15S9G5

3 회원들

안내서 5개 작성하였습니다

댓글 52개

Excellent tutorial. Very detailed and helpful pictures.

Do you know what the part number and where it can be purchased?

Thanks!

Li V Xi - 답글

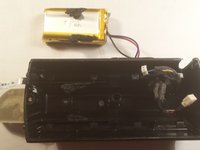
I also want to know about the battery specs

ravimohansairam Krishna - 답글

https://www.youtube.com/watch?v=apF4qT3e...

Follow this video tutorial. this will help you definitely

danish -

Mine is not working anymore and I suspect that the battery is not charging. I´ve checked the battery and its code is AEC653055-2Pwith rating 3,7V 2000 mAh. It has 3 cables: red, yellow and black. I´ve used a voltage meetering to check if there some charge coming from and it had 4,0 VDC. So, probably the problem related to my device is with the battery, because it´s not charging. Anyone else had this same issue?

Marcio Michel - 답글

hey. i had the same problem with the battery of JBL flip. and i fixed it. Complete video tutorial is here :)

https://www.youtube.com/watch?v=apF4qT3e...

danish -

댓글 쓰기

조회 통계:

24 시간 전: 2

7일 전: 14

30일 전: 60

전체 시간: 102,423