주요 콘텐츠로 건너뛰기

Joy-Con 2 (Left) Battery Replacement

필요한 것

  1. Joy-Con 2 (Left) Battery Replacement, Remove the right edge screws: 1 단계, 이미지 2개 중 1개 Joy-Con 2 (Left) Battery Replacement, Remove the right edge screws: 1 단계, 이미지 2개 중 2개
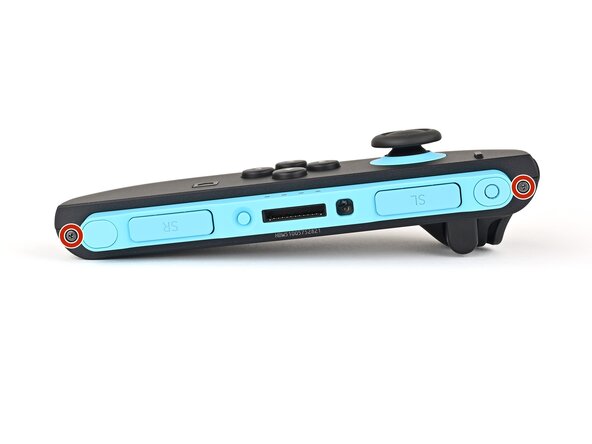
    • Use a tri‑point Y00 driver to remove the two 3.1 mm‑long black screws on the right edge of the controller.

  2. Joy-Con 2 (Left) Battery Replacement, Insert an opening pick: 2 단계, 이미지 2개 중 1개 Joy-Con 2 (Left) Battery Replacement, Insert an opening pick: 2 단계, 이미지 2개 중 2개
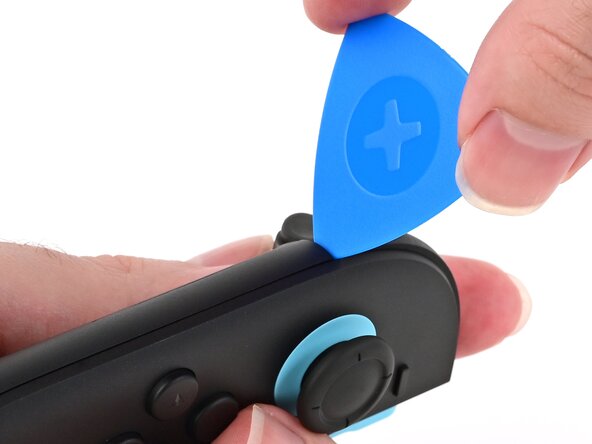
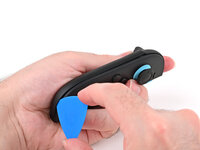
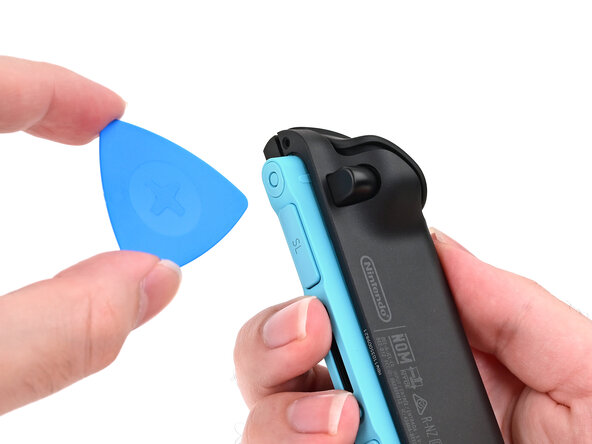
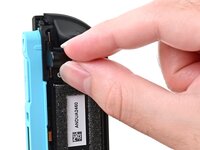
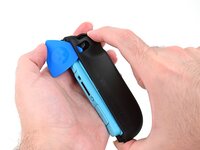
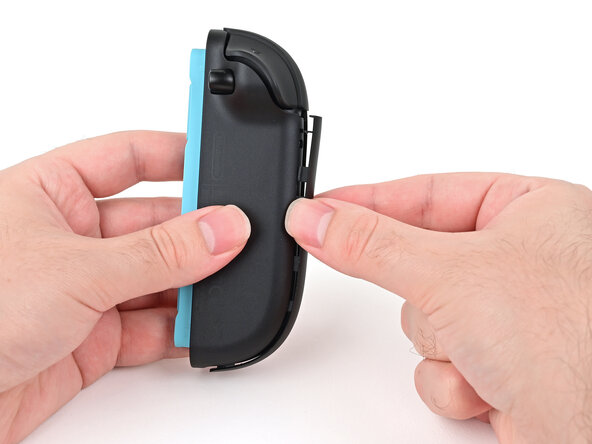
    • Insert an opening pick into the gap underneath the bumper button on the left side of the controller, with a point of the pick pointing downwards.

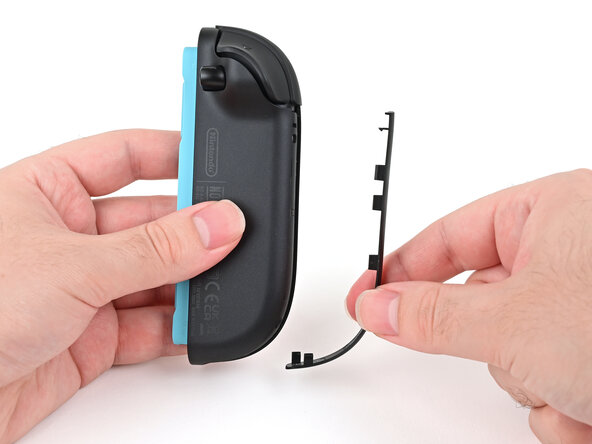
    • Pry up to slightly lift the plastic strip running across the left edge of the controller.

  3. Joy-Con 2 (Left) Battery Replacement, Separate the plastic strip: 3 단계, 이미지 3개 중 1개 Joy-Con 2 (Left) Battery Replacement, Separate the plastic strip: 3 단계, 이미지 3개 중 2개 Joy-Con 2 (Left) Battery Replacement, Separate the plastic strip: 3 단계, 이미지 3개 중 3개
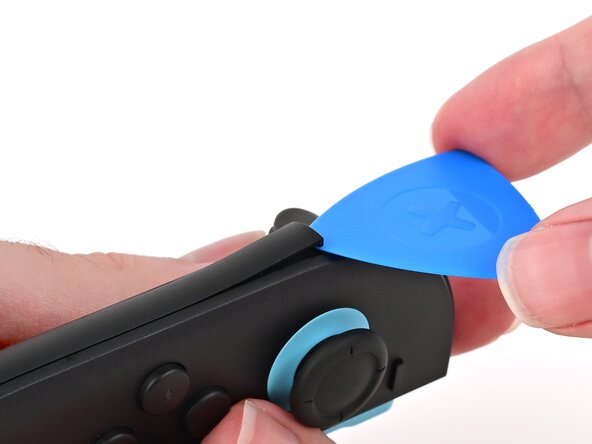
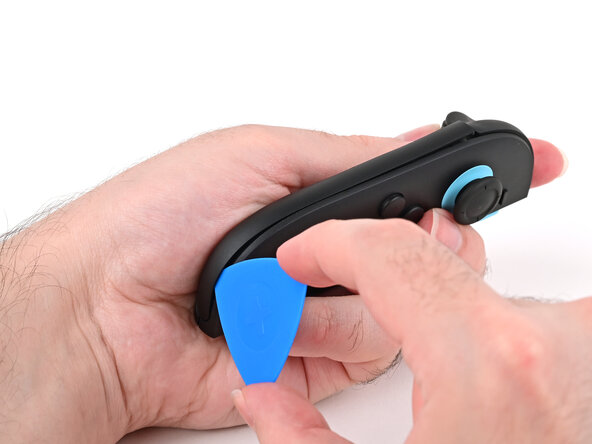
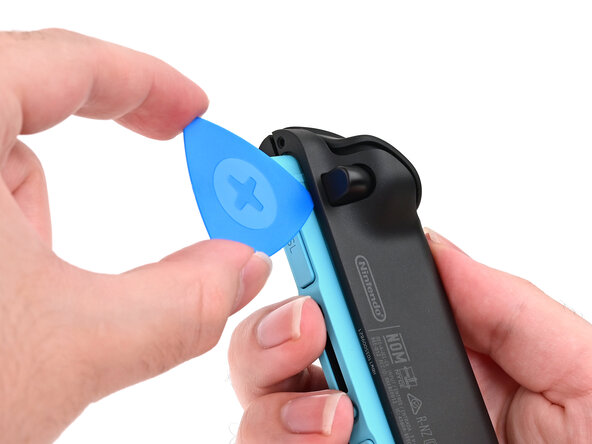
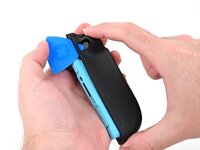
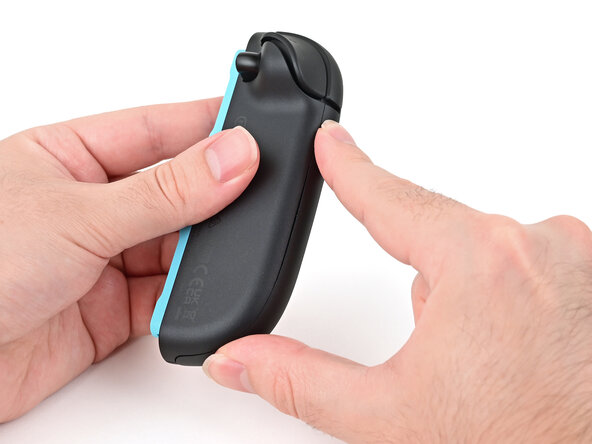
    • Slide the opening pick around to the front of the controller.

    • Slide the opening pick down the plastic strip to separate the clips and adhesive securing it to the controller's body.

  4. Joy-Con 2 (Left) Battery Replacement, Remove the plastic strip: 4 단계, 이미지 3개 중 1개 Joy-Con 2 (Left) Battery Replacement, Remove the plastic strip: 4 단계, 이미지 3개 중 2개 Joy-Con 2 (Left) Battery Replacement, Remove the plastic strip: 4 단계, 이미지 3개 중 3개
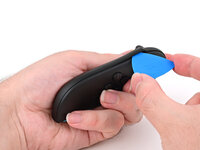
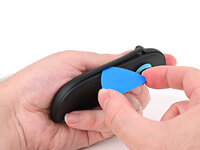
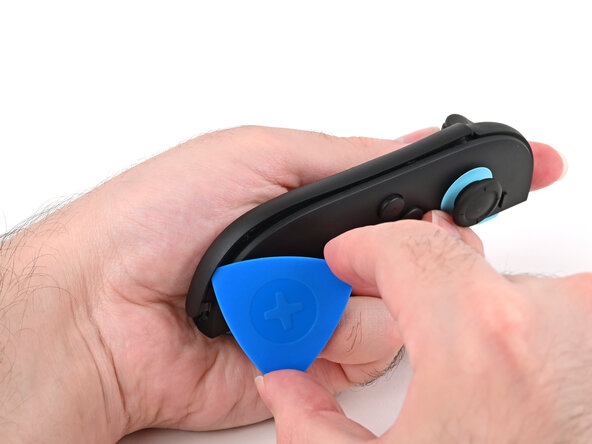
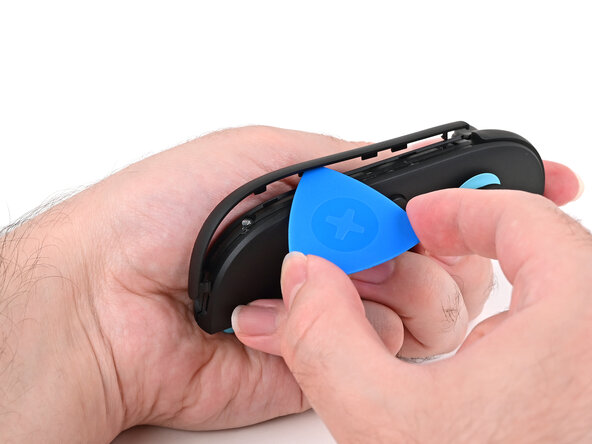
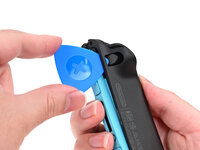
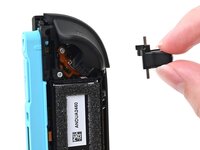
    • Pry up on the bottom edge of the plastic strip with slow, steady force.

    • Repeat this prying action along the length of the strip until it's fully detached.

  5. Joy-Con 2 (Left) Battery Replacement: 5 단계, 이미지 1개 중 1개
    • Remove the plastic strip.

  6. Joy-Con 2 (Left) Battery Replacement, Remove the left edge screws: 6 단계, 이미지 2개 중 1개 Joy-Con 2 (Left) Battery Replacement, Remove the left edge screws: 6 단계, 이미지 2개 중 2개
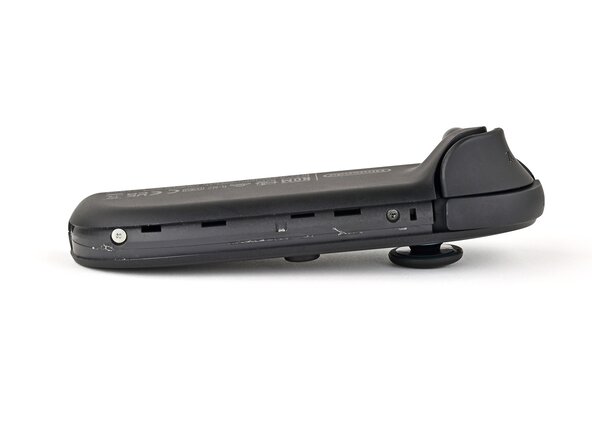
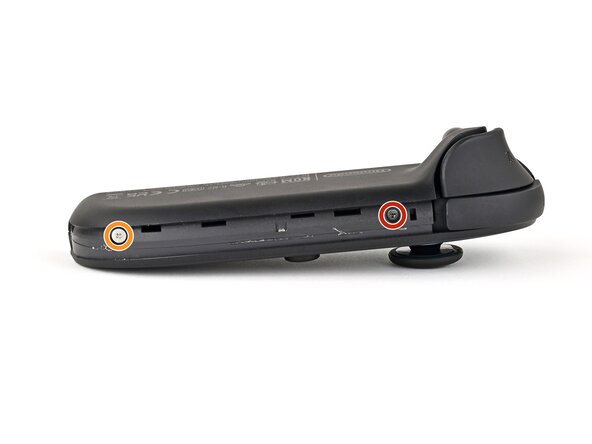
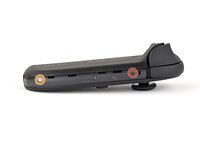
    • Remove the two screws on the left edge of the controller:

    • One 3.1 mm‑long tri‑point Y00 black screw

    • One 3.0 mm‑long JIS 00 silver screw

    • You can use a Phillips screwdriver in a pinch, but you risk damaging or stripping the screw. Push down firmly on the screwdriver and twist slowly. Often, switching drivers may help, even if they're the same size.

  7. Joy-Con 2 (Left) Battery Replacement, Insert an opening pick: 7 단계, 이미지 3개 중 1개 Joy-Con 2 (Left) Battery Replacement, Insert an opening pick: 7 단계, 이미지 3개 중 2개 Joy-Con 2 (Left) Battery Replacement, Insert an opening pick: 7 단계, 이미지 3개 중 3개
    • Don't try to remove the back cover yet.

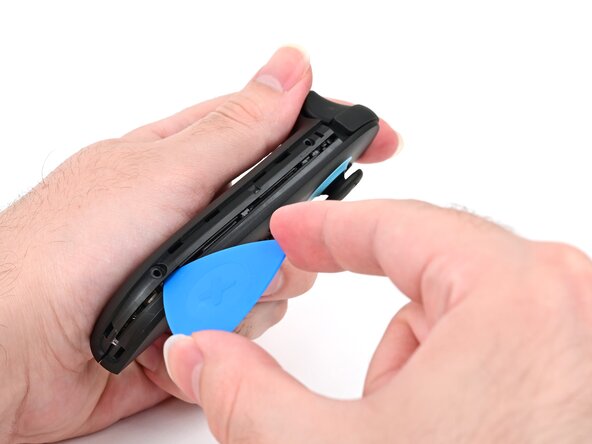
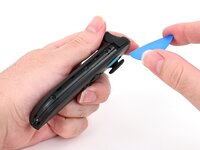
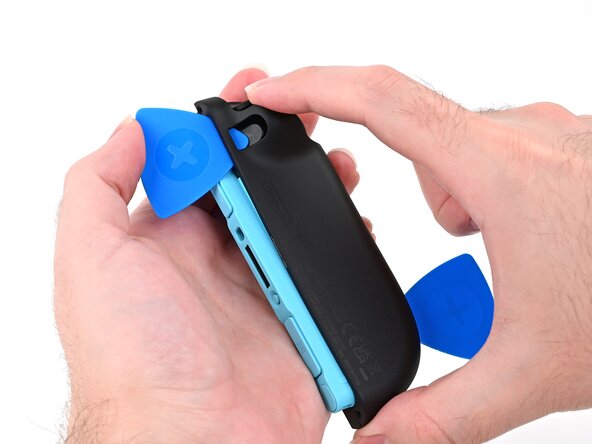
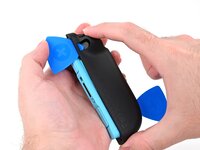
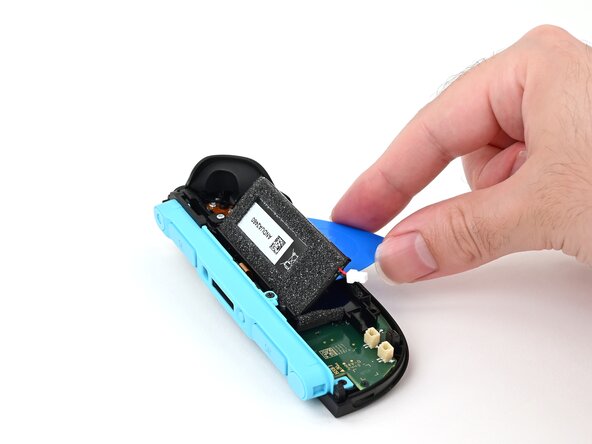
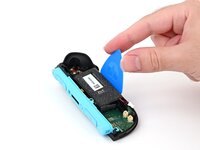
    • Insert an opening pick into the gap between the front and back halves of the controller on its left side.

    • Slide the pick down the controller to disengage the clips.

    • Leave the opening pick at the bottom of the controller's left edge, just before its curve.

    • The opening pick will fall out once the back cover is removed. If it falls out before then, put it back to keep the two halves separated.

  8. Joy-Con 2 (Left) Battery Replacement, Insert a second opening pick: 8 단계, 이미지 3개 중 1개 Joy-Con 2 (Left) Battery Replacement, Insert a second opening pick: 8 단계, 이미지 3개 중 2개 Joy-Con 2 (Left) Battery Replacement, Insert a second opening pick: 8 단계, 이미지 3개 중 3개
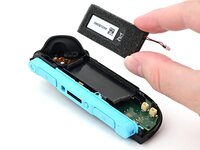
    • Hold the controller upside-down.

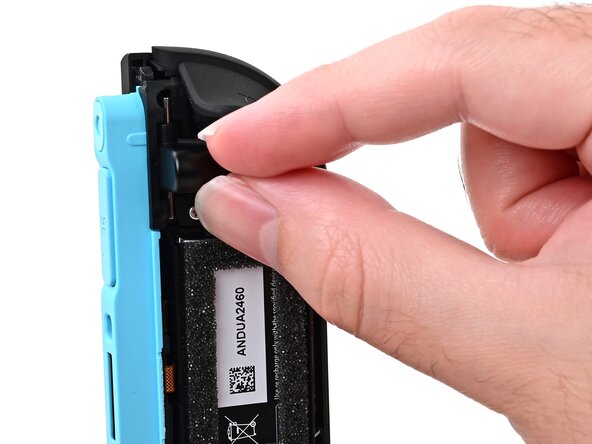
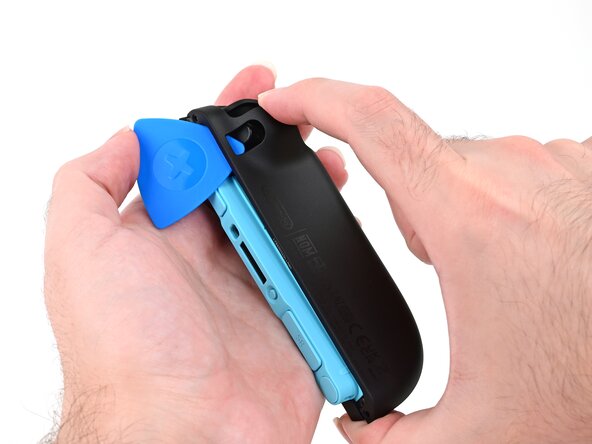
    • Insert a point of another opening pick next to the release button at the top of the controller.

    • Use the opening pick to press the release button through the gap.

  9. Joy-Con 2 (Left) Battery Replacement, Release the back cover: 9 단계, 이미지 3개 중 1개 Joy-Con 2 (Left) Battery Replacement, Release the back cover: 9 단계, 이미지 3개 중 2개 Joy-Con 2 (Left) Battery Replacement, Release the back cover: 9 단계, 이미지 3개 중 3개
    • The back cover is connected to the controller by a cable at the bottom. Don't try to remove it completely yet.

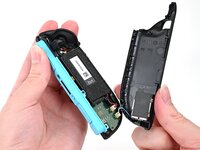
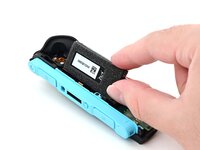
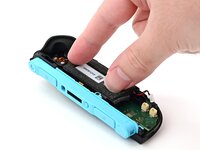
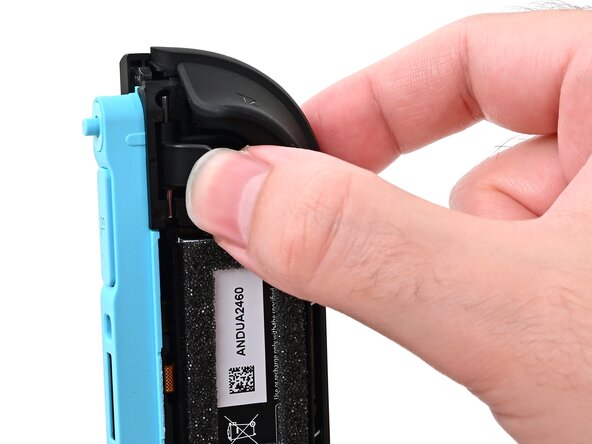
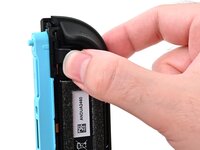
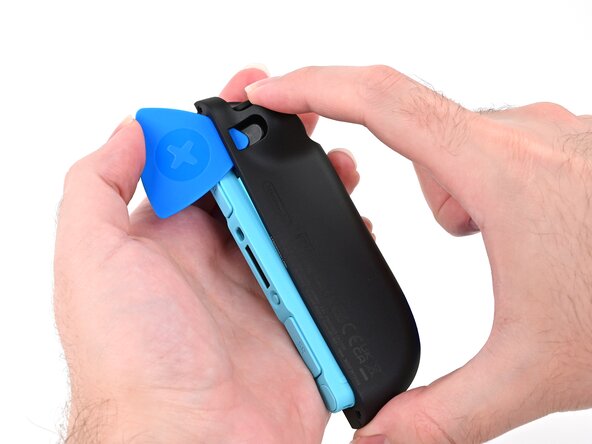
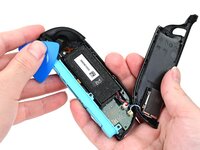
    • While holding the release button with the opening pick, use your other hand to slide the back cover down to release the clips securing it to the controller's body.

    • Open the back cover.

  10. Joy-Con 2 (Left) Battery Replacement, Remove the back cover: 10 단계, 이미지 2개 중 1개 Joy-Con 2 (Left) Battery Replacement, Remove the back cover: 10 단계, 이미지 2개 중 2개
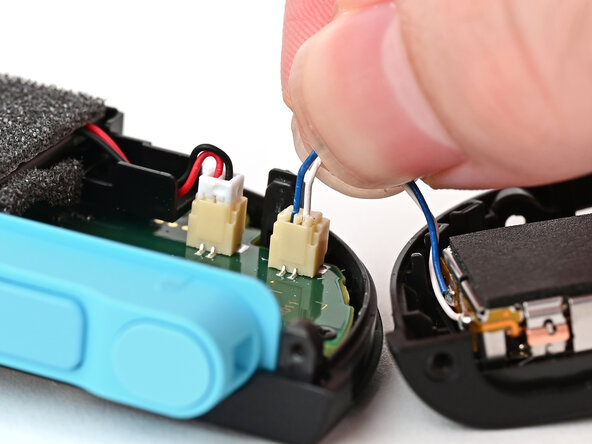
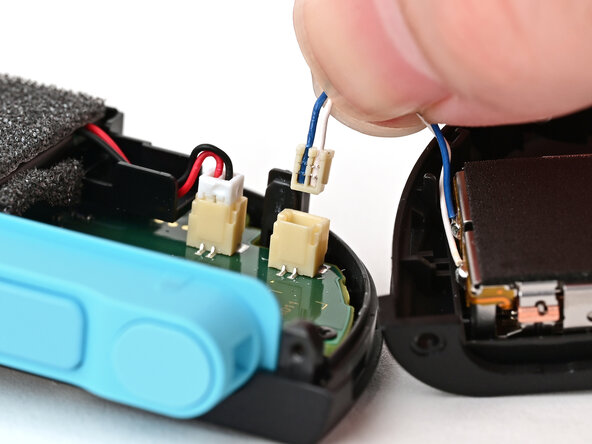
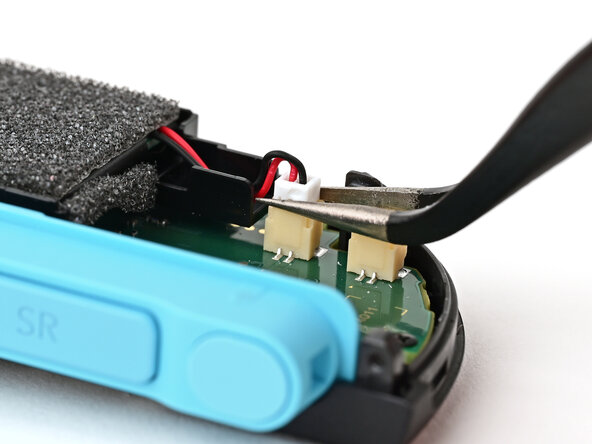
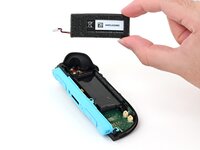
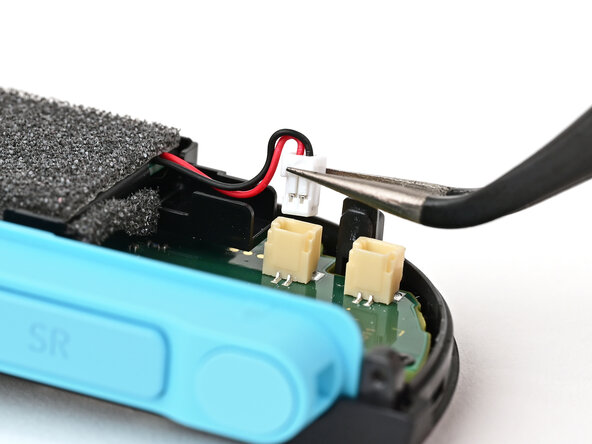
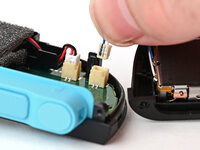
    • Firmly grasp the two wires (blue and white) above the rumble motor connector, located at the bottom of the controller's board, and pull the beige connector out of its socket.

    • Pulling the cable won't damage it, but don't dig your nails into the plastic sheathing.

    • Remove the back cover.

  11. Joy-Con 2 (Left) Battery Replacement, Disconnect the battery: 11 단계, 이미지 3개 중 1개 Joy-Con 2 (Left) Battery Replacement, Disconnect the battery: 11 단계, 이미지 3개 중 2개 Joy-Con 2 (Left) Battery Replacement, Disconnect the battery: 11 단계, 이미지 3개 중 3개
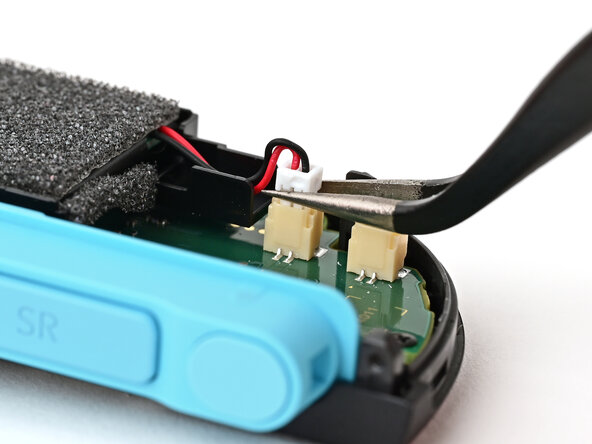
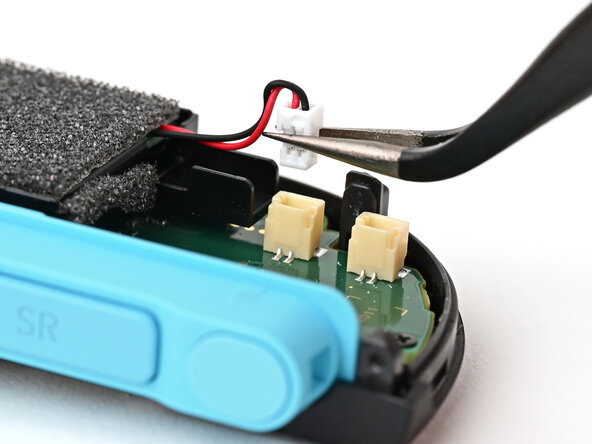
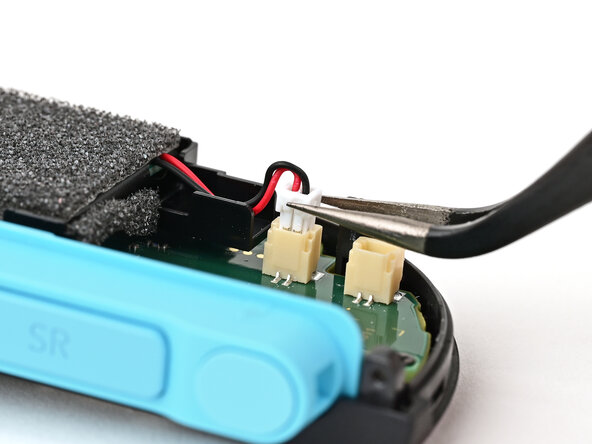
    • Use tweezers or your fingers to firmly grip the battery cable's white JST connector and pull straight away from its socket to disconnect it.

    • Once partially lifted, reposition your fingers/tweezers to beneath the connector's upper lip to increase your grip.

  12. Joy-Con 2 (Left) Battery Replacement, Remove the release button: 12 단계, 이미지 2개 중 1개 Joy-Con 2 (Left) Battery Replacement, Remove the release button: 12 단계, 이미지 2개 중 2개
    • Pick up the release button and remove it.

  13. Joy-Con 2 (Left) Battery Replacement, Remove the battery: 13 단계, 이미지 3개 중 1개 Joy-Con 2 (Left) Battery Replacement, Remove the battery: 13 단계, 이미지 3개 중 2개 Joy-Con 2 (Left) Battery Replacement, Remove the battery: 13 단계, 이미지 3개 중 3개
    이 단계에 사용된 도구:
    iFixit Adhesive Remover
    $19.99
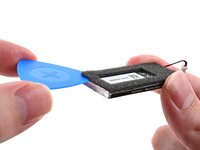
    • Insert a flat edge of an opening pick into the gap between the battery and the battery well.

    • Pry the battery up slowly with steady force to release the adhesive.

    • Don't bend or crease the battery—apply steady force and give the adhesive time to release.

    • If it feels stubborn, apply a few drops of adhesive remover or high-concentration (90% or higher) isopropyl alcohol to the battery side of the pick while it's inserted and allow it to run under the battery. Be careful not to spill it elsewhere in the controller.

    • If you're using adhesive remover, follow these preparation steps first.

    • Remove the battery.

  14. Joy-Con 2 (Left) Battery Replacement, Disassembly complete: 14 단계, 이미지 1개 중 1개
    • Congratulations on completing disassembly! The remaining steps will show how to reassemble your console.

  15. Joy-Con 2 (Left) Battery Replacement, Clean the frame: 15 단계, 이미지 2개 중 1개 Joy-Con 2 (Left) Battery Replacement, Clean the frame: 15 단계, 이미지 2개 중 2개
    이 단계에 사용된 도구:
    Cotton Swabs
    $4.99
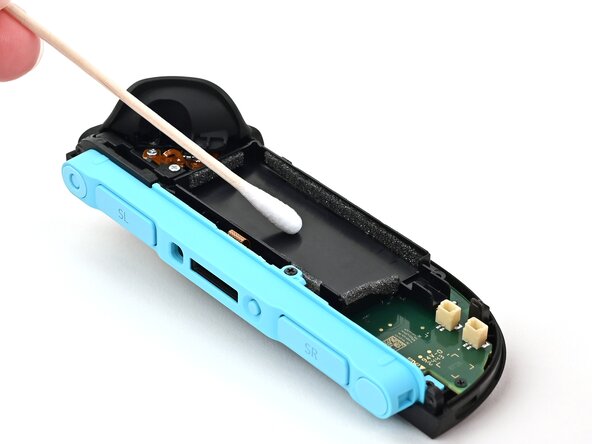
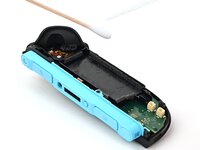
    • Apply isopropyl alcohol to a cotton swab and wipe any adhesive residue from the frame.

    • The foam on the inside walls of the frame dissolves in isopropyl alcohol. Avoid damaging the foam.

  16. Joy-Con 2 (Left) Battery Replacement, Transfer the foam: 16 단계, 이미지 3개 중 1개 Joy-Con 2 (Left) Battery Replacement, Transfer the foam: 16 단계, 이미지 3개 중 2개 Joy-Con 2 (Left) Battery Replacement, Transfer the foam: 16 단계, 이미지 3개 중 3개
    • If your replacement battery includes new foam, skip this step.

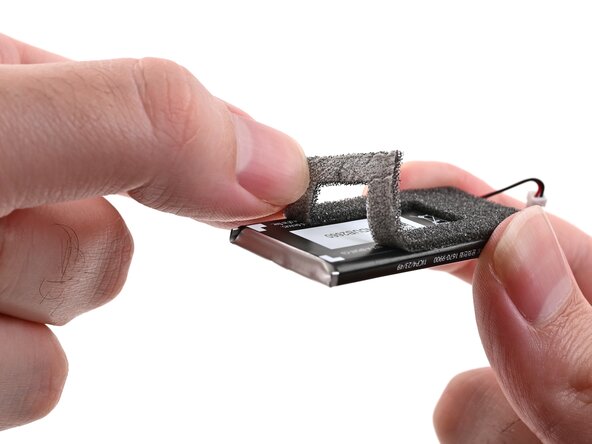
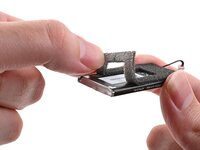
    • Slide an opening pick or fingernail between the foam and the battery, making sure it's completely below the foam's adhesive.

    • Carefully peel the foam sticker, including its adhesive, off the old battery. Avoid stretching or tearing the foam.

    • If the foam does tear, apply the pieces to the replacement battery in their original shape.

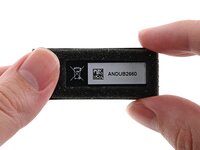
    • Apply the foam sticker to the new battery so the edges of the foam are aligned with the edges of the battery.

  17. Joy-Con 2 (Left) Battery Replacement, Install the battery: 17 단계, 이미지 3개 중 1개 Joy-Con 2 (Left) Battery Replacement, Install the battery: 17 단계, 이미지 3개 중 2개 Joy-Con 2 (Left) Battery Replacement, Install the battery: 17 단계, 이미지 3개 중 3개
    이 단계에 사용된 도구:
    Tesa 61395 Tape
    $2.99
    • If your replacement battery came with adhesive pre-installed, peel off any adhesive liners.

    • If your replacement battery doesn't include new adhesive, use thin, double-sided tape instead. If you're using our pre-cut card, cut one of the 5 mm strips so it's half as long, and apply the strips to the back of the battery.

    • Align the battery with its housing. Ensure the battery cable lines up with its channel.

    • Lower one side of the battery, then the other, into its housing.

    • Press and hold on the battery for 10 seconds to bond the adhesive.

  18. Joy-Con 2 (Left) Battery Replacement, Install the release button: 18 단계, 이미지 3개 중 1개 Joy-Con 2 (Left) Battery Replacement, Install the release button: 18 단계, 이미지 3개 중 2개 Joy-Con 2 (Left) Battery Replacement, Install the release button: 18 단계, 이미지 3개 중 3개
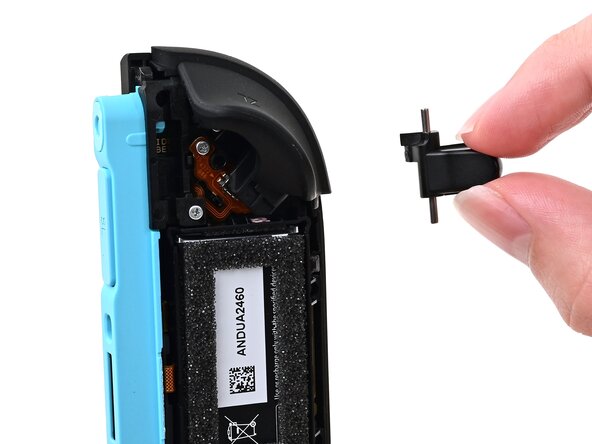
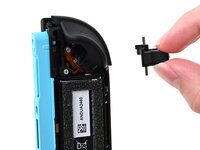
    • Hold the release button so its smooth face is perpendicular to the controller.

    • Insert the release button into its bracket.

    • If the release pin doesn't stick out of the controller when the button is pressed, the button isn't installed correctly. Re-insert or flip the button and try again.

  19. Joy-Con 2 (Left) Battery Replacement, Connect the battery: 19 단계, 이미지 3개 중 1개 Joy-Con 2 (Left) Battery Replacement, Connect the battery: 19 단계, 이미지 3개 중 2개 Joy-Con 2 (Left) Battery Replacement, Connect the battery: 19 단계, 이미지 3개 중 3개
    • Align the battery connector over its socket on the board.

    • Press down on the connector until it's fully seated.

  20. Joy-Con 2 (Left) Battery Replacement, Connect the rumble motor: 20 단계, 이미지 2개 중 1개 Joy-Con 2 (Left) Battery Replacement, Connect the rumble motor: 20 단계, 이미지 2개 중 2개
    • Align the rumble motor connector to its socket on the bottom edge of the board and push down until it's fully seated to connect it.

  21. Joy-Con 2 (Left) Battery Replacement, Install the back cover: 21 단계, 이미지 3개 중 1개 Joy-Con 2 (Left) Battery Replacement, Install the back cover: 21 단계, 이미지 3개 중 2개 Joy-Con 2 (Left) Battery Replacement, Install the back cover: 21 단계, 이미지 3개 중 3개
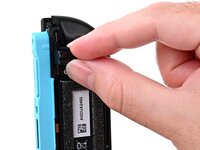
    • Use an opening pick to press and hold the release button.

    • Place the back cover over the controller body so the release button cutout is slightly below the release button.

    • The release button is held down when the release pin is protruding from the frame. If the release button falls out of position, put it back and try again.

    • Press and slide the back cover up until the cutout for the release button is aligned with the button itself.

    • Ensure the rumble motor wires (blue & white) are fully within the frame.

  22. Joy-Con 2 (Left) Battery Replacement: 22 단계, 이미지 2개 중 1개 Joy-Con 2 (Left) Battery Replacement: 22 단계, 이미지 2개 중 2개
    • Remove the opening pick.

  23. Joy-Con 2 (Left) Battery Replacement, Install the left edge screws: 23 단계, 이미지 2개 중 1개 Joy-Con 2 (Left) Battery Replacement, Install the left edge screws: 23 단계, 이미지 2개 중 2개
    • Install the two screws on the left edge of the controller:

    • One 3.1 mm‑long tri‑point Y00 black screw

    • One 3.0 mm‑long JIS 00 silver screw

  24. Joy-Con 2 (Left) Battery Replacement, Install the plastic strip: 24 단계, 이미지 3개 중 1개 Joy-Con 2 (Left) Battery Replacement, Install the plastic strip: 24 단계, 이미지 3개 중 2개 Joy-Con 2 (Left) Battery Replacement, Install the plastic strip: 24 단계, 이미지 3개 중 3개
    • Align the clips on the plastic strip with their cut-outs on the controller body.

    • Insert the clips on the bottom edge first, then insert the rest so the plastic strip sits flush.

  25. Joy-Con 2 (Left) Battery Replacement, Install the right edge screws: 25 단계, 이미지 2개 중 1개 Joy-Con 2 (Left) Battery Replacement, Install the right edge screws: 25 단계, 이미지 2개 중 2개
    • Use a tri‑point Y00 driver to install the two 3.1 mm‑long black screws on the right edge of the controller.

결론

You finished fixing your Joy-Con 2!

Don't throw your battery in the trash. Click here to learn how to dispose of it properly.

Repair didn’t go as planned? Try some basic troubleshooting, or ask our Joy-Con 2 Answers Community for help.

Nick Schultz

회원 가입일: 03/24/24

36,897 평판

안내서 224개를 작성함

0가이드 댓글

댓글 쓰기

조회 통계:

지난 24시간: 6

지난 7일: 38

지난 30일: 168

전체 시간: 927