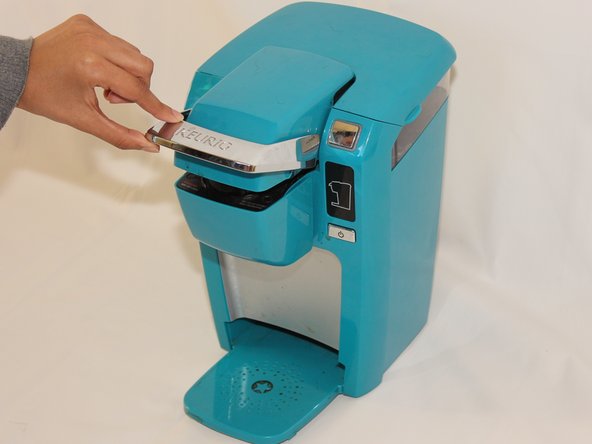
소개
Diese Anleitung wird helfen, dich durch die Schritte zu führen, um die Nadel der Keurig Mini zu ersetzen. Um in das Gerät zu kommen brauchst du nur einen PH1 Kreuzschlitzschraubendreher.
필요한 것
-
-
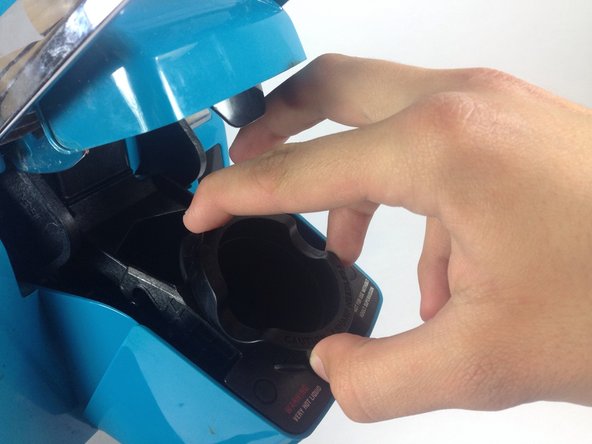
Lege einen Finger fest auf jede der drei Laschen, die den K-Cup-Halter in Position halten, und drücke sie leicht ein. Die Laschen sind schwer zu sehen, aber sie sind vorhanden und erleichtern das Herausnehmen.
-
Die obere Lasche befindet sich an der gleichen Stelle wie das weiße Dreieck und die unteren beiden befinden sich unter den in der Abbildung hervorgehobenen Kunststoffhöckern.
You may want to show a picture of the needles to show what exactly to avoid even though it might be blatantly obvious.
You should write "They" between "inside the K-cup because" and "may puncture your hand"
I did the needle up the 2 pin hole trick and it's working now!
What is a needle up the 2 pin hole trick?
Gina -
-
-
-
-
Öffnen den oberen Deckel der Keurig.
-
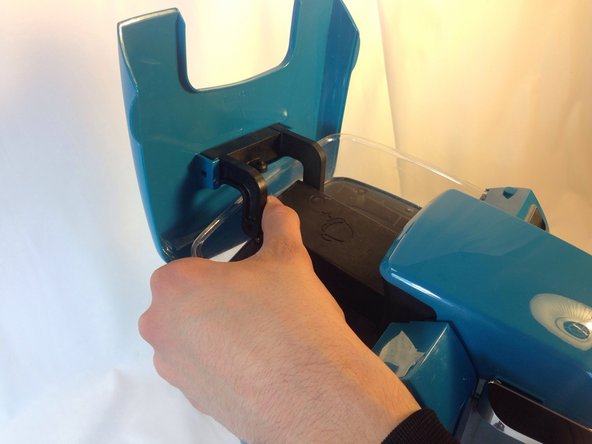
Ziehe einen der Arme, die den oberen Deckel festhalten, direkt nach außen. Es wird etwas Kraft erfordern, den Arm vom Stift zu lösen. Sobald eine Seite ab ist, wiederhole den Vorgang am zweiten Arm.
This step isn’t necessary.
Thank you!! Since I sure cldnt get both arms to come off!
I cannot get the arms to come off at all!
-
-
-
Stelle die Keurig aufrecht so hin, dass die Vorderseite in deine Richtung zeigt.
-
Ziehe die Abdeckung von der Oberseite der Keurig ab. Sie sollte sich einfach, mit wenig Kraft abnehmen lassen.
Not coming off easily. Pull toward front a little helps.
There are two plastic latching tabs that hold down the back of this cover, about 5/8 inch in from either side. It should be possible to locate them by probing along the back parting line with a thin-blade screwdriver and release them by pressing forward. Or apply excessive force like I did and break them off.
Thx for warning, Lytle!
The two tabs face forward so pushing on them won't help. Instead, push the cover BACK while wiggling its sideways. The cover may stick a little at first. You can pry it up SLIGHTLY but once a small gap opens, quit prying...just push back and wiggle sideways until the cover moves back about quarter inch and comes loose.
-
-
-
Greife den Schlauch fest und ziehe ihn von der Kunstoffdüse ab.
Before pulling, you can see if this portion of the tube is clogged. If clogged at the other end, you may be wasting time going further. See comments at the last step.
Maybe, but it’s unlikely to be the case. The transition from roomy hose to cramped needle outlets is where syphoned up coffee grounds get caked up. And you might not see it. I squeezed the hose at the union a few times and that made black crud come loose. A visual inspection only would not have shown that.
Our unit's hose end was secured with a plastic zip tie that had to be cut off. When replacing the hose, a new zip tie was required.
DO NOT cut it. Just slide the zip tie with your fingers. Then when reattaching the hose, put on hose first then shimmy zip tie back over union.
Thanks so much Sr Sr Jr for both comments here!
-
-
-
Entferne die beiden 9mm PH1 Kreuzschlitzschrauben an der Oberseite des Geräts.
-
-
-
Drücke leicht auf die Düse, an welche der Schlauch angeschlossen war. Das Kunststoffgehäuse mit der Nadel sollte mit wenig Kraft abspringen.
Handle needs to be in upright position, then it pops out without force.
The screws for the top cover are hard to get back in because they are not attracted to magnets. But they are honestly unnecessary to put back, and most likely there to keep the cover in place during assembly and transport. It clips in nicely on its own and won’t come off during normal use.
-


Arbeite die Schritte in umgekehrter Reihenfolge ab, um dein Gerät wieder zusammenzubauen.
Arbeite die Schritte in umgekehrter Reihenfolge ab, um dein Gerät wieder zusammenzubauen.
다른 한 분이 해당 안내서를 완성하였습니다.
다음 번역가들에게 특별히 감사 드립니다:
100%


이 번역자 분들은 저희가 세상을 수리하는데 동참해 주시는 분입니다! 기여하시겠습니까?
번역 시작하기 ›
팀

Cal Poly, Team 17-1, Forte Winter 2014 Cal Poly, Team 17-1, Forte Winter 2014 회원
CPSU-FORTE-W14S17G1
5 회원들
안내서 17개 작성하였습니다