주요 콘텐츠로 건너뛰기

Keyboard replacement

필요한 것

  1. Keyboard replacement, Battery: 1 단계, 이미지 1/3 Keyboard replacement, Battery: 1 단계, 이미지 2/3 Keyboard replacement, Battery: 1 단계, 이미지 3/3
    • Unlock the battery latch on the right.

    • Unlock the battery lock on the left.

    • Remove the battery pack from its slot.

  2. Keyboard replacement, Keyboard: 2 단계, 이미지 1/3 Keyboard replacement, Keyboard: 2 단계, 이미지 2/3 Keyboard replacement, Keyboard: 2 단계, 이미지 3/3
    • Gently detach the first clip from the bar with the ON / OFF button.

    • Gently detach the second clip from the bar with the ON / OFF button.

    • And so on.

  3. Keyboard replacement: 3 단계, 이미지 1/3 Keyboard replacement: 3 단계, 이미지 2/3 Keyboard replacement: 3 단계, 이미지 3/3
    • Flip the laptop over and then untap this bar

    • The four screws that moor the keyboard will appear.

    • Now unscrew these four screws.

  4. Keyboard replacement: 4 단계, 이미지 1/3 Keyboard replacement: 4 단계, 이미지 2/3 Keyboard replacement: 4 단계, 이미지 3/3
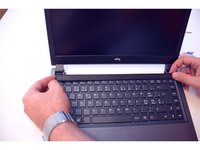
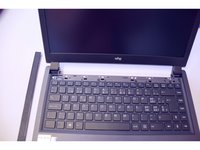
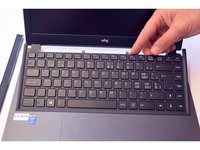
    • Now gently release the keyboard.

    • Then reverse it.

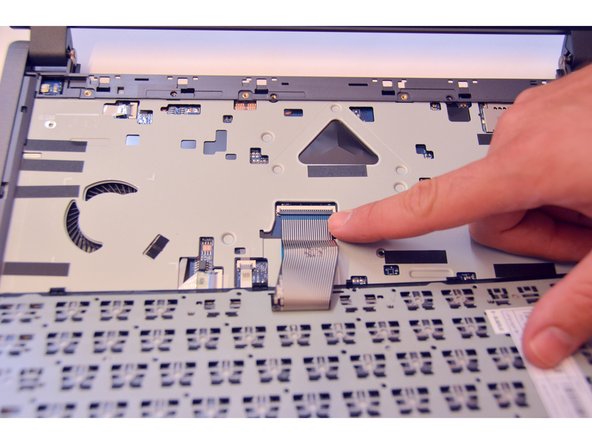
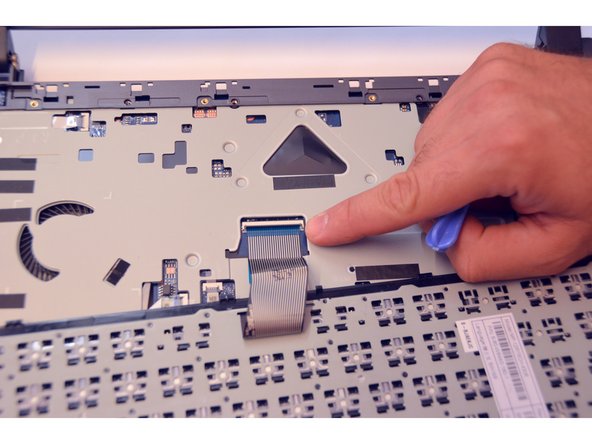
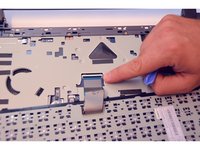
    • Release now by helping you with a screwdriver the keyboard cable.

  5. Keyboard replacement: 5 단계, 이미지 1/1
    • Once the cable is released, lift the keyboard out of its slot.

결론

To reassemble your device follow the following instructions in reverse order

다음 번역가들에게 특별히 감사 드립니다:

fr en

100%

irlanda님은 저희가 세상을 수리하는데 동참하신 분입니다! 기여하시겠습니까?
번역 시작하기 ›

Felice Suglia

회원 가입일: 06/15/13

30,884 평판

안내서 264개 작성하였습니다

댓글 0개

댓글 쓰기

조회 통계:

24 시간 전: 0

7일 전: 4

30일 전: 14

전체 시간: 1,641