소개
Use this guide to replace a cracked, scratched, or faulty display (screen) in your Kindle 3.
필요한 것
-
-
Turn the device upside-down and insert a pry tool between the two case pieces.
-
Work the pry tool around the edge of the case, releasing the 18 clips. Don't insert your tool too far, or you may damage components near the edges of the device. The clips are all in the outer edge of the backplate anyway. Note that the clip above the power switch is bigger and stronger than the rest.
-
Pull the rear cover off. The remaining two clips near the center of the back are surprisingly strong, but they face in the same direction so don't just pull up. Instead slide the cover slightly towards the top of device to release them.
 FixBot에 문의하기
-
-
-
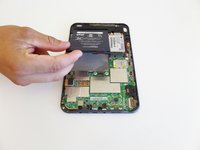
Unscrew the two silver 4 mm Phillips screws securing the battery connector.
-
Set the screws aside in a safe place -- there are exposed components and it's easy for them to short-circuit something.
-
-
-
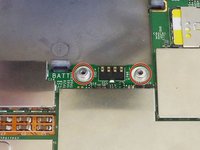
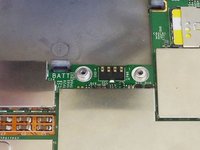
Lift battery out of housing starting at the end that was secured by the screws.
-
Watch out for the odd-shaped silver washers beneath the battery connector (see second photo); they are necessary for proper mating of the electrical contacts when the screws are re-tightened.
-
-
-
-
Remove six silver Phillips screws from the locations shown.
-
-
-
Pry the display connector straight up from its socket on the motherboard to disconnect it.
-
-
-
Remove eleven smaller, gray-colored Phillips screws from the locations shown.
-
-
-
Lifting from the top edge, slide the entire motherboard and midframe assembly together away from the bottom edge of the Kindle, and remove it carefully.
-
-
-
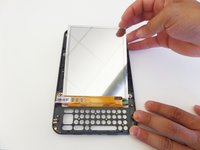
Remove the damaged screen from the housing.
-
Press gently from the outside to the inside. Be careful not to break the frame.
-


To reassemble your device, follow these instructions in reverse order.
다른 104명이 해당 안내서를 완성하였습니다.
팀

CSU Fullerton, Team 1-5, Bruce Fall 2014 CSU Fullerton, Team 1-5, Bruce Fall 2014 회원
CSUF-BRUCE-F14S1G5
4 회원들
안내서 16개를 작성함
38가이드 댓글
I did it!
But it worked only the third time I opened the kindle, the first and second time the screen stayed frozen with some horizontal lines, the third time I only unlatched and latched all the ribbon cables and...voila! it worked!
Thank you, Im VERY happy!
marferrero - 답글 공유
Awesome Guide!!!
Ebay or this place has them.
http://www.powerbookmedic.com/Amazon-Kin...
The screw diagrams for grey and silver sets were very helpful!
note: There 2 or 3 odd cup-shaped washers that differ between versions. 2 go under the batter screws to keep height/pressure constant, on may be under a screw for the modem/RF module.
Lee Studley - 답글 공유
Yes! I did it! Kindle works properly! Many tnx!!!
Mike Titov - 답글 공유
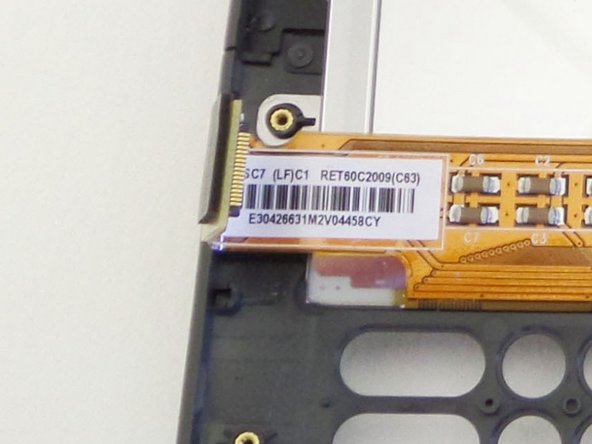
Please note before ordering: there are at least two different models of screen for the Kindle 3 keyboard.
ED060SCE(LF)T1-0I and ED060SC7(LF)C1 (you can find the model no. on a sticker on the back of the screen). My UK 3G model had the ...C1 built in. Be sure to order the correct one. The ...T1 screen will work as a replacement for the ...C1 model, but badly (text is fine, images and screensavers are not display correctly).