주요 콘텐츠로 건너뛰기
수리 커뮤니티 가입 - 계정 만들기

Kodak EasyShare M381 Screen Replacement

필요한 것

  1. Kodak EasyShare M381 Screen Replacement, Battery: 1 단계, 이미지 2개 중 1개 Kodak EasyShare M381 Screen Replacement, Battery: 1 단계, 이미지 2개 중 2개
    • First, press in and slide forward the battery latch as indicated by the arrow.

    댓글 쓰기

  2. Kodak EasyShare M381 Screen Replacement: 2 단계, 이미지 1개 중 1개
    • Press down on battery until you hear a click and release it. Battery should easily slide out.

    댓글 쓰기

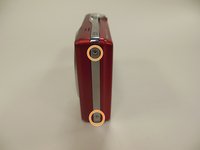
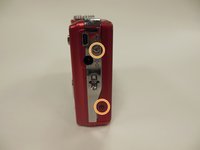
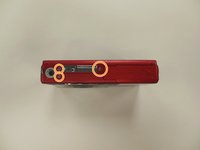
  3. Kodak EasyShare M381 Screen Replacement, Back Panel Frame: 3 단계, 이미지 3개 중 1개 Kodak EasyShare M381 Screen Replacement, Back Panel Frame: 3 단계, 이미지 3개 중 2개 Kodak EasyShare M381 Screen Replacement, Back Panel Frame: 3 단계, 이미지 3개 중 3개
    • Remove the 3.9 mm frame screws using a Phillips #00 screwdriver.

    • Using a magnetized surface to keep from losing screws may be very helpful.

    댓글 쓰기

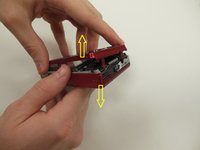
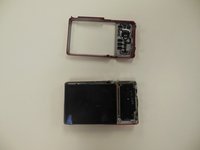
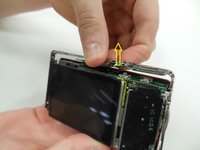
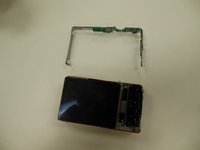
  4. Kodak EasyShare M381 Screen Replacement: 4 단계, 이미지 2개 중 1개 Kodak EasyShare M381 Screen Replacement: 4 단계, 이미지 2개 중 2개
    • Using both hands, carefully pull the frame apart from the camera.

    댓글 쓰기

  5. Kodak EasyShare M381 Screen Replacement, Screen: 5 단계, 이미지 1개 중 1개
    • Remove the two 3.85 mm screws on the bottom right of the camera, as indicated.

    댓글 쓰기

  6. Kodak EasyShare M381 Screen Replacement: 6 단계, 이미지 1개 중 1개
    • Remove dial button located on top of camera, by gently pulling up.

    댓글 쓰기

  7. Kodak EasyShare M381 Screen Replacement: 7 단계, 이미지 2개 중 1개 Kodak EasyShare M381 Screen Replacement: 7 단계, 이미지 2개 중 2개
    • Starting at one side, carefully work the chrome frame off of the camera itself.

    • Be careful not to disturb the shutter or flash buttons on top of the camera.

    댓글 쓰기

  8. Kodak EasyShare M381 Screen Replacement: 8 단계, 이미지 1개 중 1개
    • On the right side of the camera, locate and remove the two 3.25 mm screws as highlighted.

    댓글 쓰기

  9. Kodak EasyShare M381 Screen Replacement: 9 단계, 이미지 3개 중 1개 Kodak EasyShare M381 Screen Replacement: 9 단계, 이미지 3개 중 2개 Kodak EasyShare M381 Screen Replacement: 9 단계, 이미지 3개 중 3개
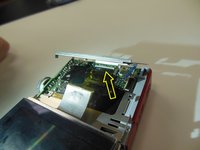
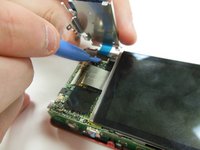
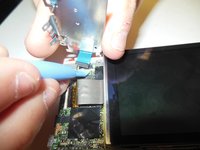
    • Carefully lift the motherboard panel up, pulling towards the left. Make sure you do not rip the blue ribbon.

    • Using a plastic opening tool, gently lift up on the ribbon fastener until it is in an upright position.

    • Slide panel away from camera.

    댓글 쓰기

  10. Kodak EasyShare M381 Screen Replacement: 10 단계, 이미지 2개 중 1개 Kodak EasyShare M381 Screen Replacement: 10 단계, 이미지 2개 중 2개
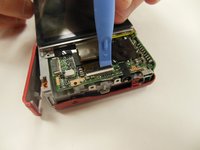
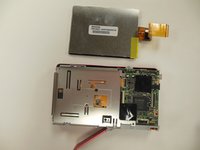
    • Using a plastic opening tool, gently lift ribbon clamp as indicated to remove the screen ribbon from the motherboard.

    • Screen should now be detached. Gently lift it away from the base of the camera.

    댓글 쓰기

결론

To reassemble your device, follow these instructions in reverse order.

취소: 해당 안내서를 완성하지 않았습니다.

작성자

4다른 기여자 명과 함께

Christina Hamby

회원 가입일: 01/30/15

449 평판

안내서 4개를 작성함

0가이드 댓글

댓글 쓰기

조회 통계:

지난 24시간: 1

지난 7일: 10

지난 30일: 39

전체 시간: 879