소개
Removing the power button might be useful when attempting to clean the device.
필요한 것
-
-
Place the watch upside down on a hard surface so that its back case is facing upright.
-
Use a T4 Torx Star screwdriver to remove the four 4.0 mm Torx screws from the corners of the back case.
 FixBot에 문의하기
-
-
-
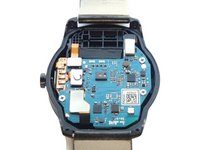
Use a plastic opening tool to pry open the back case from both sides of the watch.
-
-
-
-
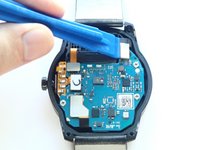
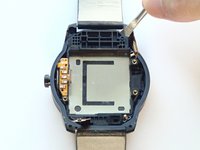
With a plastic opening tool, disconnect the four connectors on the top of the motherboard.
-
-
-
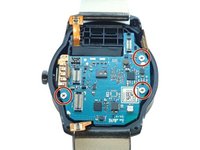
Remove three 3.0 mm Phillips screws on the edges of the motherboard with a Phillips #000 screwdriver.
-
-
-
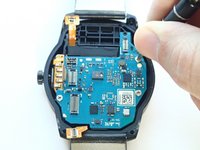
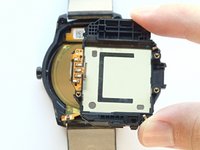
Grasp the edges of the motherboard and slide it slightly towards the right to remove it from its case.
-
-
-
Use a plastic opening tool to pry the battery out of the device.
-
-
-
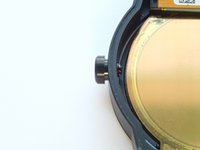
Pry the battery housing from the top right corner using a spudger.
-
Once loosened, remove the battery housing.
-
-
이 단계에 사용된 도구:Tweezers$4.99
-
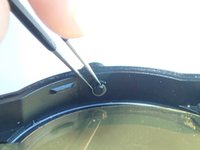
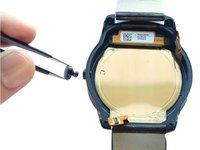
On the power button, locate a small grey washer on the interior side of the watch.
-
Use a pair of tweezers or another pointed object to push the washer out of its socket, and remove the power button.
-


To reassemble your device, follow these instructions in reverse order.
다른 7명이 해당 안내서를 완성하였습니다.
팀

USF Tampa, Team 1-1, Remmell Fall 2015 USF Tampa, Team 1-1, Remmell Fall 2015 회원
USFT-REMMELL-F15S1G1
5 회원들
안내서 22개를 작성함