소개
If your screen protector is cracked or prevents touch commands to the display, use this guide to replace your screen protector.
필요한 것
-
-
Remove the two 7mm screws holding the back panel of the phone using the P5 bit and magnetic driver.
-
-
-
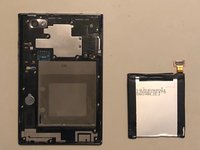
Carefully use the plastic opening tool to pry the back panel of the phone from the front screen. This will expose the battery and other parts.
-
-
-
Use the Phillips #0 screwdriver to remove the 5mm screw holding the metal bracket that protects the battery's ribbon cable.
-
-
-
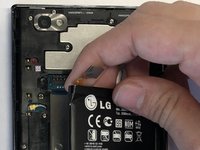
Carefully use the plastic opening tool to pry the ribbon cable connecting the battery to the motherboard of the phone.
-
-
-
-
Remove the thirteen 5mm screws holding the plastic shield covering the motherboard using the Phillips #00 screwdriver.
-
-
-
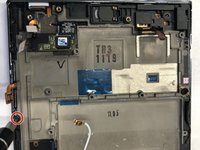
Carefully use the plastic opening tool to pry the plastic shield from the motherboard. This will expose the motherboard and ribbon cables for each component.
-
-
-
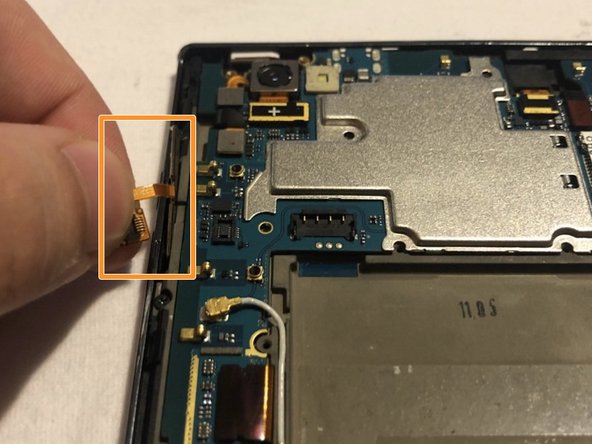
Carefully use the plastic opening tool to pry the ribbon cable below the camera itself from the motherboard.
-
-
-
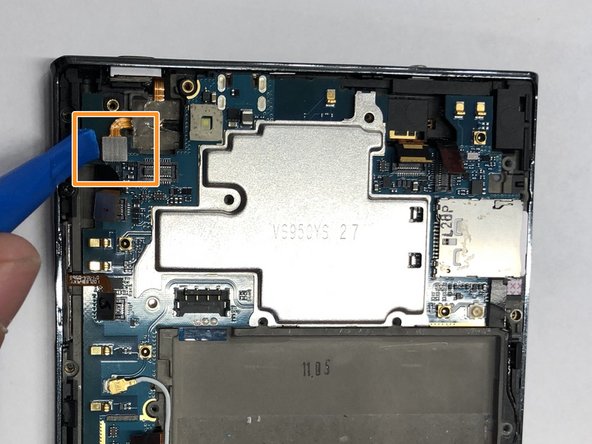
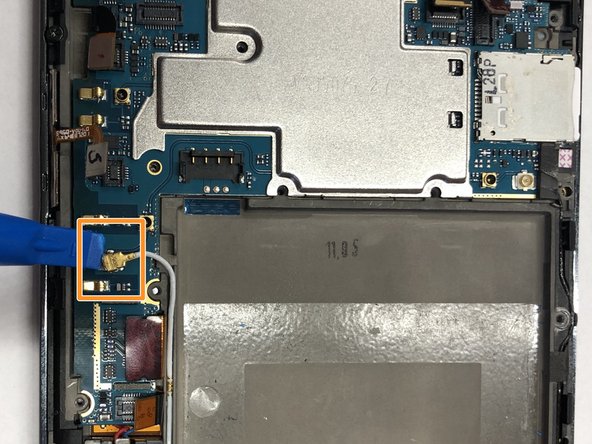
Carefully use the plastic opening tool to pry the ribbon cable connecting the battery to the motherboard of the phone.
-
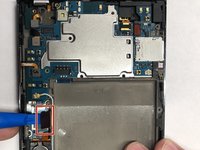
Slowly pull the ribbon cable upward releasing the volume buttons from the phone.
-
-
-
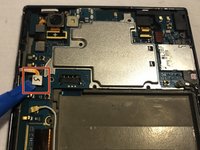
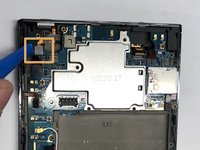
Carefully use the plastic opening tool to pry the ribbon cable below the volume buttons on the left side of the phone.
-
Carefully use the plastic opening tool to pry the ribbon cable to the left of the camera.
-
-
-
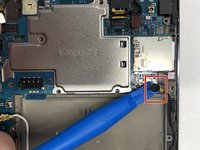
Carefully use the plastic opening tool to pry the wire that connects to the bottom home and back display buttons.
-
Carefully use the plastic opening tool to pry the second wire on the right side of the battery that also connects to the bottom home and back display buttons.
-
-
-
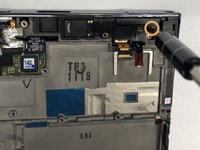
Carefully use the plastic opening tool to pry the motherboard from the front screen.
-
-
-
Remove the 5mm Phillips #00 screw below the volume buttons holding the plastic shield onto the screen display.
-
Remove the 5mm Phillips #00 screw on the top right of the phone.
-
-
-
Carefully pull the ribbon cable upward and away from the front screen display.
-
-
-
Carefully use the plastic opening tool to pry the screen protector from the display and motherboard.
-
-
-
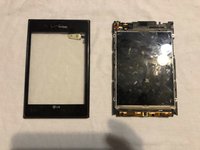
Slowly separate the front screen from the screen protector. This will remove the screen protector from the phone.
-


To reassemble your device, follow these instructions in reverse order.
팀

UMass Dartmouth, Team S3-G4, Peak Fall 2018 UMass Dartmouth, Team S3-G4, Peak Fall 2018 회원
UMASSD-PEAK-F18S3G4
3 회원들
안내서 12개를 작성함