주요 콘텐츠로 건너뛰기

LG Muziq LX570 Keypad Replacement

필요한 것

  1. LG Muziq LX570 Keypad Replacement, Battery: 1 단계, 이미지 1/2 LG Muziq LX570 Keypad Replacement, Battery: 1 단계, 이미지 2/2
    • Slide the battery cover release towards top of phone.

    • Place one finger at each side of the battery cover.

    • Lift and remove the battery cover.

  2. LG Muziq LX570 Keypad Replacement: 2 단계, 이미지 1/2 LG Muziq LX570 Keypad Replacement: 2 단계, 이미지 2/2
    • Place a finger at the top corner of the battery and lift out of the phone.

  3. LG Muziq LX570 Keypad Replacement, Rear Case: 3 단계, 이미지 1/2 LG Muziq LX570 Keypad Replacement, Rear Case: 3 단계, 이미지 2/2
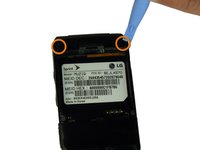
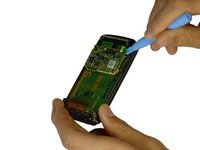
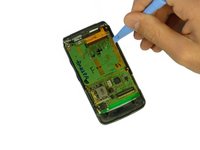
    • Use the spudger to lift up the two screw covers at the top of the phone.

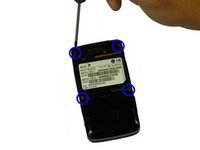
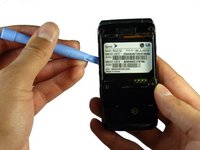
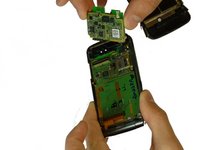
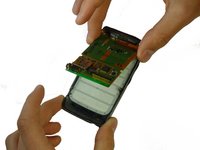
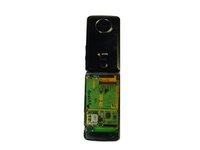
    • Remove all four Phillips#00 (3.3mm) screws with screwdriver.

  4. LG Muziq LX570 Keypad Replacement: 4 단계, 이미지 1/3 LG Muziq LX570 Keypad Replacement: 4 단계, 이미지 2/3 LG Muziq LX570 Keypad Replacement: 4 단계, 이미지 3/3
    • Use the spudger to lift up the rear case from the phone.

    • Note: Rear case is connected on all sides and will have to be detached on all sides before removal.

    • Remove the rear case from the device.

  5. LG Muziq LX570 Keypad Replacement, Motherboard: 5 단계, 이미지 1/3 LG Muziq LX570 Keypad Replacement, Motherboard: 5 단계, 이미지 2/3 LG Muziq LX570 Keypad Replacement, Motherboard: 5 단계, 이미지 3/3
    • Use the spudger to lift the motherboard from the phone.

  6. LG Muziq LX570 Keypad Replacement, Keypad: 6 단계, 이미지 1/3 LG Muziq LX570 Keypad Replacement, Keypad: 6 단계, 이미지 2/3 LG Muziq LX570 Keypad Replacement, Keypad: 6 단계, 이미지 3/3
    • Caution: The circuit board is connected via ribbon to the phone. Do not break this connection.

    • Note: The circuit board is attached by clips on both sides of the board. Detach each clip before removing the motherboard from the phone.

    • Use the spudger to detach the circuit board from the phone.

  7. LG Muziq LX570 Keypad Replacement: 7 단계, 이미지 1/3 LG Muziq LX570 Keypad Replacement: 7 단계, 이미지 2/3 LG Muziq LX570 Keypad Replacement: 7 단계, 이미지 3/3
    • Open the phone to expose the keypad.

    • Use your finger to push the keypad from the front towards the circuit board.

    • Remove the keypad from the phone.

결론

To reassemble your device, follow these instructions in reverse order.

Braden Burk

회원 가입일: 01/22/12

1 평판

안내서 5개 작성하였습니다

Cal Poly, Team 3-29, Amido Winter 2012 Cal Poly, Team 3-29, Amido Winter 2012 회원

CPSU-AMIDO-W12S3G29

4 회원들

안내서 14개 작성하였습니다

댓글 0개

댓글 쓰기

조회 통계:

24 시간 전: 0

7일 전: 0

30일 전: 1

전체 시간: 693