주요 콘텐츠로 건너뛰기
수리 커뮤니티 가입 - 계정 만들기

LG Optimus T Motherboard Replacement

필요한 것

  1. LG Optimus T Motherboard Replacement, Motherboard: 1 단계, 이미지 3개 중 1개 LG Optimus T Motherboard Replacement, Motherboard: 1 단계, 이미지 3개 중 2개 LG Optimus T Motherboard Replacement, Motherboard: 1 단계, 이미지 3개 중 3개
    • Working on your device while it is turned on may result in electric shock. Make sure to shut down and unplug your device before you begin.

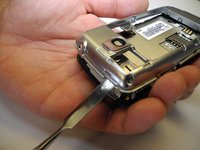
    • Using a prying device, such as a plastic opening tool, remove the phone’s back cover. At the top of the phone, there’s an indentation to put the Spudger into to pop the case off

    댓글 쓰기

  2. LG Optimus T Motherboard Replacement: 2 단계, 이미지 1개 중 1개
    • Remove the battery. There’s an indentation to the left of the camera lens to pull up on the battery with your finger

    댓글 쓰기

  3. LG Optimus T Motherboard Replacement: 3 단계, 이미지 1개 중 1개
    • Use a J0 screwdriver to remove the six 4.5mm screws.

    댓글 쓰기

  4. LG Optimus T Motherboard Replacement: 4 단계, 이미지 2개 중 1개 LG Optimus T Motherboard Replacement: 4 단계, 이미지 2개 중 2개
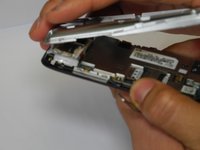
    • You might have difficulty popping the interior case off. You may use the metal spudger here with caution if the plastic opening tool fails

    • Remove interior case. Insert the spudger into the indentations at the top, or bottom of the phone to pry off the interior case.

    댓글 쓰기

  5. LG Optimus T Motherboard Replacement: 5 단계, 이미지 1개 중 1개
    • Pull up on connector tab

    댓글 쓰기

  6. LG Optimus T Motherboard Replacement: 6 단계, 이미지 2개 중 1개 LG Optimus T Motherboard Replacement: 6 단계, 이미지 2개 중 2개
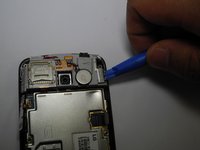
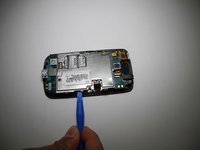
    • Remove SD card mount. Insert the plastic opening tool on the right side to pop off

    댓글 쓰기

  7. LG Optimus T Motherboard Replacement: 7 단계, 이미지 2개 중 1개 LG Optimus T Motherboard Replacement: 7 단계, 이미지 2개 중 2개
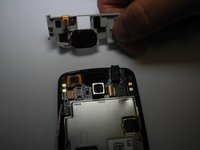
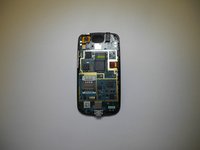
    • Remove metal panel

    • There are four retaining points to insert plastic opening tool and pop off panel

    댓글 쓰기

  8. LG Optimus T Motherboard Replacement: 8 단계, 이미지 1개 중 1개
    • Use a J0 screwdriver to remove the two 1.8mm screws from charging port. (Charging port and motherboard are connected.)

    • Remove motherboard

    댓글 쓰기

결론

To reassemble your device, follow these instructions in reverse order.

취소: 해당 안내서를 완성하지 않았습니다.

다른 한 분이 해당 안내서를 완성하였습니다.

작성자

4다른 기여자 명과 함께

stacey

회원 가입일: 02/07/17

219 평판

안내서 2개를 작성함

Ohio State, Team 1-3, Wilder Spring 2017 Ohio State, Team 1-3, Wilder Spring 2017 회원

OSU-WILDER-S17S1G3

4 회원들

안내서 10개를 작성함

0가이드 댓글

댓글 쓰기

조회 통계:

지난 24시간: 0

지난 7일: 3

지난 30일: 23

전체 시간: 504