주요 콘텐츠로 건너뛰기
수리 커뮤니티 가입 - 계정 만들기

Leapfrog LeapPad 3 Display Assembly Replacement

필요한 것

동영상 개요

    1. Leapfrog LeapPad 3 Display Assembly Replacement, Battery: 1 단계, 이미지 3개 중 1개 Leapfrog LeapPad 3 Display Assembly Replacement, Battery: 1 단계, 이미지 3개 중 2개 Leapfrog LeapPad 3 Display Assembly Replacement, Battery: 1 단계, 이미지 3개 중 3개
      이 단계에 사용된 도구:
      Anti-Static Wrist Strap
      $7.95
      • Before taking apart your device, ensure that it is turned off and that your anti-static wrist strap is secured to a ground.

      • Remove the six 10.0 mm Phillips #0 screws from the outer case and remove the cover with your hands.

      • You will not need to pry the case off.

      댓글 쓰기

    2. Leapfrog LeapPad 3 Display Assembly Replacement: 2 단계, 이미지 3개 중 1개 Leapfrog LeapPad 3 Display Assembly Replacement: 2 단계, 이미지 3개 중 2개 Leapfrog LeapPad 3 Display Assembly Replacement: 2 단계, 이미지 3개 중 3개
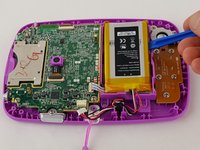
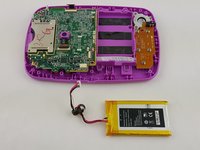
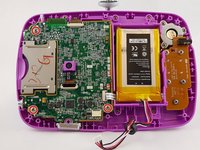
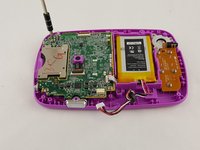
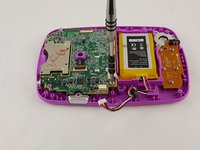
      • Unplug the battery from the motherboard with your hands.

      • The battery sits to the right of the motherboard.

      댓글 쓰기

    3. Leapfrog LeapPad 3 Display Assembly Replacement: 3 단계, 이미지 2개 중 1개 Leapfrog LeapPad 3 Display Assembly Replacement: 3 단계, 이미지 2개 중 2개
      • Pry the battery gently off of the plastic platform with an opening tool.

      • Do not to puncture the battery, as the material inside can be dangerous.

      댓글 쓰기

    1. Leapfrog LeapPad 3 Display Assembly Replacement, Speaker: 4 단계, 이미지 2개 중 1개 Leapfrog LeapPad 3 Display Assembly Replacement, Speaker: 4 단계, 이미지 2개 중 2개
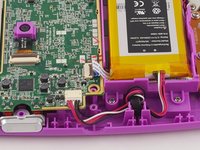
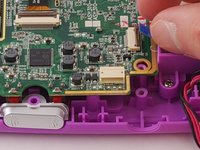
      • Disconnect the audio cord from the motherboard using a plastic opening tool.

      • When re-plugging this cord be sure it is flush with the slot, otherwise the speaker and directional pad will malfunction.

      • Use caution when unplugging, and re-plugging the ribbon cord as they are fragile.

      댓글 쓰기

    2. Leapfrog LeapPad 3 Display Assembly Replacement: 5 단계, 이미지 3개 중 1개 Leapfrog LeapPad 3 Display Assembly Replacement: 5 단계, 이미지 3개 중 2개 Leapfrog LeapPad 3 Display Assembly Replacement: 5 단계, 이미지 3개 중 3개
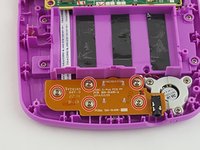
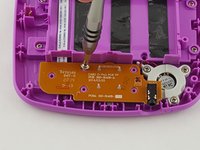
      • Unscrew the five 6.0 mm phillips head screws from the board containing the audio jack and directional pad.

      댓글 쓰기

    3. Leapfrog LeapPad 3 Display Assembly Replacement: 6 단계, 이미지 3개 중 1개 Leapfrog LeapPad 3 Display Assembly Replacement: 6 단계, 이미지 3개 중 2개 Leapfrog LeapPad 3 Display Assembly Replacement: 6 단계, 이미지 3개 중 3개
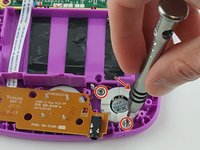
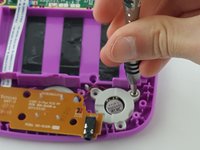
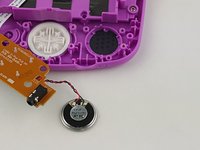
      • Unscrew the three 6.5 mm phillips head screws holding down the speaker to the right of the audio jack.

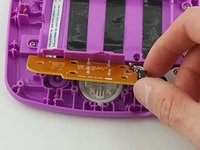
      • Remove the board and speaker from the device.

      댓글 쓰기

    1. Leapfrog LeapPad 3 Display Assembly Replacement, Motherboard: 7 단계, 이미지 2개 중 1개 Leapfrog LeapPad 3 Display Assembly Replacement, Motherboard: 7 단계, 이미지 2개 중 2개
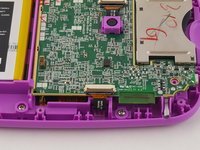
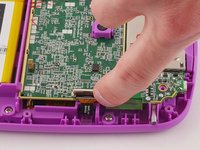
      • Unplug the front facing camera cord with an opening tool to free the top of the motherboard.

      댓글 쓰기

    2. Leapfrog LeapPad 3 Display Assembly Replacement: 8 단계, 이미지 3개 중 1개 Leapfrog LeapPad 3 Display Assembly Replacement: 8 단계, 이미지 3개 중 2개 Leapfrog LeapPad 3 Display Assembly Replacement: 8 단계, 이미지 3개 중 3개
      • Remove the three 6 mm phillips head screws holding the motherboard to the display assembly.

      댓글 쓰기

    3. Leapfrog LeapPad 3 Display Assembly Replacement: 9 단계, 이미지 3개 중 1개 Leapfrog LeapPad 3 Display Assembly Replacement: 9 단계, 이미지 3개 중 2개 Leapfrog LeapPad 3 Display Assembly Replacement: 9 단계, 이미지 3개 중 3개
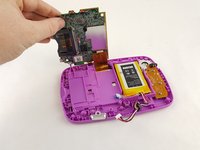
      • Carefully lift the motherboard out of the case, exposing the last remaining cord on the underside of the motherboard.

      • Disconnect the gold display assembly cord with an opening tool to fully disconnect the motherboard.

      • The device was rotated 180 degrees in order to unplug the display assembly cord.

      댓글 쓰기

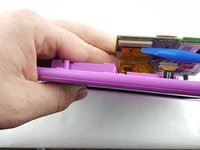
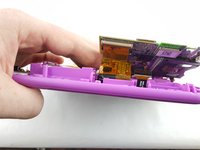
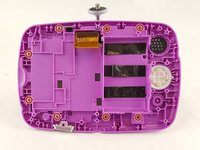
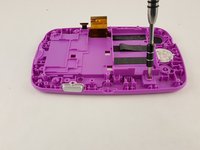
    1. Leapfrog LeapPad 3 Display Assembly Replacement, Display Assembly: 10 단계, 이미지 2개 중 1개 Leapfrog LeapPad 3 Display Assembly Replacement, Display Assembly: 10 단계, 이미지 2개 중 2개
      • Unscrew the eight 6.5mm Phillips #0 screws from the plastic casing.

      댓글 쓰기

    2. Leapfrog LeapPad 3 Display Assembly Replacement: 11 단계, 이미지 3개 중 1개 Leapfrog LeapPad 3 Display Assembly Replacement: 11 단계, 이미지 3개 중 2개 Leapfrog LeapPad 3 Display Assembly Replacement: 11 단계, 이미지 3개 중 3개
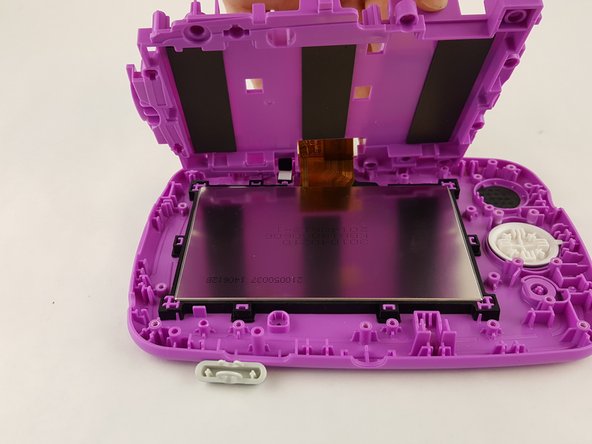
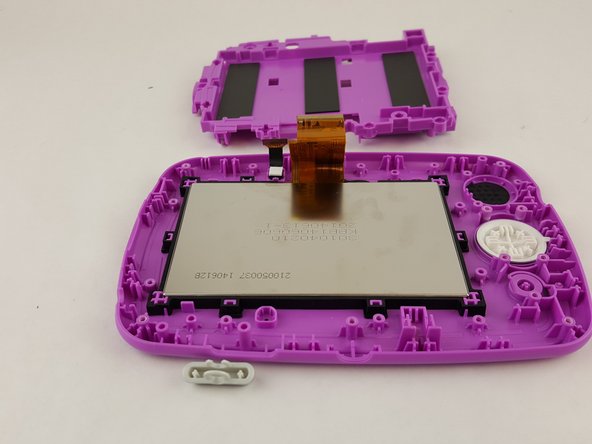
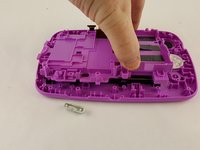
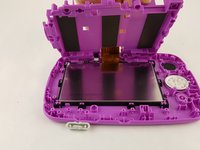
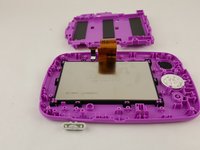
      • Remove the covering with your hands to allow full view of the display assembly.

      댓글 쓰기

    3. Leapfrog LeapPad 3 Display Assembly Replacement: 12 단계, 이미지 3개 중 1개 Leapfrog LeapPad 3 Display Assembly Replacement: 12 단계, 이미지 3개 중 2개 Leapfrog LeapPad 3 Display Assembly Replacement: 12 단계, 이미지 3개 중 3개
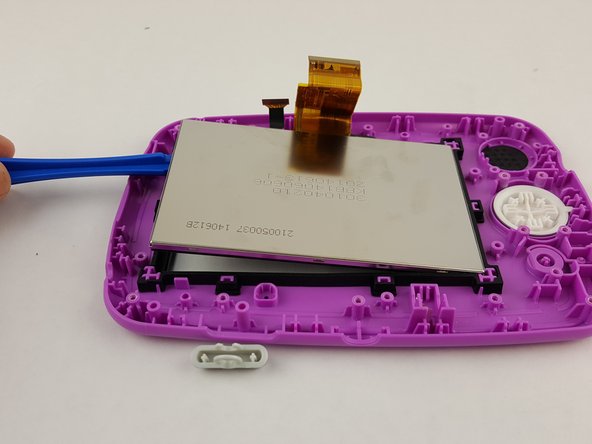
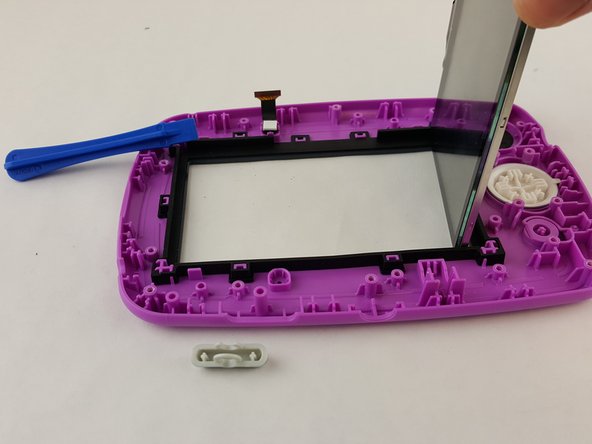
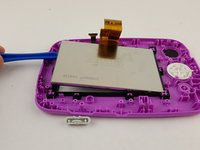
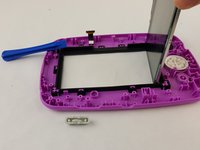
      • Remove the display assembly from the black rubber sleeve carefully.

      • There is a specific orientation for the rubber sleeve so take note of its position.

      댓글 쓰기

결론

To reassemble your device, follow these instructions in reverse order.

취소: 해당 안내서를 완성하지 않았습니다.

다른 5명이 해당 안내서를 완성하였습니다.

작성자

5다른 기여자 명과 함께

Matt Irvine

회원 가입일: 02/04/16

952 평판

안내서 6개를 작성함

USF Tampa, Team 16-2, Blackwell Winter 2016 USF Tampa, Team 16-2, Blackwell Winter 2016 회원

USFT-BLACKWELL-W16S16G2

3 회원들

안내서 12개를 작성함

4가이드 댓글

Everything worked ok but unit now will not go to home page. after I replaced the display. They tell you necessary tools but never tell you where or how to use the wrist grounding strap.

Dave Alan - 답글 공유

Bonjour, j’ai bien réussi à accéder à l’écran,

Ma question:

Oû peut-on se procurer un écran neuf SVP?

Gregory Commarmond - 답글 공유

Pouvez vous m'indiquer où trouver un écran de remplacement ?

Merci d'avance

Domi Luky - 답글 공유

OK, Visiblement ce tuto ne sert plus à rien car il est Impossible de trouver le display de remplacement!!

Domi Luky - 답글 공유

댓글 쓰기

조회 통계:

지난 24시간: 1

지난 7일: 8

지난 30일: 38

전체 시간: 1,716