소개
In this guide you will learn the basics for replacing the camera in the LexiBook Tablet One. This guide will include removing the battery. A plastic spudger and pencil may be useful for this guide.
필요한 것
-
-
Find the seam in the casing. Insert the blue plastic opening tool, and slide to either side carefully undoing the clips. The clips are hidden within the casing and are spaced roughly 1.5 in. apart.
 FixBot에 문의하기
-
-
-
Insert a spudger between the speaker and the casing. Gently pop the speaker out, and set the panel to the side.
-
-
-
-
Using a plastic spudger, wedge the tool between the battery and LCD. Repeatedly gouge and work around the edges of the battery until the adhesive breaks free. You will have to apply generous pressure, as long as you push horizontally the components should not be further damaged.
-
-
-
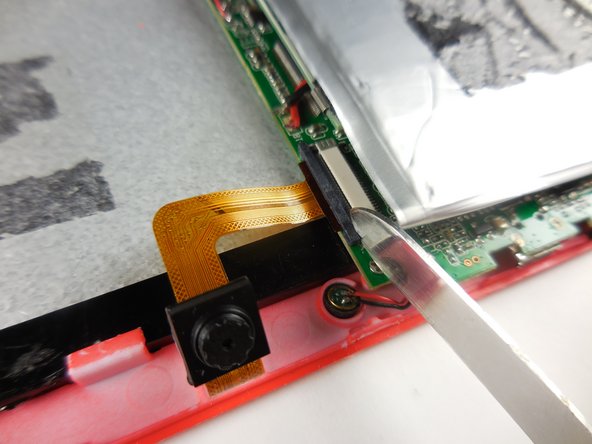
Remove the ribbon cable leading to the camera by carefully using a flat headed tool to open the ribbon clip.
-
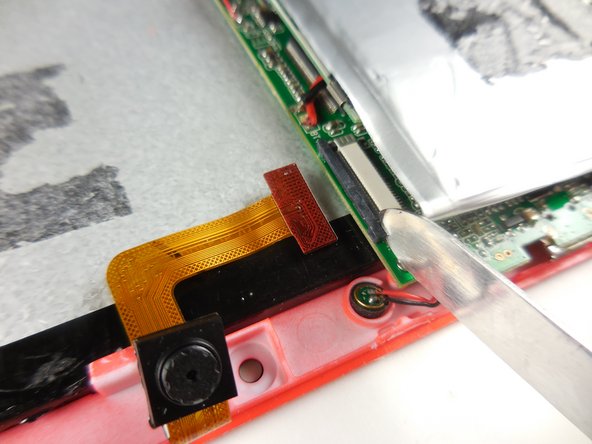
Gently slide the ribbon cable out while holding the clip open.
-
-
-
When inserting your new camera, maintain the clip's open position and slide the new ribbon cable in.
-


To reassemble your device, follow these instructions in reverse order.
다른 한 분이 해당 안내서를 완성하였습니다.
팀

Colorado Springs, Team 2-5, Panko Spring 2015 Colorado Springs, Team 2-5, Panko Spring 2015 회원
UCCS-PANKO-S15S2G5
3 회원들
안내서 10개를 작성함