필요한 것
-
-
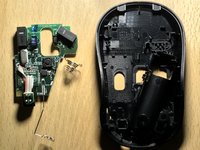
Unscrew the Phillips #1 screw in the battery compartment after removing the battery.
-
Some mice have a smaller screw, directly down and to the side of the on/off slider. The rest of the disassembly is the same.
-
-
-
-
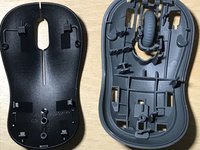
Wiggle the grey part of the top to remove it by pulling it towards you(away from the scroll wheel).
-
Reasoning by Jacob Hickey "because in the internal top part of the mouse where the buttons/scroll wheel is, there’s hinges-like “tooth” that’ll snap if you do pull on it. It’s like opening a jewelry box that has a hinge on one end of the box… if that makes sense…"
-
-
-
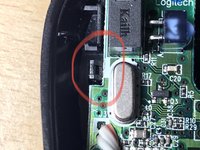
Push back small black clips to release the circuit board.
-
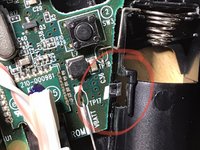
Slide up the metal battery connectors to free them from the casing. (Note that these are soldered to the circuit board.)
-
Fully remove the circuit board with the battery connectors and image sensor still attached.
-
-
-
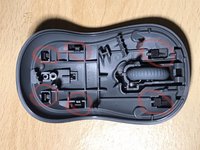
Working from back to front (left to right in the first image) unclip the first two pairs of black plastic clips.
-
Slide the black upper casing forwards over the mouse wheel whilst applying pressure the two front clips to release them.
-
Separate the two casing layers fully.
-


To reassemble your device, follow these instructions in reverse order.
다른 42명이 해당 안내서를 완성하였습니다.

12가이드 댓글
Thank you Karmanyaah Malhotra for takin’ the time to do this for everybody like me :-)
Jacob Hickey - 답글 공유
were can i buy these iems telll mee please
TElll me now or else
I will be sad