이 번역은 원본 안내서의 최신 업데이트를 반영하지 않을 수 있습니다. 번역 업데이트를 돕거나 아니면 원본 안내서 보기를 참조하세요.
소개
After some time left mouse click fails. This results in unintended double clicks or drag and drop. This can be solved by disassembling the mouse and folding a metal part.
Thanks to Kyler's Studio for the tutorial I initially followed.
필요한 것
-
-
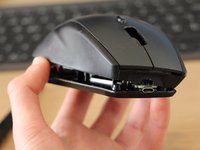
On the back of the mouse, slide the power switch so that the red area is showing to turn off the mouse. Pry open the panel on the bottom to remove the battery.
 FixBot에 문의하기
-
-
-
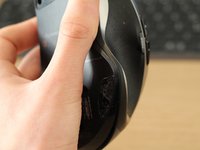
To access the screws necessary to open the mouse, you must remove the pads on the bottom of the mouse. Use a sharp tool such as an iFixit Jimmy tool or an X-acto knife to separate the pad from the case. Each pad has two layers. Ideally, both should remain attached, but this is hard to achieve.
-
-
-
Use a 00 Phillips-Head screwdriver to remove the screws at the bottom of the mouse.
-
-
-
-
This step isn't necessary, but it makes it easier to work on the mouse.
-
-
-
This helps to avoid losing the white piece.
-
-
-
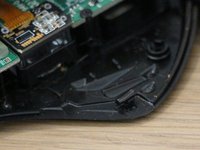
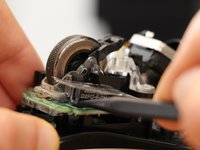
Use your spudger to push the vertical front part of the multiswitch outwards to unhook the top part of the switch casing.
-
-
-
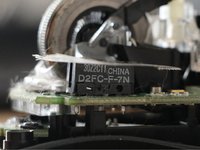
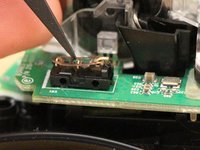
Flatten the metallic piece of the multiswitch (it will probably be curved upward) until you get a neat "click" sound.
-


To reassemble the mouse, follow the instructions in the reverse order.
다른 12명이 해당 안내서를 완성하였습니다.
다음 번역가들에게 특별히 감사 드립니다:
94%


이 번역인들은 저희가 세상을 수리하는 데 도움을 주고 있어요! 기여하시겠습니까?
번역 시작하기 ›
8가이드 댓글
merci , ca vient de sauver ma Revolution
Avec plaisir. J'en suis ravi :)
Samuel Colin - 답글 공유
Thank you so much. My left click often unregisters incorrectly. If not for step 7 and 8, I wouldn't have opened the multiswitch top and clean the contact point. Seems to work perfectly normal now. It'd be a waste to throw away the whole item just because of a tiny defective component. Thanks again for helping me fixed it.
Thuan Chau - 답글 공유
@Kenji @thuan: I'm glad I could help. Thanks for your comments!
Samuel Colin - 답글 공유