주요 콘텐츠로 건너뛰기
Logitech Webcam Pro 9000 Microphone Replacement

Logitech Webcam Pro 9000 Microphone Replacement

nieko

nieko9 다른 기여자

최종 수정일 December 26, 2022

10 - 15 분
조정

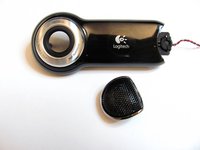
There are two parts to the microphone: the cover and the microphone and its casing. It takes about the same amount of time to remove the cover and the microphone.

필요한 것

도구

  1. Logitech Webcam Pro 9000 Microphone Replacement, Front and Back Cover: 1 단계, 이미지 2개 중 1개 Logitech Webcam Pro 9000 Microphone Replacement, Front and Back Cover: 1 단계, 이미지 2개 중 2개
    • Remove the two 8 mm Phillips #0 screws on the back cover.

    • The motherboard connects the two covers together. DO NOT separate the two yet.

    • There is a button that loosens as the Phillips screws are removed. Don't be alarmed if it falls out.

  2. Logitech Webcam Pro 9000 Microphone Replacement: 2 단계, 이미지 2개 중 1개 Logitech Webcam Pro 9000 Microphone Replacement: 2 단계, 이미지 2개 중 2개
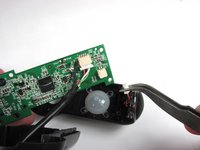
    • Remove the four 6mm Phillips #0 screws connecting the motherboard and front cover.

    • DO NOT detach the wire connecting the motherboard to the front cover.

  3. Logitech Webcam Pro 9000 Microphone Replacement, Microphone Connection: 3 단계, 이미지 2개 중 1개 Logitech Webcam Pro 9000 Microphone Replacement, Microphone Connection: 3 단계, 이미지 2개 중 2개
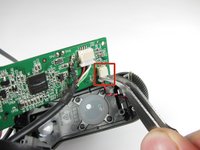
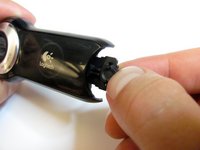
    • Grasp the white wire connector between the tabs and the socket.

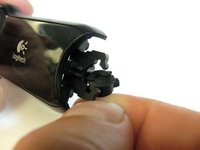
    • Wiggle the connector back and forth to remove the front cover from the motherboard.

  4. Logitech Webcam Pro 9000 Microphone Replacement, Microphone: 4 단계, 이미지 3개 중 1개 Logitech Webcam Pro 9000 Microphone Replacement, Microphone: 4 단계, 이미지 3개 중 2개 Logitech Webcam Pro 9000 Microphone Replacement, Microphone: 4 단계, 이미지 3개 중 3개
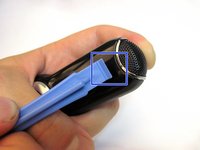
    • Wedge the plastic opening tool into the crack between the plastic cover and microphone guard.

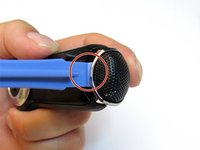
    • Use the wedge to separate the two pieces.

    • It might take more force than expected.

  5. Logitech Webcam Pro 9000 Microphone Replacement: 5 단계, 이미지 3개 중 1개 Logitech Webcam Pro 9000 Microphone Replacement: 5 단계, 이미지 3개 중 2개 Logitech Webcam Pro 9000 Microphone Replacement: 5 단계, 이미지 3개 중 3개
    • Twist the rubber casing and remove it from the plastic cover.

결론

To reassemble your device, follow these instructions in reverse order.

다른 2명이 해당 안내서를 완성하였습니다.

작성자

9다른 기여자 명과 함께

nieko

회원 가입일: 04/18/13

63 평판

안내서 2개를 작성함

Cal Poly, Team 12-34, Amido Spring 2013 Cal Poly, Team 12-34, Amido Spring 2013 회원

CPSU-AMIDO-S13S12G34

4 회원들

안내서 16개를 작성함

댓글 0개

댓글 쓰기

조회 통계:

지난 24시간: 0

지난 7일: 23

지난 30일: 26

전체 시간: 2,134