소개
If your MSI GS66 Stealth laptop (model 11UE-007) laptop is having problems with with the "blue screen of death", frequent freezes, and/or corrupted files, the random access memory stick (RAM) might be to blame. This can be attributed to many problems such as overheating, power faults, manufacturer defects or even physical damage to the laptop itself.
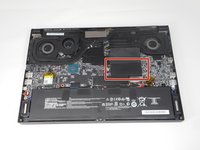
The RAM is an important part of any laptop what allows basically allows the applications to function. Luckily, this part is easy to spot and not very difficult to remove. However, this is a very delicate part and requires a light touch to replace. This guide will show the necessary steps of the location and replacement of the RAM drive.
필요한 것
-
-
Identify the nine screws around the perimeter. One screw will be under the factory seal sticker.
-
-
-
-
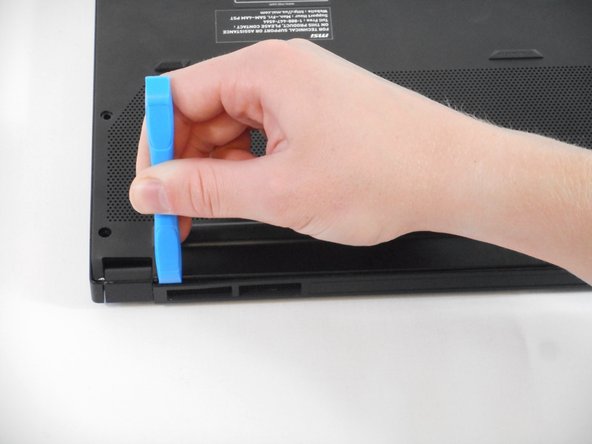
Use the tip of the blue plastic opening tool to slip between the backplate and the body of the laptop at the hinge side.
-
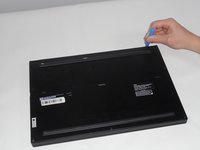
Wiggle the blue plastic opening tool as you slide it around the perimeter of the backplate to separate is from the body of the laptop.
-
-
-
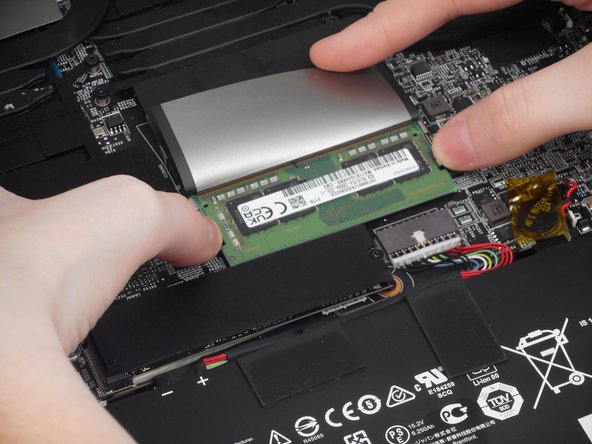
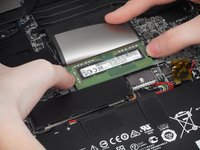
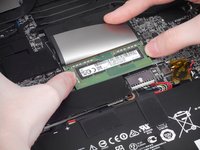
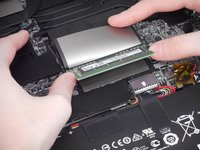
Place both thumbs on metal tabs and apply pressure in a widening motion until RAM lifts.
-


To reassemble your device, follow these instructions in reverse order.
다른 2명이 해당 안내서를 완성하였습니다.
팀

University of Memphis, Team 1-4, Sneed Fall 2023 University of Memphis, Team 1-4, Sneed Fall 2023 회원
UM-SNEED-F23S1G4
4 회원들
안내서 6개를 작성함