소개
iFixit 배터리 교체 키트와 이 안내서를 사용하여 MacBook Pro의 접착된 배터리를 안전하게 분리하세요. 키트의 접착제 제거제는 배터리를 고정하는 접착제를 녹여서 배터리를 수월하게 분리할 수 있습니다. 배터리는 개별 셀 여섯 개로 구성되어 있으며 그 중 네 개는 상단 케이스에 부착되어 있습니다.
‘’’iFixit 접착제 제거제는 가연성이 매우 높습니다.’’’ 통풍이 잘되는 곳에서 이 절차를 수행하세요. 이 과정에서 담배를 피우거나 불 근처에서 작업하지 마세요.
손상 위험을 최소화하려면 이 절차를 시작하기 전에 MacBook을 켜고 배터리를 완전히 방전하세요. 충전된 리튬-이온 배터리에 실수로 구멍이 나면 위험하고 통제할 수 없는 화재를 일으킬 수 있습니다. 배터리가 부풀어 올랐다면, 추가 예방 조치를 취하세요.
참고: 배터리 접착제를 녹이는데 사용하는 용액은 MacBook Pro 플라스틱 스피커 인클로저와 같은 특정 플라스틱을 손상할 수 있습니다. 용액을 바를 때 주의하세요.
(더 이상 판매하지 않는) 별도의 병과 주사기가 있는 옛날 iFixit 접착제 제거제를 사용하는 경우 이곳을 클릭하여 약간 수정한 지침을 보세요.
필요한 것
-
-
하단 케이스를 상단 케이스에 고정하는 다음 나사 열 개를 풀어주세요:
-
2.3mm P5 Pentalobe/펜타로브/별나사 두 개
-
3.0mm P5 Pentalobe/펜타로브/별나사 여덟 개
-
-
-
-
엄지 또는 손가락을 사용하여 SSD 트레이의 플라스틱 스프링 바를 구부려 기기 전면의 클립 두 개를 해제하세요.
-
스프링 바를 누르며 SSD 어셈블리를 기울여 공간에서 꺼내세요.
-
-
-
상단 케이스에서 배터리 전체를 들어 올리고 배터리를 분리하세요.
-
운이 좋으면 손가락으로 접착제 조각을 천천히 당겨 빼낼 수 있습니다.
-
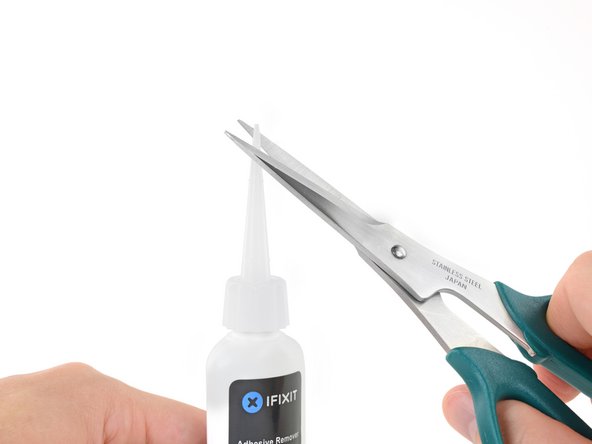
그렇지 않으면 각 접착 부분을 약간의 접착제 제거제로 2-3분 동안 적신 다음 여는 픽 또는 키트의 다른 도구 중 하나로 긁어내야 합니다. 이는 꽤 많은 노력이 필요로 합니다. 인내심을 가지세요.
-
남아있는 모든 접착제 제거제를 닦아내고 MacBook Pro를 자연 건조할 때까지 몇 분 정도 기다리세요.
-
새로 설치한 배터리를 보정하세요: 배터리를 100% 충전한 다음 최소 두 시간 더 충전하세요. 그런 다음 플러그는 뽑고 정상적으로 사용하여 배터리를 방전하세요. 배터리 부족 경고가 나타나면 작업을 저장하고 배터리 부족으로 인해 절전 모드가 활성화될 때까지 노트북을 켜놓으세요. 최소한 5시간 이상을 기다리고 나서 노트북을 중단없이 100% 충전하세요.
-


기기를 재조립하려면 이 지침을 역순으로 따르세요.
기기를 재조립하려면 이 지침을 역순으로 따르세요.
다른 104명이 해당 안내서를 완성하였습니다.
다음 번역가들에게 특별히 감사 드립니다:
100%

Christian Kim님은 저희가 세상을 수리하는데 동참하신 분입니다! 기여하시겠습니까?
번역 시작하기 ›


댓글 48개
Followed this guide step by step. Very comprehensive and accurate. I would never have dared disconnect the speakers if this guide didn't show me how.
One point though. The lower left and right speaker screws had some metallic sponge on top of them. I wouldn't have known there were screws underneath.
Excellent guide. I'm a repair technician who works on both PCs and Macs. This was my first rMBP battery replacement and I wasn't sure what to expect. For those experienced with electronics repairs, I'd say this is a relatively easy repair with the exception of releasing the adhesive which holds the battery cells to the case. I was eventually able to do it with a spudger and some elbow grease, but I was worried at times that I was going to puncture the battery. Apple really needs to dial back the strength of adhesive they use for these applications. They are clearly making it as difficult as possible for the average user to attempt, which IMO may end up costing them well informed and thoughtful customers. This setup is similar to the iPhone 6 battery (which I actually did puncture with a spudger the first time I removed one) albeit more involved to remove. In the case of the iPhone, a few minutes on the hot plate loosens it right up but this isn't really feasible in the case of the rMBP.
I recommend to skip step 14 ( pry the left speaker cable connector up off from its socket on the logic board). The risk of damaging the socket is very high. There is even a warning in this guide (Be sure you are prying up on the connector, not the socket itself!).
Proceed from 13 to 15 and 16 to remove the right speaker. Still with the connector in place you can put the speaker a bit aside and have enough room to remove the battery packs in the steps later.
Same for left speaker and its connector cable (step 18).
Hint by @roelofk with old credit card is very helpful.
Excellent description and excellent pictures. Thx