주요 콘텐츠로 건너뛰기

Moto C Daughterboard Replacement

필요한 것

  1. Moto C Daughterboard Replacement, Back Cover: 1 단계, 이미지 1/3 Moto C Daughterboard Replacement, Back Cover: 1 단계, 이미지 2/3 Moto C Daughterboard Replacement, Back Cover: 1 단계, 이미지 3/3
    • Power off your phone before beginning disassembly.

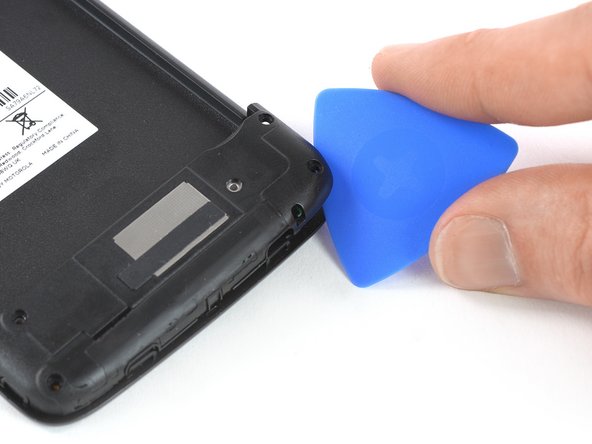
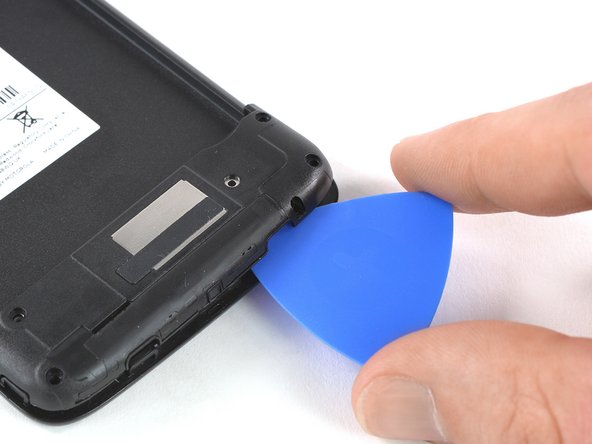
    • Insert a thumbnail, or spudger, into the notch on the bottom right corner to start separating the phone unit from the back cover.

    • Move it to the bottom left corner and pry the phone unit out of the back cover until you can get a good grip.

  2. Moto C Daughterboard Replacement: 2 단계, 이미지 1/2 Moto C Daughterboard Replacement: 2 단계, 이미지 2/2
    • Lift the phone out of the back cover.

  3. Moto C Daughterboard Replacement, Battery: 3 단계, 이미지 1/3 Moto C Daughterboard Replacement, Battery: 3 단계, 이미지 2/3 Moto C Daughterboard Replacement, Battery: 3 단계, 이미지 3/3
    • Use a finger or spudger to lever the battery out of its recess and remove it.

  4. Moto C Daughterboard Replacement, Daughterboard Cover: 4 단계, 이미지 1/1
    • Remove the four 3.5 mm long Torx T5 screws.

    • Some screws might be covered with stickers.

  5. Moto C Daughterboard Replacement: 5 단계, 이미지 1/3 Moto C Daughterboard Replacement: 5 단계, 이미지 2/3 Moto C Daughterboard Replacement: 5 단계, 이미지 3/3
    • Apply the edge of an opening pick to the bottom right corner under the daughterboard cover.

    • Twist the opening pick to open the plastic clamps of the daughterboard cover.

    • Slide the opening pick to the left and pry it upwards until you can get a good grip on the daughterboard cover.

  6. Moto C Daughterboard Replacement: 6 단계, 이미지 1/1
    • Remove the daughterboard cover.

  7. Moto C Daughterboard Replacement, Daughterboard: 7 단계, 이미지 1/2 Moto C Daughterboard Replacement, Daughterboard: 7 단계, 이미지 2/2
    이 단계에 사용된 도구:
    Tweezers
    $4.99
    구매
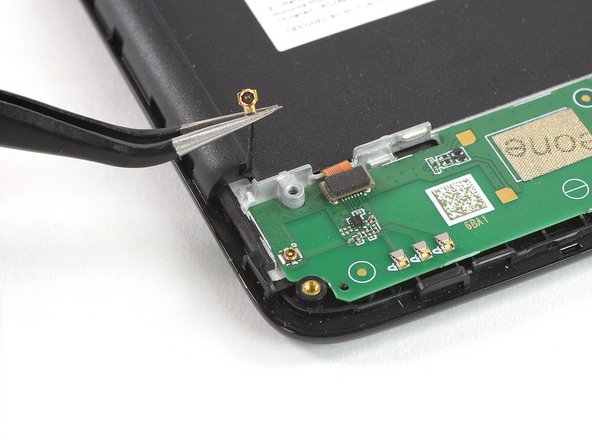
    • Use a pair of tweezers to disconnect the antenna cable on the left of the daughterboard.

  8. Moto C Daughterboard Replacement: 8 단계, 이미지 1/2 Moto C Daughterboard Replacement: 8 단계, 이미지 2/2
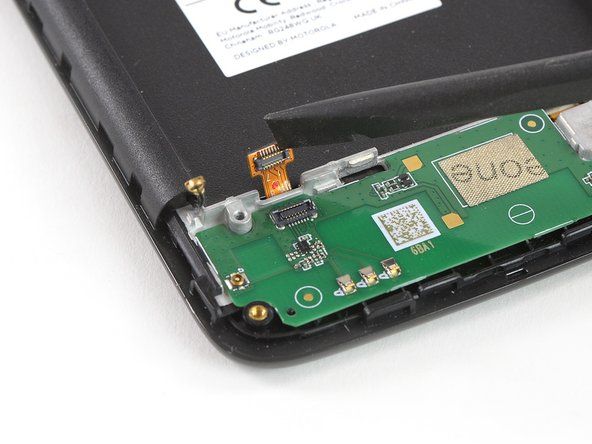
    • Use a spudger to disconnect the digitizer flex cable on the upper left of the daughterboard.

  9. Moto C Daughterboard Replacement: 9 단계, 이미지 1/2 Moto C Daughterboard Replacement: 9 단계, 이미지 2/2
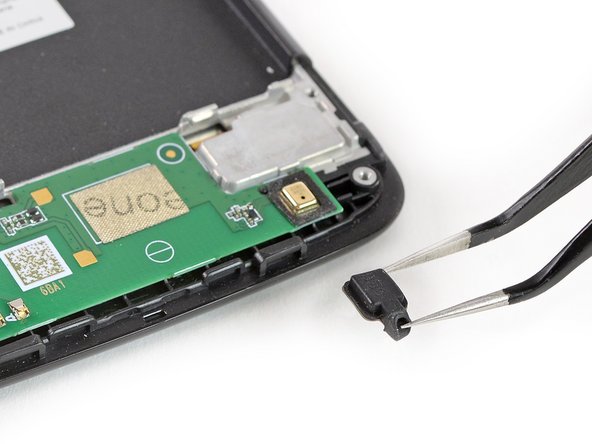
    • Use a pair of tweezers to remove the rubber gasket that covers the microphone on the bottom right of the daughterboard.

  10. Moto C Daughterboard Replacement: 10 단계, 이미지 1/1
    • Prepare an iOpener and apply it to the bottom part of the display for at least two minutes to loosen the adhesive beneath the daughterboard.

  11. Moto C Daughterboard Replacement: 11 단계, 이미지 1/3 Moto C Daughterboard Replacement: 11 단계, 이미지 2/3 Moto C Daughterboard Replacement: 11 단계, 이미지 3/3
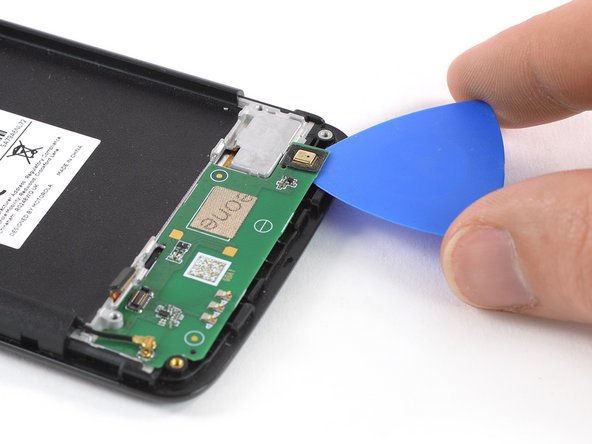
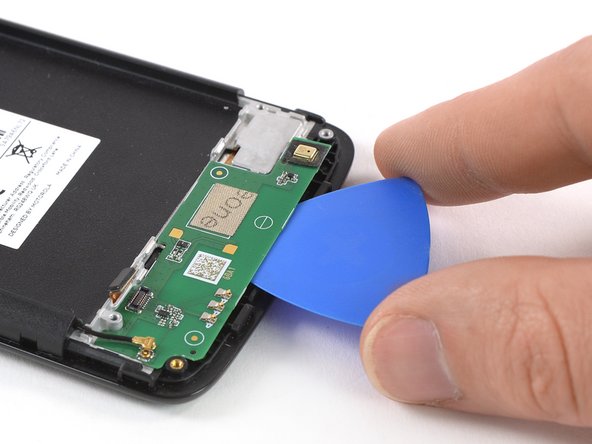
    • Apply an opening pick to the bottom right corner of the daughterboard.

    • Carefully slide the opening pick under the daughterboard to cut the adhesive underneath.

    • Slide the opening pick from right to left to cut all the adhesive.

  12. Moto C Daughterboard Replacement: 12 단계, 이미지 1/2 Moto C Daughterboard Replacement: 12 단계, 이미지 2/2
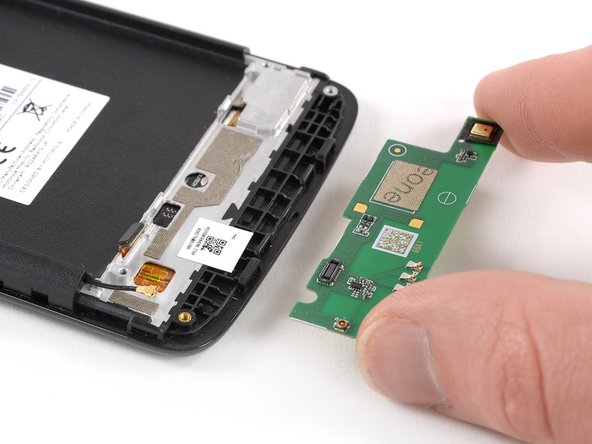
    • Twist the opening pick to lift the daughterboard until you can get a good grip.

    • Remove the daughterboard.

결론

To reassemble your device, follow these instructions in reverse order.

Apply new adhesive where it’s necessary.

Take your e-waste to an R2 or e-Stewards certified recycler.

Repair didn’t go as planned? Check out our Answers community for troubleshooting help.

Dominik Schnabelrauch

회원 가입일: 11/23/16

209,996 평판

안내서 682개 작성하였습니다

iFixit iFixit 회원

Staff

141 회원들

안내서 17,895개 작성하였습니다

댓글 0개

댓글 쓰기

조회 통계:

24 시간 전: 0

7일 전: 0

30일 전: 6

전체 시간: 412