주요 콘텐츠로 건너뛰기

Moto C Plus Earpiece Speaker Replacement

필요한 것

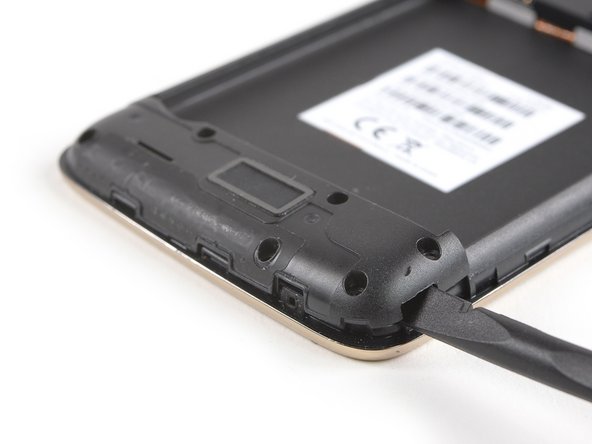
  1. Moto C Plus Earpiece Speaker Replacement, Back Cover: 1 단계, 이미지 1/3 Moto C Plus Earpiece Speaker Replacement, Back Cover: 1 단계, 이미지 2/3 Moto C Plus Earpiece Speaker Replacement, Back Cover: 1 단계, 이미지 3/3
    • Power off your phone before beginning disassembly.

    • Insert a thumbnail, or spudger, into the notch on the bottom right to start separating the phone unit from the back cover.

    • Move to the bottom left corner and pry the phone unit out of the back cover until you can get a good grip.

  2. Moto C Plus Earpiece Speaker Replacement: 2 단계, 이미지 1/2 Moto C Plus Earpiece Speaker Replacement: 2 단계, 이미지 2/2
    • Lift the phone out of the back cover.

  3. Moto C Plus Earpiece Speaker Replacement, Battery: 3 단계, 이미지 1/3 Moto C Plus Earpiece Speaker Replacement, Battery: 3 단계, 이미지 2/3 Moto C Plus Earpiece Speaker Replacement, Battery: 3 단계, 이미지 3/3
    • Use a spudger or fingernail to lift the battery starting at the notch on the bottom left.

    • Lever the battery out of its recess and remove it.

  4. Moto C Plus Earpiece Speaker Replacement, Daughterboard Cover: 4 단계, 이미지 1/1
    • Remove the six 3.1 mm Phillips #00 screws securing the daughterboard cover.

  5. Moto C Plus Earpiece Speaker Replacement: 5 단계, 이미지 1/3 Moto C Plus Earpiece Speaker Replacement: 5 단계, 이미지 2/3 Moto C Plus Earpiece Speaker Replacement: 5 단계, 이미지 3/3
    • Apply a spudger to the right side of the daughterboard cover.

    • Twist the spudger sideways to pry up the daughterboard cover until you get a good grip.

    • Remove the daughterboard cover.

  6. Moto C Plus Earpiece Speaker Replacement, Motherboard Cover: 6 단계, 이미지 1/1
    • Remove the five 3.1 mm long Phillips #00 screws.

  7. Moto C Plus Earpiece Speaker Replacement: 7 단계, 이미지 1/3 Moto C Plus Earpiece Speaker Replacement: 7 단계, 이미지 2/3 Moto C Plus Earpiece Speaker Replacement: 7 단계, 이미지 3/3
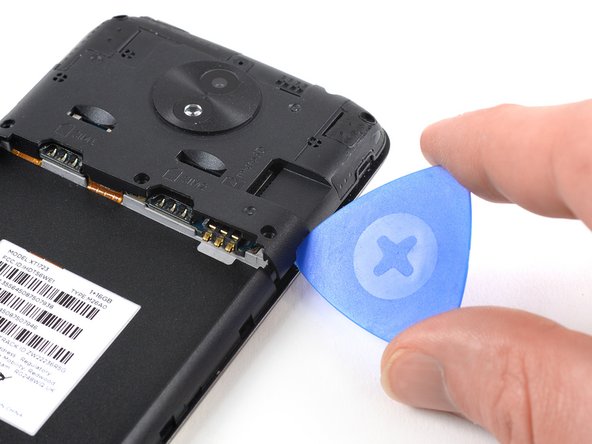
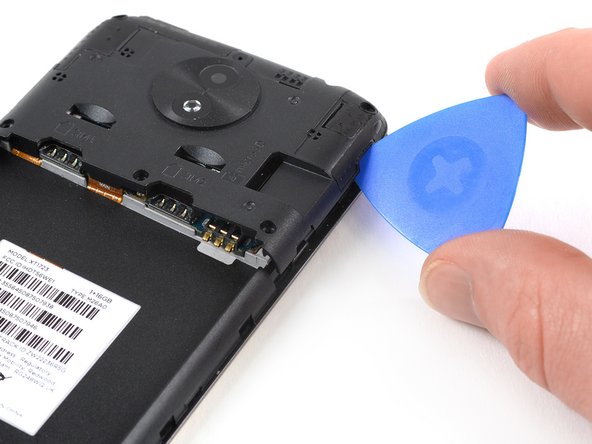
    • Apply an opening pick to the bottom right corner of the motherboard cover.

    • Twist the opening pick to free the motherboard cover out of the plastic clamps on the right side of the phone.

  8. Moto C Plus Earpiece Speaker Replacement: 8 단계, 이미지 1/2 Moto C Plus Earpiece Speaker Replacement: 8 단계, 이미지 2/2
    • Repeat the previous step on the left side of the motherboard cover to free it out of the plastic clamps.

    • Pry up the motherboard cover until you can get a good grip.

    • Remove the motherboard cover.

  9. Moto C Plus Earpiece Speaker Replacement, Motherboard Assembly: 9 단계, 이미지 1/1
    • Remove the two 3.2 mm Phillips #00 screws securing the motherboard.

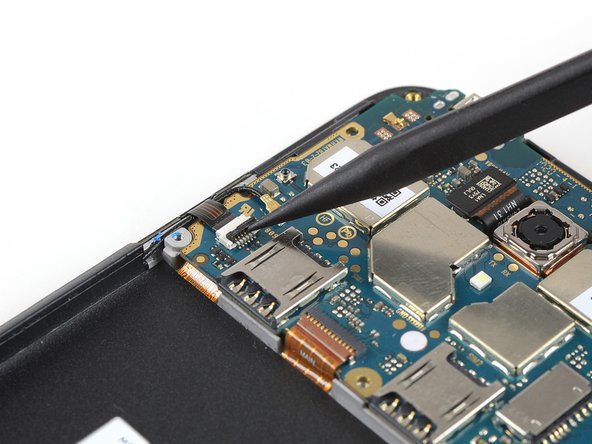
  10. Moto C Plus Earpiece Speaker Replacement: 10 단계, 이미지 1/2 Moto C Plus Earpiece Speaker Replacement: 10 단계, 이미지 2/2
    • Use the tip of a spudger to lift the latch on the power and volume button ZIF connector.

  11. Moto C Plus Earpiece Speaker Replacement: 11 단계, 이미지 1/2 Moto C Plus Earpiece Speaker Replacement: 11 단계, 이미지 2/2
    • Use a pair of tweezers to pull the power and volume button flex cable out of the ZIF connector.

    • Fold the power and volume button flex cable out of the way.

  12. Moto C Plus Earpiece Speaker Replacement: 12 단계, 이미지 1/2 Moto C Plus Earpiece Speaker Replacement: 12 단계, 이미지 2/2
    • Pry up and disconnect the antenna cable.

    • Fold the antenna cable out of the way.

  13. Moto C Plus Earpiece Speaker Replacement: 13 단계, 이미지 1/2 Moto C Plus Earpiece Speaker Replacement: 13 단계, 이미지 2/2
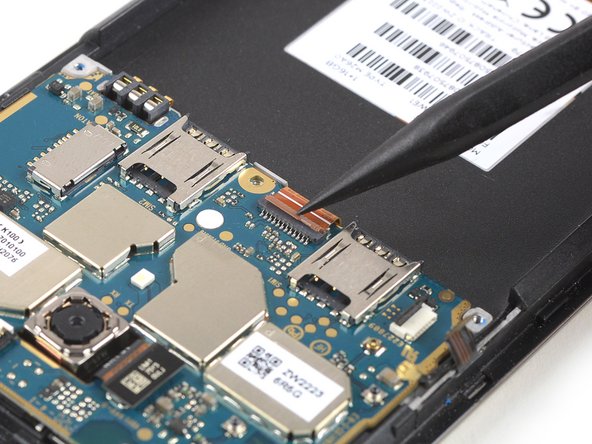
    • Use the tip of a spudger to open the interconnect cable ZIF connector by lifting the brown flap.

    • When reassembling make sure the white line on the cable aligns with the closed flap.

  14. Moto C Plus Earpiece Speaker Replacement: 14 단계, 이미지 1/2 Moto C Plus Earpiece Speaker Replacement: 14 단계, 이미지 2/2
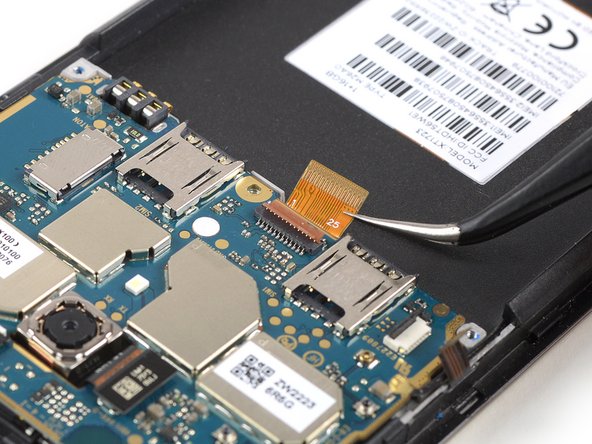
    • Use a pair of tweezers to pull the interconnect flex cable out of the ZIF connector.

  15. Moto C Plus Earpiece Speaker Replacement: 15 단계, 이미지 1/2 Moto C Plus Earpiece Speaker Replacement: 15 단계, 이미지 2/2
    • Use the tip of a spudger to open the flap of the ZIF connector next to the headphone jack.

  16. Moto C Plus Earpiece Speaker Replacement: 16 단계, 이미지 1/2 Moto C Plus Earpiece Speaker Replacement: 16 단계, 이미지 2/2
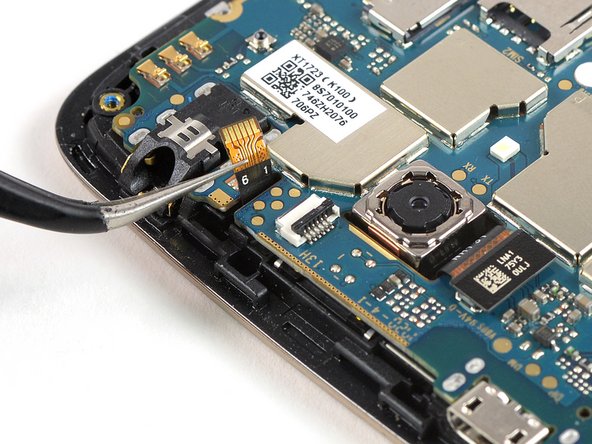
    • Use a pair of tweezers to pull the flex cable out of the ZIF connector.

  17. Moto C Plus Earpiece Speaker Replacement: 17 단계, 이미지 1/2 Moto C Plus Earpiece Speaker Replacement: 17 단계, 이미지 2/2
    • Don't try to remove the motherboard all the way yet. The display flex cable is still connected to its rear side.

    • Use a spudger to carefully lift the motherboard until you can get a good grip. Avoid to damage the cables next to the motherboard.

    • Lift the motherboard and fold it back until you have enough space to disconnect the display flex cable.

  18. Moto C Plus Earpiece Speaker Replacement: 18 단계, 이미지 1/2 Moto C Plus Earpiece Speaker Replacement: 18 단계, 이미지 2/2
    • Use the edge of a spudger to pry up and disconnect the display flex cable from the motherboard.

  19. Moto C Plus Earpiece Speaker Replacement: 19 단계, 이미지 1/1
    • Remove the motherboard.

  20. Moto C Plus Earpiece Speaker Replacement, Earpiece Speaker: 20 단계, 이미지 1/1
    • Use an iOpener and apply it to the top edge of the display to loosen the adhesive beneath the earpiece speaker.

  21. Moto C Plus Earpiece Speaker Replacement: 21 단계, 이미지 1/2 Moto C Plus Earpiece Speaker Replacement: 21 단계, 이미지 2/2
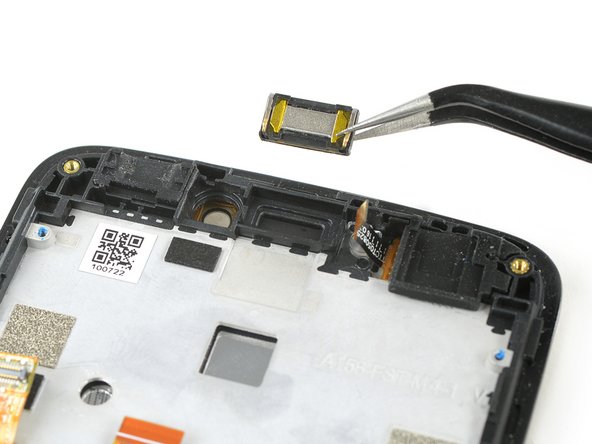
    • Use a pair of tweezers to carefully grab and remove the earpiece speaker.

결론

To reassemble your device, follow these instructions in reverse order.

다른 2명이 해당 안내서를 완성하였습니다.

Dominik Schnabelrauch

회원 가입일: 11/23/16

204,077 평판

안내서 682개 작성하였습니다

iFixit iFixit 회원

Staff

135 회원들

안내서 17,199개 작성하였습니다

댓글 0개

댓글 쓰기

조회 통계:

24 시간 전: 1

7일 전: 5

30일 전: 13

전체 시간: 1,102