소개
You've shattered your screen and now you can barely use your phone without covering your hand in cuts. With this guide, you'll be able to replace that screen with a slick new one.
필요한 것
-
-
Remove the two 4.5mm screws in the bottom left and right corners of the device using a T4 Torx Screwdriver.
 FixBot에 문의하기
-
-
-
Holding the device in your hand, push the screen towards the top of the phone until it disconnects from the base of the phone.
-
-
-
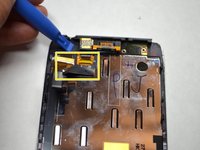
이 단계에 사용된 도구:Tweezers$4.99
-
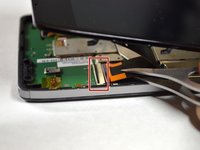
Use tweezers to remove the yellow tape covering the lcd/digitizer cable connector.
-
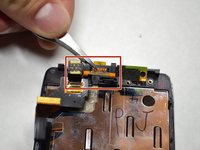
Carefully lift up the black locking tab to release the lcd/digitizer cable.
-
-
-
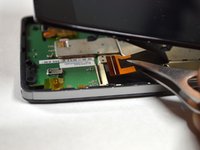
Lift up the screen further to reveal another cable at the top of the device connecting the motherboard to the screen.
-
Use tweezers to lift the black bar on top of the ZIF connector.
-
Pull the ribbon cable out of the connector with tweezers.
-
Now that there are no cables connecting the screen to the motherboard, remove the screen.
-
-
이 단계에 사용된 도구:Tweezers$4.99
-
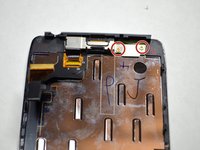
Remove the two 2.0mm T4 Torx screws near the top of the screen.
-
Remove the metal plate protecting the front camera and ear speaker with tweezers.
-
-
-
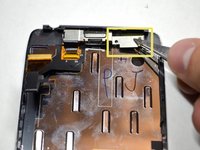
Using a plastic openining tool, lift up the front camera and ear speaker assembly.
-
Remove the assembly with tweezers.
-


To reassemble your device, follow these instructions in reverse order.
다른 2명이 해당 안내서를 완성하였습니다.
팀

Cal Poly, Team 4-4, Maness Spring 2015 Cal Poly, Team 4-4, Maness Spring 2015 회원
CPSU-MANESS-S15S4G4
5 회원들
안내서 24개를 작성함