주요 콘텐츠로 건너뛰기

Motorola Razr V3 Camera Replacement

필요한 것

동영상 개요

  1. Motorola Razr V3 Camera Replacement, Battery: 1 단계, 이미지 1/2 Motorola Razr V3 Camera Replacement, Battery: 1 단계, 이미지 2/2
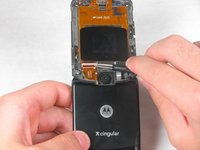
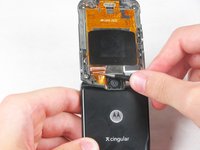
    • Remove the back cover by pressing down the silver button.

    • Pull the cover away from the phone.

  2. Motorola Razr V3 Camera Replacement: 2 단계, 이미지 1/2 Motorola Razr V3 Camera Replacement: 2 단계, 이미지 2/2
    • Remove the battery by pushing down on the top and pulling it away from the phone.

  3. Motorola Razr V3 Camera Replacement, Upper Casing: 3 단계, 이미지 1/1
    • Use tweezers to pry off the four rubber screw covers from the inside face.

    • Our phone is missing the two left screw covers, be careful not to lose yours too!

  4. Motorola Razr V3 Camera Replacement: 4 단계, 이미지 1/1
    • Remove the four T5 Torx screws that were underneath the rubber covers.

  5. Motorola Razr V3 Camera Replacement: 5 단계, 이미지 1/1
    • Use the plastic opening tool to pry the top cover away from the phone.

    • The side buttons on the phone may fall out when the top cover is separated from the phone. They can easily be put back by placing them in their original spot.

  6. Motorola Razr V3 Camera Replacement, Camera: 6 단계, 이미지 1/2 Motorola Razr V3 Camera Replacement, Camera: 6 단계, 이미지 2/2
    • Use tweezers to flip up the ZIF tab on the camera ribbon cable socket.

    • Gently pull the camera ribbon cable out of the ZIF socket.

  7. Motorola Razr V3 Camera Replacement: 7 단계, 이미지 1/1
    • Using a pair of tweezers gently grab and remove the camera from the phone.

결론

To reassemble your device, follow these instructions in reverse order.

다른 한 분이 해당 안내서를 완성하였습니다.

Christian

회원 가입일: 04/18/13

224 평판

안내서 2개 작성하였습니다

Cal Poly, Team 3-46, Amido Spring 2013 Cal Poly, Team 3-46, Amido Spring 2013 회원

CPSU-AMIDO-S13S3G46

4 회원들

안내서 8개 작성하였습니다

댓글 0개

댓글 쓰기

조회 통계:

24 시간 전: 1

7일 전: 1

30일 전: 8

전체 시간: 1,954