주요 콘텐츠로 건너뛰기

Nerf Mega Magnus Spring Replacement

필요한 것

  1. Nerf Mega Magnus Spring Replacement, Spring: 1 단계, 이미지 1/3 Nerf Mega Magnus Spring Replacement, Spring: 1 단계, 이미지 2/3 Nerf Mega Magnus Spring Replacement, Spring: 1 단계, 이미지 3/3
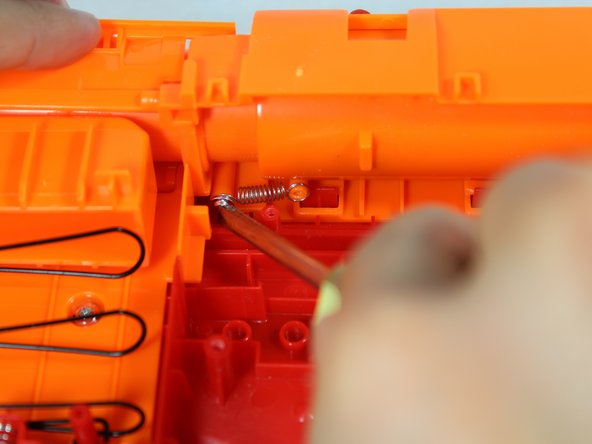
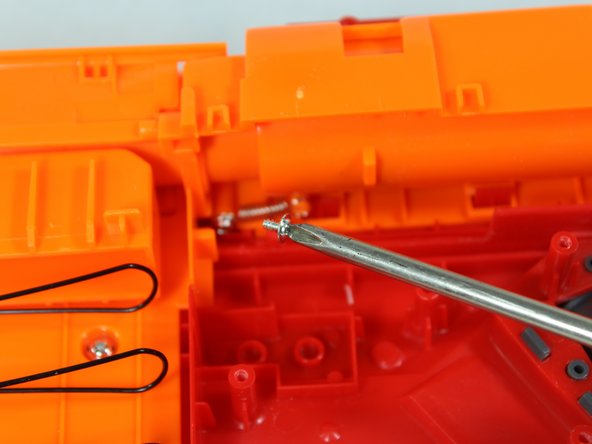
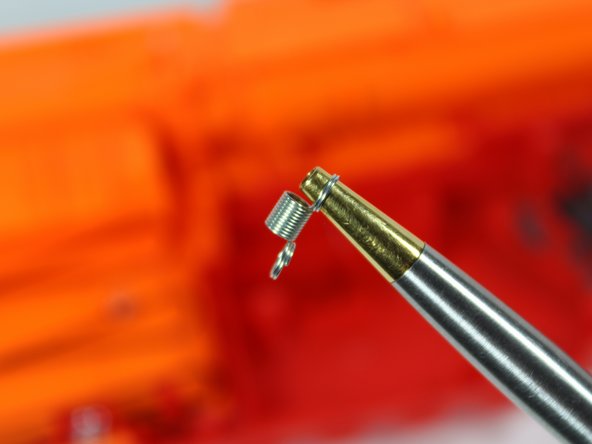
    • Start by removing the (4) exterior Phillips screws from the shell of the gun with a #1 Phillips Screwdriver.

  2. Nerf Mega Magnus Spring Replacement: 2 단계, 이미지 1/2 Nerf Mega Magnus Spring Replacement: 2 단계, 이미지 2/2
    • Pulling upward from the rest of the shell, carefully remove the half of the slide facing you.

  3. Nerf Mega Magnus Spring Replacement: 3 단계, 이미지 1/3 Nerf Mega Magnus Spring Replacement: 3 단계, 이미지 2/3 Nerf Mega Magnus Spring Replacement: 3 단계, 이미지 3/3
    • On the same side, remove all (9) screws from the body of the blaster as shown.

  4. Nerf Mega Magnus Spring Replacement: 4 단계, 이미지 1/2 Nerf Mega Magnus Spring Replacement: 4 단계, 이미지 2/2
    • Lift up on the top half of the shell with deliberate force. This should reveal the internals.

  5. Nerf Mega Magnus Spring Replacement: 5 단계, 이미지 1/3 Nerf Mega Magnus Spring Replacement: 5 단계, 이미지 2/3 Nerf Mega Magnus Spring Replacement: 5 단계, 이미지 3/3
    • Remove the screws from the trigger mechanism and lift it upward

  6. Nerf Mega Magnus Spring Replacement: 6 단계, 이미지 1/2 Nerf Mega Magnus Spring Replacement: 6 단계, 이미지 2/2
    • Locate the small grey piece under the plunger tube and remove the screw.

  7. Nerf Mega Magnus Spring Replacement: 7 단계, 이미지 1/3 Nerf Mega Magnus Spring Replacement: 7 단계, 이미지 2/3 Nerf Mega Magnus Spring Replacement: 7 단계, 이미지 3/3
    • Locate the screws on the return spring. Using a counterclockwise rotation, remove both of the screws.

  8. Nerf Mega Magnus Spring Replacement: 8 단계, 이미지 1/2 Nerf Mega Magnus Spring Replacement: 8 단계, 이미지 2/2
    • Using a small tool, carefully remove the spring from its pegs.

  9. Nerf Mega Magnus Spring Replacement: 9 단계, 이미지 1/3 Nerf Mega Magnus Spring Replacement: 9 단계, 이미지 2/3 Nerf Mega Magnus Spring Replacement: 9 단계, 이미지 3/3
    • Locate the screws behind the dart pusher mechanism. Carefully remove each screw.

  10. Nerf Mega Magnus Spring Replacement: 10 단계, 이미지 1/3 Nerf Mega Magnus Spring Replacement: 10 단계, 이미지 2/3 Nerf Mega Magnus Spring Replacement: 10 단계, 이미지 3/3
    • Pull upwards on the dart pusher and spring to remove them.

  11. Nerf Mega Magnus Spring Replacement: 11 단계, 이미지 1/2 Nerf Mega Magnus Spring Replacement: 11 단계, 이미지 2/2
    • Lift up on the magazine plate in order to remove it.

  12. Nerf Mega Magnus Spring Replacement: 12 단계, 이미지 1/3 Nerf Mega Magnus Spring Replacement: 12 단계, 이미지 2/3 Nerf Mega Magnus Spring Replacement: 12 단계, 이미지 3/3
    • Pull upward on the dart lip and it will lift off.

  13. Nerf Mega Magnus Spring Replacement: 13 단계, 이미지 1/3 Nerf Mega Magnus Spring Replacement: 13 단계, 이미지 2/3 Nerf Mega Magnus Spring Replacement: 13 단계, 이미지 3/3
    • Lift the left side of the plunger tube from its peg and the rest will slide off the spring peg.

  14. Nerf Mega Magnus Spring Replacement: 14 단계, 이미지 1/3 Nerf Mega Magnus Spring Replacement: 14 단계, 이미지 2/3 Nerf Mega Magnus Spring Replacement: 14 단계, 이미지 3/3
    • Slide the spring off its peg. If the spring is damaged, replace it.

결론

To reassemble your device, follow these instructions in reverse order.

다른 3명이 해당 안내서를 완성하였습니다.

Averi Fletcher

회원 가입일: 06/01/16

147 평판

안내서 1개 작성함

댓글 0개

댓글 쓰기

조회 통계:

24 시간 전: 0

7일 전: 3

30일 전: 10

전체 시간: 3,556