주요 콘텐츠로 건너뛰기

Nest Learning Thermostat 2nd Generation Optical Finger Motion Sensor Replacement

필요한 것

  1. Nest Learning Thermostat 2nd Generation Optical Finger Motion Sensor  Replacement, Removal from Wall: 1 단계, 이미지 1/2 Nest Learning Thermostat 2nd Generation Optical Finger Motion Sensor  Replacement, Removal from Wall: 1 단계, 이미지 2/2
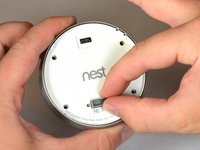
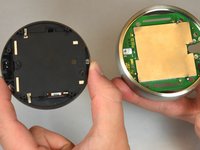
    • Grasp the display's metal outer ring with your fingers and pull directly away from the wall.

  2. Nest Learning Thermostat 2nd Generation Optical Finger Motion Sensor  Replacement, Open Display: 2 단계, 이미지 1/1
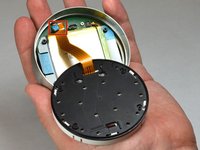
    • Turn the display over.

    • Remove the four 6 mm screws from the back of the display using a Phillips #0 screwdriver.

  3. Nest Learning Thermostat 2nd Generation Optical Finger Motion Sensor  Replacement, Remove the back of the display: 3 단계, 이미지 1/2 Nest Learning Thermostat 2nd Generation Optical Finger Motion Sensor  Replacement, Remove the back of the display: 3 단계, 이미지 2/2
    • Pinch the gray 20-pin connector with your fingers and pull directly away from the display.

    • Do NOT pull too far as there is a ribbon on the back panel connecting the 20-pin connector to the display.

  4. Nest Learning Thermostat 2nd Generation Optical Finger Motion Sensor  Replacement, Disconnect the base connection ribbon cable.: 4 단계, 이미지 1/3 Nest Learning Thermostat 2nd Generation Optical Finger Motion Sensor  Replacement, Disconnect the base connection ribbon cable.: 4 단계, 이미지 2/3 Nest Learning Thermostat 2nd Generation Optical Finger Motion Sensor  Replacement, Disconnect the base connection ribbon cable.: 4 단계, 이미지 3/3
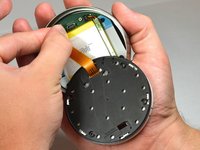
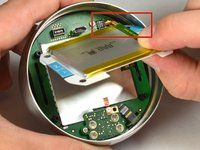
    • Locate the blue pull tab at the end of the ribbon which says, "1. Pull".

    • Grasp the tab with your fingers and pull directly away from the motherboard.

  5. Nest Learning Thermostat 2nd Generation Optical Finger Motion Sensor  Replacement, Lift battery from the base: 5 단계, 이미지 1/2 Nest Learning Thermostat 2nd Generation Optical Finger Motion Sensor  Replacement, Lift battery from the base: 5 단계, 이미지 2/2
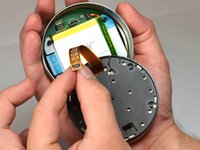
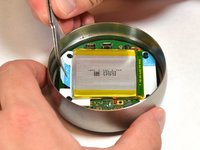
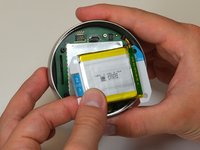
    • Locate the blue tab which says, "2. Pull".

    • Use tweezers to pull the battery up and away from the display.

    • Do NOT pull too far, as the battery is still connected to the motherboard and must be unplugged.

  6. Nest Learning Thermostat 2nd Generation Optical Finger Motion Sensor  Replacement, Disconnect the battery from the motherboard: 6 단계, 이미지 1/2 Nest Learning Thermostat 2nd Generation Optical Finger Motion Sensor  Replacement, Disconnect the battery from the motherboard: 6 단계, 이미지 2/2
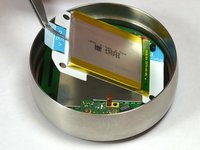
    • Locate the blue tab which says "3 unplug".

    • Grasp the battery with your fingers. Pull gently directly away from the display to unplug the battery from the motherboard.

  7. Nest Learning Thermostat 2nd Generation Optical Finger Motion Sensor  Replacement, Remove battery from the display: 7 단계, 이미지 1/3 Nest Learning Thermostat 2nd Generation Optical Finger Motion Sensor  Replacement, Remove battery from the display: 7 단계, 이미지 2/3 Nest Learning Thermostat 2nd Generation Optical Finger Motion Sensor  Replacement, Remove battery from the display: 7 단계, 이미지 3/3
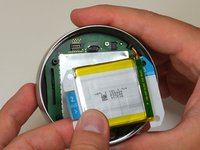
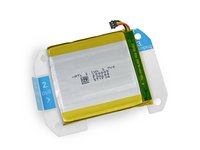
    • Grasp the battery with your fingers and pull directly away from motherboard to separate the battery from the display.

  8. Nest Learning Thermostat 2nd Generation Optical Finger Motion Sensor  Replacement, Locate auto-away sensor: 8 단계, 이미지 1/1
    • Locate the auto-away sensor.

  9. Nest Learning Thermostat 2nd Generation Optical Finger Motion Sensor  Replacement, Remove screws: 9 단계, 이미지 1/2 Nest Learning Thermostat 2nd Generation Optical Finger Motion Sensor  Replacement, Remove screws: 9 단계, 이미지 2/2
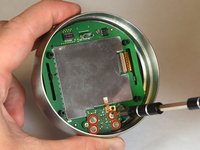
    • Remove the four 3mm screws with a #0 Phillips screwdriver.

    • Remove the one 4mm screw located at the edge of the auto-away sensor. Use a #0 Phillips screwdriver.

  10. Nest Learning Thermostat 2nd Generation Optical Finger Motion Sensor  Replacement, Remove auto-away sensor: 10 단계, 이미지 1/3 Nest Learning Thermostat 2nd Generation Optical Finger Motion Sensor  Replacement, Remove auto-away sensor: 10 단계, 이미지 2/3 Nest Learning Thermostat 2nd Generation Optical Finger Motion Sensor  Replacement, Remove auto-away sensor: 10 단계, 이미지 3/3
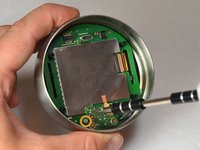
    • Lift the auto-away sensor from motherboard using tweezers.

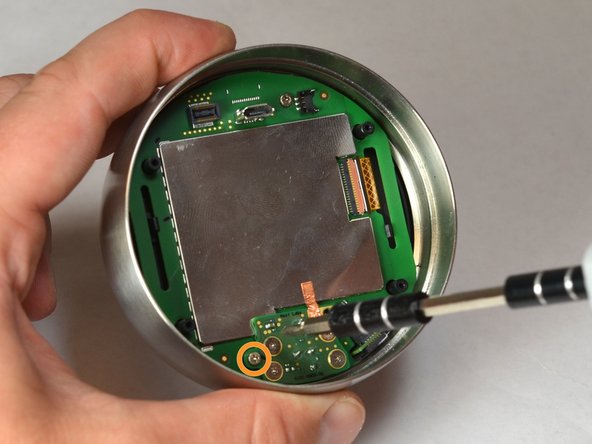
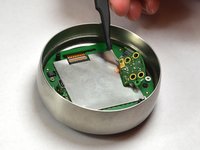
    • Peel the copper foil gently from the EMI shield.

  11. Nest Learning Thermostat 2nd Generation Optical Finger Motion Sensor  Replacement, Remove screw from motherboard: 11 단계, 이미지 1/1
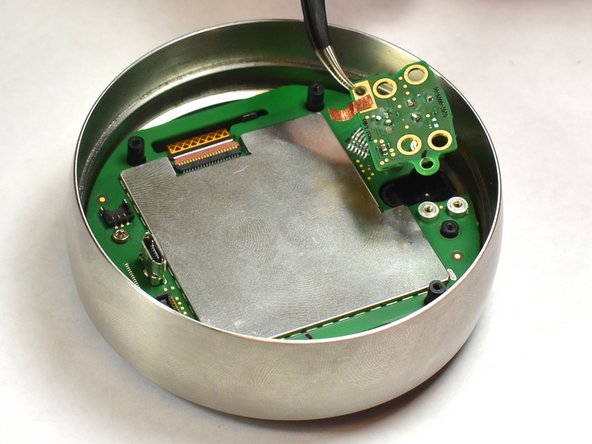
    • Remove the 4 mm screw from the motherboard using a #0 Phillips screwdriver.

  12. Nest Learning Thermostat 2nd Generation Optical Finger Motion Sensor  Replacement, Removal of EMI Shield: 12 단계, 이미지 1/2 Nest Learning Thermostat 2nd Generation Optical Finger Motion Sensor  Replacement, Removal of EMI Shield: 12 단계, 이미지 2/2
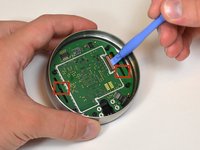
    • Remove the EMI shield from the motherboard using a plastic opening tool.

  13. Nest Learning Thermostat 2nd Generation Optical Finger Motion Sensor  Replacement, Disconnect the LCD ribbon: 13 단계, 이미지 1/2 Nest Learning Thermostat 2nd Generation Optical Finger Motion Sensor  Replacement, Disconnect the LCD ribbon: 13 단계, 이미지 2/2
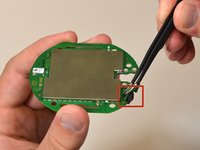
    • Unsnap the LCD ribbon from the motherboard gently using tweezers.

  14. Nest Learning Thermostat 2nd Generation Optical Finger Motion Sensor  Replacement, Disconnect the motherboard from the display: 14 단계, 이미지 1/3 Nest Learning Thermostat 2nd Generation Optical Finger Motion Sensor  Replacement, Disconnect the motherboard from the display: 14 단계, 이미지 2/3 Nest Learning Thermostat 2nd Generation Optical Finger Motion Sensor  Replacement, Disconnect the motherboard from the display: 14 단계, 이미지 3/3
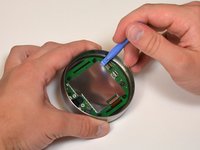
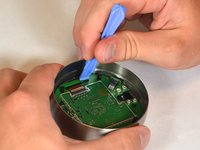
    • Locate the black tabs that hold the display to the motherboard.

    • Push the black tabs gently away from the motherboard using the plastic opening tools.

  15. Nest Learning Thermostat 2nd Generation Optical Finger Motion Sensor  Replacement, Separate the motherboard and the display: 15 단계, 이미지 1/2 Nest Learning Thermostat 2nd Generation Optical Finger Motion Sensor  Replacement, Separate the motherboard and the display: 15 단계, 이미지 2/2
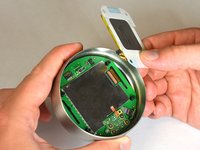
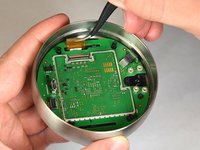
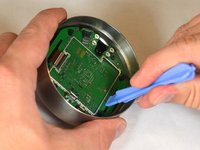
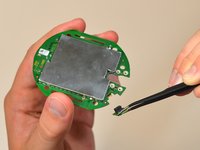
    • Pull the face display gently away from the motherboard.

  16. Nest Learning Thermostat 2nd Generation Optical Finger Motion Sensor  Replacement, Separate motherboard from steal ring: 16 단계, 이미지 1/1
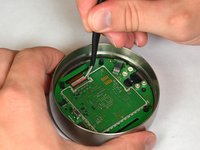
    • Using one hand to hold the steel ring, carefully lift the motherboard out of the ring using the other hand.

  17. Nest Learning Thermostat 2nd Generation Optical Finger Motion Sensor  Replacement, Removal of optical finger: 17 단계, 이미지 1/3 Nest Learning Thermostat 2nd Generation Optical Finger Motion Sensor  Replacement, Removal of optical finger: 17 단계, 이미지 2/3 Nest Learning Thermostat 2nd Generation Optical Finger Motion Sensor  Replacement, Removal of optical finger: 17 단계, 이미지 3/3
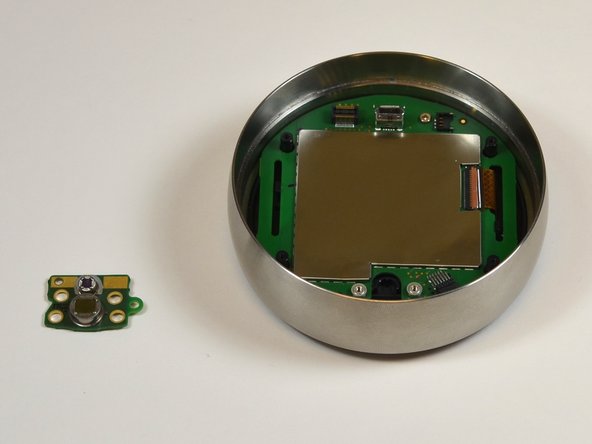
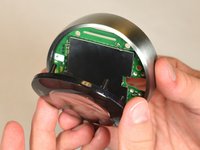
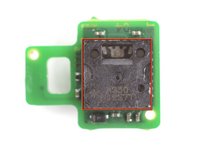
    • Locate the optical sensor, a small board attached at 90 degrees from the side of the motherboard.

    • Using the tweezers, grasp the small green piece of exposed board on the sensor, and pull directly away from the side of the motherboard.

결론

To reassemble your device, follow these instructions in reverse order.

다른 3명이 해당 안내서를 완성하였습니다.

Charles Suleskey

회원 가입일: 09/23/14

432 평판

안내서 2개 작성하였습니다

USF Tampa, Team 11-5, Blackwell Fall 2014 USF Tampa, Team 11-5, Blackwell Fall 2014 회원

USFT-BLACKWELL-F14S11G5

5 회원들

안내서 12개 작성하였습니다

댓글 9개

Where can I get the sensor?

tyjustice - 답글

I second this, for the life of me, I can't find it. Just data specs and how most of the electronics retailers online says it obsolete, specially since Avago got absorbed by Broadcom.

Luis A. Cornejo -

This is helpful up to the point where I need to know where to get the sensor. Where do I get the sensor?

Art Adams - 답글

Any update where to get a new sensor? I just received a device from a friend and it needs to be fixed.

Steven D'Ambrozio - 답글

The easier path would be to install a rotary encoder, and call it a day. If you do find the sensor, you have to code basically a driver for it and print your own pattern.

ic3balandran - 답글

댓글 쓰기

조회 통계:

24 시간 전: 1

7일 전: 3

30일 전: 18

전체 시간: 5,538