소개
This guide shows how to remove and replace the audio port located on the motherboard in the top right-hand corner of the phone.
필요한 것
-
이 단계에 사용된 도구:SIM Card Eject Tool$2.99
-
Power off the phone, by long-pressing the power button and touching Power off.
-
Remove the SIM tray using the SIM Card Eject Tool.
 FixBot에 문의하기
-
-
이 단계에 사용된 도구:T5 Torx Screwdriver$5.49
-
Remove the two screws from the bottom of the phone with a T5 Torx Screwdriver.
-
-
-
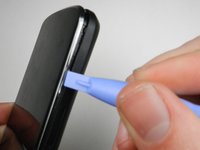
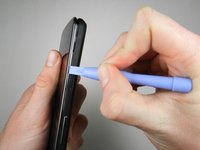
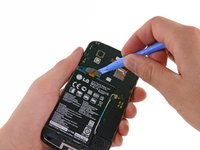
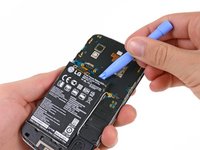
Gently open the back case by prying along the edge of the cover, starting at a corner of the phone and circling around the phone using a plastic opening tool.
-
-
-
-
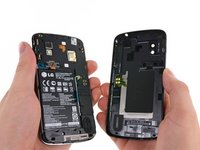
Remove the two 1.8 mm Phillips screws holding down the battery connector.
-
Using a plastic opening tool, disconnect the battery cable from its socket on the motherboard.
-
-
이 단계에 사용된 도구:Plastic Cards$2.99
-
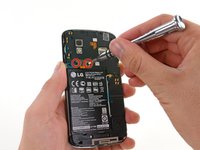
Remove the blue tape that secures the white antenna cable to the battery.
-
Using a spudger, carefully disconnect the white antenna cable.
-
Carefully pry the battery out with a Plastic Opening Tool, starting at the top left-hand corner and working down towards the bottom right-hand corner.
-
-
-
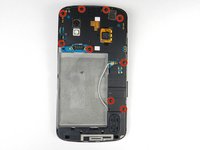
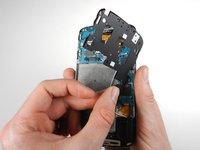
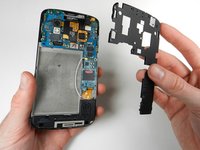
Remove the nine 4.6 mm Phillips #000 screws. Gently lift out the plastic cover.
-
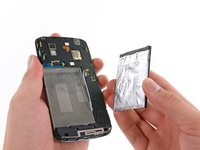
The midframe is held in with two clips, one at either side. Use a plastic spudger to release each side and gently lift up and away.
-
-
-
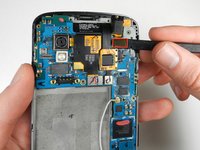
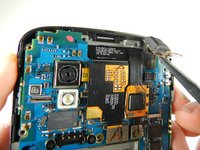
Using a spudger, pop off the gray connector on the top right of the motherboard.
-
-
-
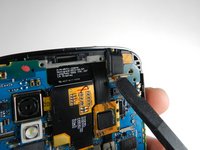
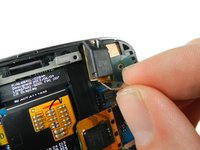
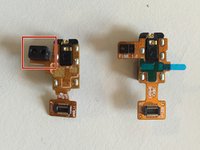
Gently lift the audio jack upwards and to the left to remove it from the motherboard.
-
-
-
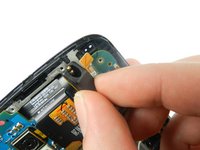
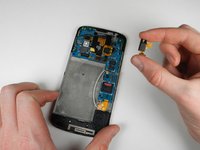
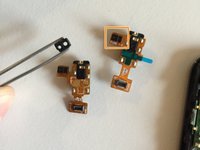
The audio port will likely lift out together with the ambient light sensor rubber cap.
-
Remove the cap from the old part and move it to the new one. Ensure the cap stays in place when installing the new audio port into the phone.
-


To reassemble your device, follow these instructions in reverse order.
다른 26명이 해당 안내서를 완성하였습니다.
팀

Cal Poly, Team 3-32, Amido Winter 2013 Cal Poly, Team 3-32, Amido Winter 2013 회원
CPSU-AMIDO-W13S3G32
4 회원들
안내서 24개를 작성함
1가이드 댓글
where can I order the original connector on my Nexus 4? With delivery to the Crimea.
Grateful for the answer in advance.
Konstantin - 답글 공유