소개
이 안내서는 하단 LCD와 터치스크린 디지타이저를 교체하는 방법을 소개합니다.
필요한 것
-
-
-
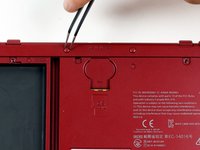
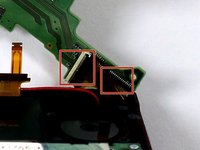
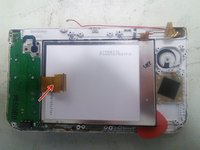
빨간색으로 표시된 부분이 NFC 안테나 지지대이며, LCD/촉각 장치에 접근하기 전에 분리해야 합니다.
-
상단과 하단에 피크와 같은 얇은 도구를 사용하여 NFC 안테나의 상단과 하단 플라스틱 지지대 클립을 풀어주고 분리하세요.
-
-
-
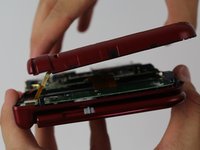
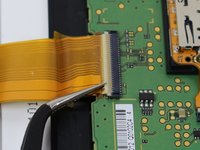
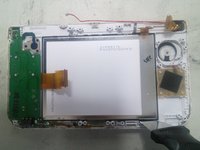
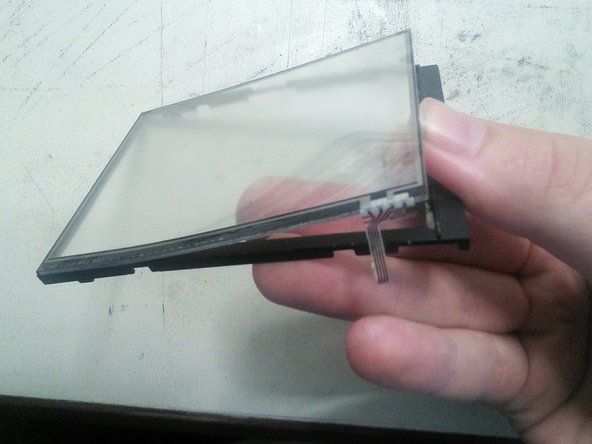
LCD/터치 스크린의 검은색 지지대와 콘솔 케이스 사이에 납작한 도구를 밀어 넣은 다음, 살살 들어 올리세요. 그런 다음, 피크를 아래로 밀어서 제자리에 고정하세요.
-
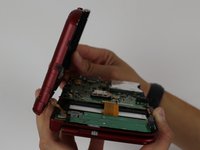
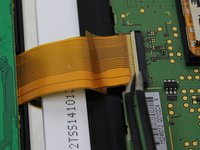
그런 다음 아래에서 밀어서 어셈블리를 들어 올리거나 계속 돌면서 클립을 풀고 빼낼 수 있습니다.
-


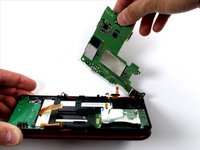


기기를 다시 재조립하려면 위의 과정을 역순으로 따라주세요.
기기를 다시 재조립하려면 위의 과정을 역순으로 따라주세요.
다른 18명이 해당 안내서를 완성하였습니다.
다음 번역가들에게 특별히 감사 드립니다:
100%

이 번역인들은 저희가 세상을 수리하는 데 도움을 주고 있어요! 기여하시겠습니까?
번역 시작하기 ›

팀

댓글 15개
I followed this guide to the letter last night on my hyrule gold new 3ds XL (from hence forth I will refer to this unit as my “old n3dsXL”) before attempting the same repair on my new unit. It worked fine on my old n3dsXL. So I went ahead with doing the same repair on my new unit.
Well it went fine till I tried to turn it on. The blue light comes on then after a few seconds there’s a “pop” sound and the unit turns back off. Can anyone tell me what just happened here?
Also tried putting the original touch screen back in the new unit and it still does the same pop sound and shuts off
You might need to reseat the cables i had this issue on my old ds lite and my old n3ds all i had to do was that and it fixed it for me also if that doesn’t work get a cotton swab and dip it in rubbing alcohol and clean the end of the ribbon cables then re insert them.
Same thing happened to me my first time—brief blue light but would not power on. Tore it down and re-connected all the cables more carefully the second time. That fixed it.
BBW -
I just disassembled my new 3ds xl to clean my lower screen and touch sensor following this guide, it went smoothly but now everything works except the touch sensor, why??
I have done this successfully three times now—thank you for the excellent guide. Newcomers should know there is one ERROR and one OMISSION in the procedure. (1) ERROR - In Step 13, the topmost ZIF connector marked in red *does* have a clamp, unlike the other four. If you attempt to pull the connector loose without opening the clamp you will break it—see the frustrated comments to Step 13 for examples. (2) OMISSION - At Step 16, before removing the cartridge drive you must unplug the connector at the top of the component. This is shown as unplugged in the photo, but the step is missing from the written instructions. The clamp on this plug loosens on the *opposite* side from where the cable is inserted, unlike the other clamps in the guide.