소개
이 안내서는 회로 기판이라고도 불리는 Nintendo DS 마더보드를 교체하는 방법을 설명합니다.
Nintendo DS는 무선 연결과 내장 마이크를 갖추고 두 개의 화면을 동시에 활용하는 Nintendo의 게임기입니다.
마더보드는 기기 내 모든 부품 사이의 통신을 담당합니다. 따라서 작동하는 부품 간의 통신이 예상보다 오래 걸리거나 통신이 원활하지 않을 경우 마더보드 교체가 필요합니다.
DS의 마더보드를 제거하면 화면에 접근하거나 다른 핵심 부품을 교체할 수 있습니다.
이 교체 작업은 10개의 간단한 안내서 단계로 완료할 수 있습니다.
필요한 것
-
-
-
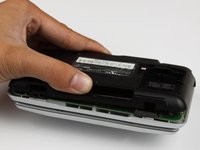
플라스틱 여는 도구 또는 스퍼저를 사용하여 하단에서 배터리를 들어 올리세요. 플라스틱 여는 도구나 스퍼저가 없다면 손톱을 사용해도 됩니다.
-
-
-
-
이 단계에 사용된 도구:Tweezers$4.99
-
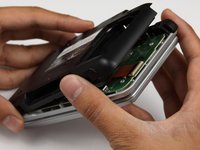
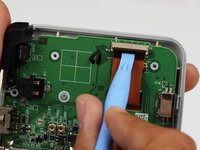
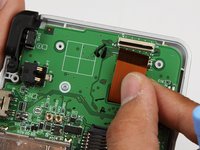
가장 오른쪽에 있는 큰 리본 케이블 아래에 있는 두 개의 작은 리본 케이블을 찾으세요.
-
작은 리본 케이블의 잠금장치를 아래쪽으로 밀어 잠금을 해제하고 케이블을 분리하세요.
-
-
-
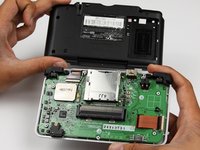
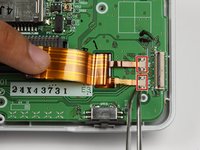
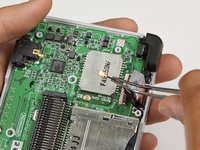
와이파이 안테나 피그테일 커넥터를 찾으세요.
-
집게를 사용하여 안테나의 머리 부분을 잡고 제거하세요. 가볍게 흔드는 동작을 사용하여 커넥터를 위로 당겨 분리하세요.
-


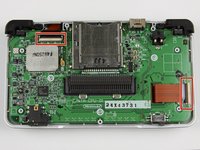


기기를 재조립하려면 이 지침을 역순으로 따르세요.
다른 24명이 해당 안내서를 완성하였습니다.
다음 번역가들에게 특별히 감사 드립니다:
100%

Translation Bot님은 저희가 세상을 수리하는데 동참하신 분입니다! 기여하시겠습니까?
번역 시작하기 ›
팀

Cal Poly, Team 18-3, Maness Fall 2009 Cal Poly, Team 18-3, Maness Fall 2009 회원
CPSU-MANESS-F09S18G3
4 회원들
안내서 50개를 작성함
2가이드 댓글
This was really helpful. Thank you!
I need a ds ribbon bale ?