소개
이 안내서를 따라서 Nintendo Switch 게임 콘솔에서 손상된 또는 결함있는 헤드폰 잭 및 게임 카드 리더를 교체하세요.
스위치는 JIS 나사를 사용하지만 유사시에는 십자 드라이버를 사용할 수 있습니다. 나사가 벗겨지지 않도록 주의하세요. iFixit의 십자 비트는 JIS-스타일 나사와 교차 호환되도록 설계되었습니다.
참고: 방열판을 분리하면 헤드폰 잭과 게임 카드 리더를 쉽게 분리할 수 있지만 필수 요건은 아닙니다. 방열판을 분리한다면, 두 부품—및 CPU—에서 서멀 페이스트를 닦아내고 실드 플레이트와 방열판을 설치하기 전에 새 페이스트를 다시 바르세요.
실드 플레이트를 분리할 때, 플레이트와 방열판 사이의 열 화합물을 교체해야 합니다. 일반 서멀 페이스트는 큰 간격을 잇도록 설계되지 않았기 때문에 가장 가까운 대체품은 K5 Pro 점성 서멀 페이스트입니다.
참고: 이 안내서, 그리고 자사가 판매하는 부품은 2017년에 처음 출시한 Nintendo Switch 모델과 더불어 2019년에 출시한 최신 모델과 호환됩니다 (각 모델 번호 HAC-001 및 HAC-001(-01)).
필요한 것
-
-
Joy Con 컨트롤러 후면의 작은 동그란 버튼을 누르고 있으세요.
-
버튼을 누른 상태에서, 컨트롤러를 위를 향해서 미세요.
-
-
이 단계에 사용된 도구:Magnetic Project Mat$19.95
-
Y00 스크루드라이버를 사용하여 후면 패널을 고정하는 6.3mm-길이 나사 네 개를 풀어주세요.
-
-
-
JIS 000 드라이버 혹은 iFixit PH 000 드라이버를 사용하여 후면 패널을 고정하는 다음 나사들을 풀어주세요:
-
기기 상단 가장자리에 있는 2.5mm-길이 나사 한 개
-
기기 하단 가장자리에 있는 2.5mm-길이 나사 두 개
-
-
-
-
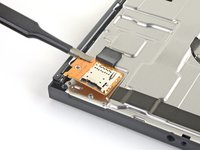
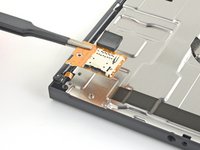
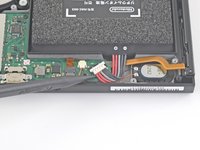
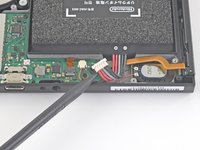
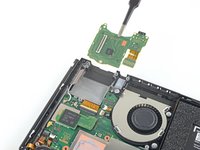
JIS 000 드라이버 혹은 iFixit PH 000 드라이버를 사용하여 microSD 카드 리더를 기기에 고정하는 3.1mm 나사를 풀어주세요.
-
-
-
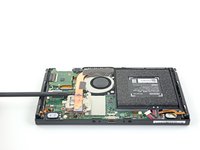
JIS 000 드라이버 혹은 iFixit PH 000 드라이버를 사용하여 실드 플레이트를 기기에 고정하는 3mm 나사 여섯 개를 풀어주세요.
-
-
-
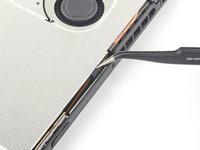
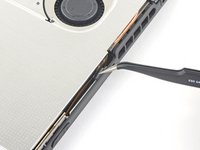
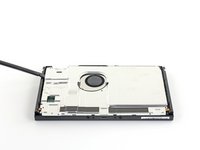
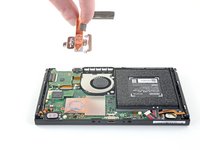
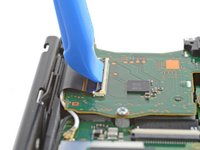
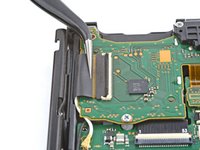
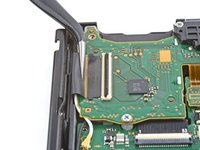
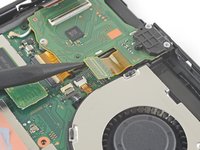
기기의 가장자리를 따라서 실드 플레이트 아랫면에 spudger/스퍼저를 끼우세요
-
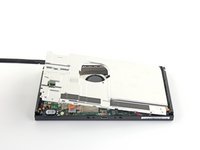
실드 플레이트를 들어올려 기기에서 분리하세요.
-
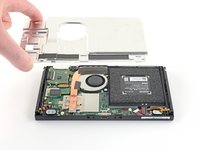
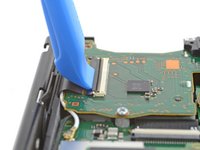
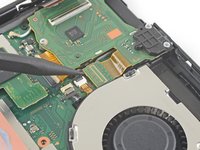
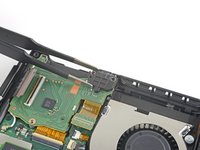
신중을 기하면 이 써멀 컴파운드를 재사용할 수 있습니다. 컴파운드가 더럽혀지지 않도록 하고 재조립시 방열판과 실드 플레이트 사이에 완전하게 접하는지 확인하세요.
-
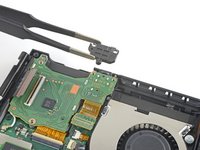
써멀 컴파운드를 교체해야 한다면, 재조립시 써멀 페이스트 안내서를 참조하여 기존 써멀 컴파운드를 제거하고 K5 Pro 같은 적절한 컴파운드로 교체하세요.
-


새 교체 부품을 원래 부품과 비교하세요—설치하기 전에 나머지 부품을 옮기거나 새 부품에서 접착 뒷면을 제거해야 할 수 있습니다.
기기를 재조립하려면, 이 지침들을 역순으로 따르세요.
기기를 부팅했는데 새 게임 카드 리더가 작동하지 않으면, 기기를 다시 끄고 배터리 커넥터를 분리했다가 다시 연결하세요.
전자 폐기물을 R2 또는 e-Stewards 인증 재활용 센터로 가져가세요.
수리가 계획대로 진행되지 않았습니까? 자사의 기본 문제 해결 또는 Nintendo Switch 답변 커뮤니티에서 확인하세요.
새 교체 부품을 원래 부품과 비교하세요—설치하기 전에 나머지 부품을 옮기거나 새 부품에서 접착 뒷면을 제거해야 할 수 있습니다.
기기를 재조립하려면, 이 지침들을 역순으로 따르세요.
기기를 부팅했는데 새 게임 카드 리더가 작동하지 않으면, 기기를 다시 끄고 배터리 커넥터를 분리했다가 다시 연결하세요.
전자 폐기물을 R2 또는 e-Stewards 인증 재활용 센터로 가져가세요.
수리가 계획대로 진행되지 않았습니까? 자사의 기본 문제 해결 또는 Nintendo Switch 답변 커뮤니티에서 확인하세요.
다른 121명이 해당 안내서를 완성하였습니다.
다음 번역가들에게 특별히 감사 드립니다:
100%


이 번역인들은 저희가 세상을 수리하는 데 도움을 주고 있어요! 기여하시겠습니까?
번역 시작하기 ›

댓글 56개
It worked, thanks
After changing the board out, I don’t have touch on the screen, put the original PCB back in the console and i have touch again, so its not that I did any damage to the flexes or ZIF connector. Any one have any ideas?
Hey man, did you ever figure this out? I have the exact same issue. My touchscreen is no longer working.
Seems there are different kinds of card slots, European, American and Japanese, Installing for example an Eurean version into an American version wil result in a not working touchscreen , i think it`s a software issue as the cardslot had same parts, if anyone finds a workaround please let us know
Nintendo does not like aftermarket replacement part. Get original second hand and will be ok
mfijak -