소개
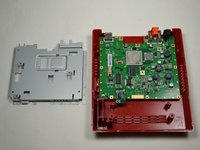
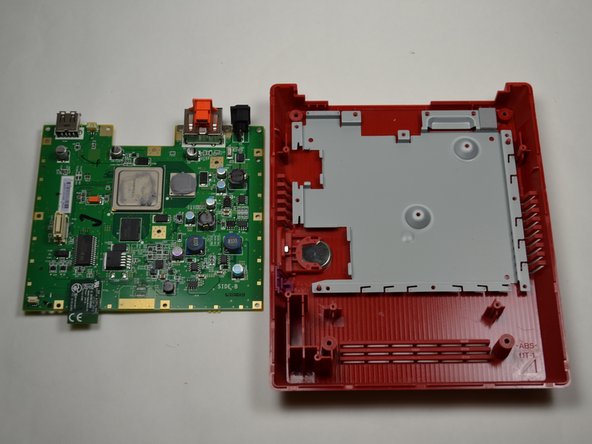
이 안내서는 Nintendo Wii Mini의 마더보드 교체 방법을 상세히 설명합니다. 이미지에 표시된 단계는 분해 과정이며, 교체 및 재조립은 이 단계를 역순으로 수행하면 간단히 완료할 수 있습니다.
정밀 전자 기기를 다룰 때는 정전기 방지 팔찌 사용을 권장합니다.
Wii Mini에서 다음과 같은 증상이 나타나면 마더보드 교체가 필요할 수 있습니다: 전원 공급 장치가 정상임에도 불구하고 Wii가 켜지지 않거나 부팅되지 않는 경우.
필요한 것
-
-
-
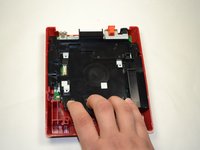
Wii mini를 똑바로 놓습니다. 그런 다음 플라스틱 여는 도구를 사용하여 콘솔의 가운데 가장자리를 따라 이동하며 윗면 덮개를 느슨하게 만듭니다.
-
콘솔의 윗면 덮개를 조심스럽게 들어 올려 따로 치워 둡니다.
-
-
-
이 단계에 사용된 도구:Tweezers$4.99
-
Wii mini를 돌려 기기 뒷면이 사용자를 향하게 하세요.
-
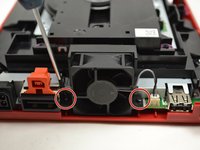
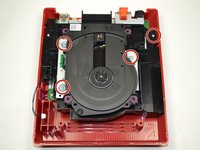
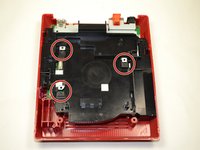
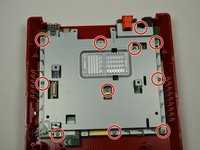
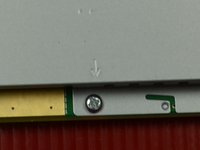
필립스 #0 스크루드라이버를 사용하여 팬 부품 양옆에 있는 6mm 나사 2개를 푸세요.
-
-
-
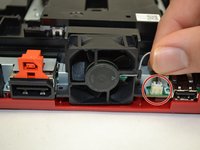
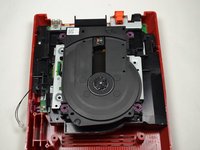
손가락을 사용하여 핀 커넥터의 윗부분을 똑바로 위로 부드럽게 당겨 콘솔에서 팬을 분리하세요.
-
팬 부품을 제거하고 따로 치워 두세요.
-
-
-
-
-
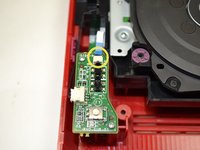
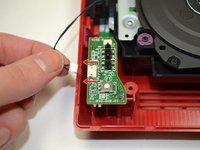
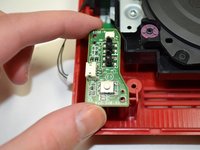
손가락을 사용하여 파워 보드 상단에서 파란색 리본 케이블을 밀어 빼내세요.
-
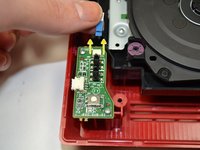
필립스 스크루드라이버 #0을 사용하여 파워 보드 상단과 하단에 있는 4mm 나사 2개를 풀어 주세요.
-
-
-
-
-
-
-
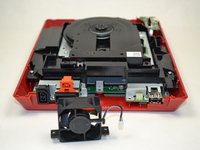
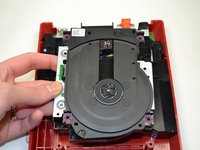
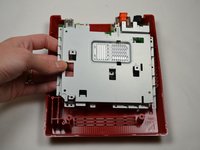
손가락을 사용하여 검은색 플라스틱 트레이를 몸쪽으로 당겨 콘솔에서 느슨하게 만드세요.
-
트레이를 들어 올리기 전에 검은색 사각형 부품이 금속 사각형 부품에서 완전히 분리되었는지 확인하세요.
-
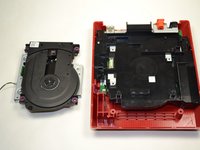
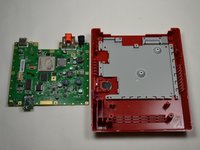
분리되었다면 플라스틱 트레이를 콘솔에서 들어 올려 따로 치워 두세요.
-


기기를 재조립하려면 이 지침을 역순으로 따르세요.
다른 11명이 해당 안내서를 완성하였습니다.
다음 번역가들에게 특별히 감사 드립니다:
100%

Translation Bot님은 저희가 세상을 수리하는데 동참하신 분입니다! 기여하시겠습니까?
번역 시작하기 ›
팀

1가이드 댓글
Can you fit a Wii Motherboard inside this casing, and use the dvd drive, if so I have a few wiis with broken DVD drives I would like to repair and this would be a cheap solution.