소개
Replacing the faceplate is very quick and simple to do.
필요한 것
-
-
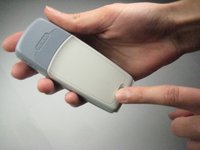
Press down on the small gray button located on the back of the phone.
-
Slide the back plate down and off.
 FixBot에 문의하기
-
-
-
-
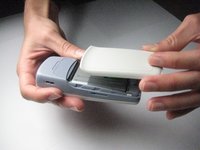
To remove the battery, begin by holding the phone sideways.
-
Then, insert your thumb in the groove below the battery and push the battery up and out.
-
-
-
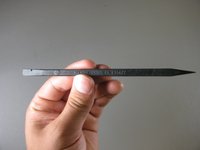
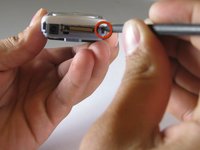
Locate the spudger. A photo of the correct spudger is provided to the left.
-
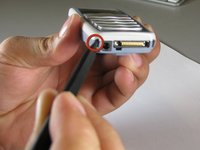
Turn the front of the phone to face you. Find the two small square holes on the bottom left and right sides of the faceplate.
-
Insert the spudger into each square hole and push up to detach the face plate.
-


To reassemble your device, follow these instructions in reverse order.
팀

Cal Poly, Team 14-38, Forte Fall 2010 Cal Poly, Team 14-38, Forte Fall 2010 회원
CPSU-FORTE-F10S14G38
5 회원들
안내서 18개를 작성함